1. Welcome to Tacoma World!

    You are currently viewing as a guest! To get full-access, you need to register for a FREE account.

    As a registered member, you’ll be able to:
    • Participate in all Tacoma discussion topics
    • Communicate privately with other Tacoma owners from around the world
    • Post your own photos in our Members Gallery
    • Access all special features of the site

Project cap acquired!

Discussion in 'Tonneau Covers, Caps and Shells' started by deanosaurus, Oct 1, 2020.

  1. Oct 1, 2020 at 7:37 AM
    #1
    deanosaurus

    deanosaurus [OP] Caveman

    Joined:
    Jul 23, 2018
    Member:
    #260241
    Messages:
    1,542
    Northeast Region
    Vehicle:
    09 TRD OR AC
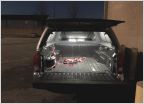
    Picked up this fiberglass shell with TracRac already installed for $200, used but perfectly serviceable.

    IMG_20200928_135748.jpg

    It was made by a local company, which is nice. They rate it for 300 lbs up top for this model, which has steel plates sandwiched in the fiberglass where the rack is mounted.

    It needs a thorough cleaning and new seals, but after that I'll be trimming the rack and putting together a rooftop solar system to support integrated lighting, device charging, and fridge use with an eye towards nice build documentation for other folks.
     
  2. Oct 4, 2020 at 9:47 AM
    #2
    deanosaurus

    deanosaurus [OP] Caveman

    Joined:
    Jul 23, 2018
    Member:
    #260241
    Messages:
    1,542
    Northeast Region
    Vehicle:
    09 TRD OR AC
    Got the cap off the truck and on its back for refit. My friend helped with the move - it wasn't bad. They were nice enough at the salvage yard to install it with a forklift, so I wasn't actually sure how heavy it was as I prepped to move it. Not a big deal.

    Here it is prepped for surgery:
    [​IMG]

    The existing flat seals were shot:
    [​IMG]

    Goo-Gone to the rescue! Blech.
    [​IMG]

    The front of the cap has just a little bit of rot. I'll probably let it air out for a few days, then fill it with resin, let it cure, and then skim the entire bearing surface of the shell with some steel reinforced Bondo before putting the new seal on.
    [​IMG][​IMG]

    The window seals were in surprisingly good shape except for being a little shrunk. I'm going to call the manufacturer tomorrow to see if they'll sell me a seal kit. Their website is broken, but they're still answering phones - I called before buying to see what the load rating was.

    Not pictured here was a lot of boring detail cleaning with a heavy duty cleaner, elbow grease, and pulling/picking at window seals.

    Next up, repairs on the rot up front, installation of new seals, and planning for wiring.
     
    Last edited: Oct 4, 2020
    bfrazier, synaps3 and Tacman19 like this.
  3. Oct 5, 2020 at 10:04 PM
    #3
    Tacman19

    Tacman19 Well-Known Member

    Joined:
    Jan 18, 2020
    Member:
    #316444
    Messages:
    2,247
    Gender:
    Male
    First Name:
    Dave
    Mid Missouri
    Vehicle:
    19 Tacoma SOLD
    As many as I can fabricate
    That's a nice cap. Can't wait to see the solar install.
    Zim
     
  4. Oct 10, 2020 at 3:31 PM
    #4
    deanosaurus

    deanosaurus [OP] Caveman

    Joined:
    Jul 23, 2018
    Member:
    #260241
    Messages:
    1,542
    Northeast Region
    Vehicle:
    09 TRD OR AC
    Picked this stuff up to fill that void. It was inexpensive and more than enough for the job.
    [​IMG]

    Dug out as much of the rotten plywood core as I could, formed a tape dam, and filled the two large voids with three total batches - one pour in each, then a third to level both.
    [​IMG][​IMG]

    I used an old box top and a disposable plastic spoon to mix and apply the epoxy. It was pretty simple to take a scoop of the mixed epoxy with the spoon and then drizzle it into the void. I was surprised at the amount of control I had in terms of getting it to pour right down into the bottom of the crevice by altering the speed of the drizzle from the spoon.
     
    bfrazier and synaps3 like this.
  5. Oct 10, 2020 at 6:52 PM
    #5
    bfrazier

    bfrazier Member

    Joined:
    Sep 27, 2020
    Member:
    #342117
    Messages:
    16
    Gender:
    Male
    First Name:
    Bob
    Vehicle:
    1989 Toyota SR5 4X4 Pickup
    Wow, that's a nice one! I found out that a carpet kit for the interior is neither hard nor expensive. Since you have the windows out....

    Hey, great find! Keep us posted and GOOD LUCK!
     
    deanosaurus[OP] likes this.
  6. Oct 11, 2020 at 3:43 AM
    #6
    deanosaurus

    deanosaurus [OP] Caveman

    Joined:
    Jul 23, 2018
    Member:
    #260241
    Messages:
    1,542
    Northeast Region
    Vehicle:
    09 TRD OR AC
    I'm actually thinking I'm going to use Reflectix (that tinfoil bubble wrap looking stuff) to line the interior, possibly with an intermediate layer of synthetic quilt batting to hold an extra layer of air against the fiberglass. I may do a layer of carpet on the top surfaces above the bedsides, though, both for appearance and comfort.
     
    bfrazier[QUOTED] likes this.
  7. Nov 9, 2020 at 7:49 AM
    #7
    deanosaurus

    deanosaurus [OP] Caveman

    Joined:
    Jul 23, 2018
    Member:
    #260241
    Messages:
    1,542
    Northeast Region
    Vehicle:
    09 TRD OR AC
    (Not pictured) Installed new seals on the windows, a new gasket on the bottom of the shell, and a seal to fill the gap between the front of the bed and the camper shell due to the height difference of the bed rail caps.

    I used Toyota FIPG on the window frames, because I had it on hand. If I ever need to pull the frames again, I will he replacing them completely with custom frames and windows, so I'm not concerned about clean removal.

    The gasket and front rail filler were both from the same manufacturer. They make a tailgate seal kit as well. I have used all three of them and have been impressed with the quality as well as the attention to detail that they show in their packaging and instructions. Follow the directions and you will have excellent results.

    I don't have any photos of the process of installing the seals, because I was trying my damndest to get it done before the temp dropped too far.

    Note: The following parts include those specced for <=200lb caps. Check for suitable replacements if you have a fat baby.

    Tailgate seal: https://www.amazon.com/gp/product/B00IPQWXZQ/
    Front rail seal: https://www.amazon.com/gp/product/B07147Y43J
    Cap seal: https://www.amazon.com/gp/product/B00NCC0SY6
    Flap: https://www.amazon.com/gp/product/B07WQZVB79/

    The flap seal on the rear hatch was pretty blown, and was of the type that slides into a slot in the extrusion used to make the frame of the hatch.

    I didn't like how flimsy it was, so as a proof of concept I installed some 3" neoprene with pop rivets:

    IMG_20201109_094950.jpg

    The neoprene is the nonporous sort, and is extremely tough stuff. To my surprise, the particular size I wanted was cheapest on AMZN since I wasn't ordering in quantity.

    After I established the spacing and trimming for the seal profile I wanted, I filledsome corner gaps (which were left by a little bit of warping and flexing from the life it had before me) by making some trim pieces with epoxy putty:
    IMG_20201109_095004.jpg

    By wetting the neoprene with some light oil to avoid sticking, carefully working the putty by hand, and trimming it to clear the tailgate before it was fully cured, I was able to get an excellent seal:
    IMG_20201109_095023.jpg

    And you can see the profile of the neoprene flap, which fits the profile of the tailgate as well as the corner trim:
    IMG_20201109_095042.jpg

    There's still cleanup and sanding of the putty and putty residue, and the pop rivets don't sit flush due to the details of the extrusion.

    When I'm satisfied that the concept performs well, I'm going to drill out the rivets, sand the areas under the rivets flush so the replacements sit nicely, and sand/paint the epoxy putty trim.
     
    Last edited: Nov 11, 2020
    jon_elc, bishtaco, bfrazier and 2 others like this.
  8. Nov 10, 2020 at 4:22 PM
    #8
    bfrazier

    bfrazier Member

    Joined:
    Sep 27, 2020
    Member:
    #342117
    Messages:
    16
    Gender:
    Male
    First Name:
    Bob
    Vehicle:
    1989 Toyota SR5 4X4 Pickup
    Wow - lots of progress! What did you use to re-seal the windows, and would you use it again?

    Congratulations on the nice work!
     
    deanosaurus[OP] likes this.
  9. Nov 11, 2020 at 9:13 AM
    #9
    deanosaurus

    deanosaurus [OP] Caveman

    Joined:
    Jul 23, 2018
    Member:
    #260241
    Messages:
    1,542
    Northeast Region
    Vehicle:
    09 TRD OR AC
    Thanks!

    I used Toyota FIPG for the window frames, because I had it on hand and I figured it would work just fine. I'd definitely use it again. In fact, I will likely be using it when I remove/reinstall the CapRac to repaint the risers and trim the crossbars down.

    The rubber window gaskets and wipers appear to be standard profiles but I didn't want to spend a year and a day tracking down the OEM, so I just picked them up at a very reasonable cost from the cap manufacturer (Jeraco).
     
    bfrazier[QUOTED] likes this.
  10. Nov 11, 2020 at 3:38 PM
    #10
    bfrazier

    bfrazier Member

    Joined:
    Sep 27, 2020
    Member:
    #342117
    Messages:
    16
    Gender:
    Male
    First Name:
    Bob
    Vehicle:
    1989 Toyota SR5 4X4 Pickup
    Oh! Form In Place Gasket, jeez I wish I had thought of that. Excellent idea. My Brahma manufacturer is out of business, so I wonder if what Jeraco supplies for window gaskets is the same stuff - the radius aluminum slide windows appear to all be the same. Wipes too.
     
  11. Nov 11, 2020 at 6:16 PM
    #11
    deanosaurus

    deanosaurus [OP] Caveman

    Joined:
    Jul 23, 2018
    Member:
    #260241
    Messages:
    1,542
    Northeast Region
    Vehicle:
    09 TRD OR AC
    IMG_20201009_105442.jpg
    @bfrazier Here's a profile shot of the old window gaskets that I sent to them for ID/replacement. If they look right I'll look up the number I used for their parts desk.

    The "D" shaped stuff is what goes around the inside of the metal window frame, over the glass.

    The other stuff is meant to be round, with a straight section tangential to the circle to slide in a slot in the frame of the rear hatch.

    These are not the best explanations without in-place pictures - I'll snatch some tomorrow in the light.
     
    Last edited: Nov 12, 2020
    bfrazier likes this.
  12. Nov 12, 2020 at 5:35 AM
    #12
    JDUB-Fabrication

    JDUB-Fabrication Well-Known Member

    Joined:
    Aug 11, 2019
    Member:
    #301850
    Messages:
    634
    Newburgh NY
    Vehicle:
    2010 Lexus GX460
    Awesome thread, while I just ordered a new cap, I spent years rehabbing old ones.
    Epoxy putty is amazing stuff and versatile as hell! Love having it around for whatever.
     
    deanosaurus[OP] likes this.
  13. Nov 12, 2020 at 9:59 AM
    #13
    deanosaurus

    deanosaurus [OP] Caveman

    Joined:
    Jul 23, 2018
    Member:
    #260241
    Messages:
    1,542
    Northeast Region
    Vehicle:
    09 TRD OR AC
    Yeah! It's gotten me out of many an ugly pickle in the field!

    Pulled the truck in under cover due to weather and installed some bed stiffeners, which were fabricated by @Tttacodan. FWIW, I paid full price and believe they are more than worth the cost. Hit him up if you're in the market, these are as good or better than any of the other similar products available - even the ones from the big name companies.

    Install was simple, and I only busted ONE plastic tab off my taillights. I will consider that a tactical victory.

    IMG_20201112_125148.jpg
    Pardon all the shit in the bed, I'm actually on the road right now.

    IMG_20201112_125156.jpg

    The kit from @Tttacodan comes with hardware for the bedsides, and reuses the factory bed bolt and bed rings. Nothing at all wrong with that and there are plenty of threads on the bed ring bolt still engaged for strength.

    I might replace the bed rings with some Grade 8 hardware later purely due to personal preference, not because I have any concerns regarding strength.

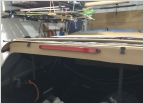
    I wanted to go ahead and splice into the driver side taillight for the third eye on the shell, but decided to hold off and ponder whether I want to bolt the cap down to the bed rails rather than use the cam clamps, and drill a wire port at the same time so I can run the third eye wiring and a Viair inside the bed body behind the taillight bulkhead.
     
    Last edited: Jan 21, 2021
  14. Nov 12, 2020 at 5:12 PM
    #14
    Bwthomas77

    Bwthomas77 Well-Known Member

    Joined:
    Sep 27, 2014
    Member:
    #139205
    Messages:
    161
    Gender:
    Male
    North Carolina
    Vehicle:
    12 dbl cab trd sport 6spd
    Supercharger, flowmaster exhaust, 4runner disc brakes, Volant CAI, ECGS bushing
    I'm not sure I understand what problem these are fixing?
     
  15. Nov 12, 2020 at 5:57 PM
    #15
    bfrazier

    bfrazier Member

    Joined:
    Sep 27, 2020
    Member:
    #342117
    Messages:
    16
    Gender:
    Male
    First Name:
    Bob
    Vehicle:
    1989 Toyota SR5 4X4 Pickup
  16. Nov 12, 2020 at 6:58 PM
    #16
    deanosaurus

    deanosaurus [OP] Caveman

    Joined:
    Jul 23, 2018
    Member:
    #260241
    Messages:
    1,542
    Northeast Region
    Vehicle:
    09 TRD OR AC
    Aside from wanting to prophylactically reinforce my tailgate channel with a pending camper shell integration, I'm also going to use them as part of the structure of a bed deck.
     
    bfrazier likes this.
  17. Nov 13, 2020 at 11:20 AM
    #17
    Bwthomas77

    Bwthomas77 Well-Known Member

    Joined:
    Sep 27, 2014
    Member:
    #139205
    Messages:
    161
    Gender:
    Male
    North Carolina
    Vehicle:
    12 dbl cab trd sport 6spd
    Supercharger, flowmaster exhaust, 4runner disc brakes, Volant CAI, ECGS bushing
    Thanks, I don't think I necessarily need them... but that has never stopped me before. I think the minis are going to go on my wish list.
     
  18. Nov 17, 2020 at 10:37 AM
    #18
    bfrazier

    bfrazier Member

    Joined:
    Sep 27, 2020
    Member:
    #342117
    Messages:
    16
    Gender:
    Male
    First Name:
    Bob
    Vehicle:
    1989 Toyota SR5 4X4 Pickup
    Looks like I have two sizes of the "D" shaped stuff, one for fixed windows and one for the slider. I've never seen one of these that didn't appear to grotesquely shrink.

    [​IMG]
     
  19. Nov 17, 2020 at 11:27 AM
    #19
    deanosaurus

    deanosaurus [OP] Caveman

    Joined:
    Jul 23, 2018
    Member:
    #260241
    Messages:
    1,542
    Northeast Region
    Vehicle:
    09 TRD OR AC
    Yeah, the old ones on my cap were the same way - inch, inch-and-a-half of shrinkage across the length. I bet Leer would sell you replacements, but if they're dumb expensive holler at me and I'll check my industrial sources.

    Edit - Jeraco may use/have used similar windows to whatever model is in your Brahma at one point, too. You might try hitting them up at https://www.jeraco.com/contact-us.html - the form there has built-in submission fields for photos so they can ID for you.
     
    bfrazier[QUOTED] likes this.
  20. Jan 13, 2021 at 5:15 AM
    #20
    deanosaurus

    deanosaurus [OP] Caveman

    Joined:
    Jul 23, 2018
    Member:
    #260241
    Messages:
    1,542
    Northeast Region
    Vehicle:
    09 TRD OR AC
    This is a lame update but I'm trying to get motivated.

    I've been taking measurements and sketching a bed platform, and I shortened the crossbars on the rack. I didn't like how far they stuck out on the sides on the narrow two tracks I find myself frequently exploring, and I definitely didn't need the extra length.

    IMG_20210112_133359.jpg

    I removed about 11" total from each, cutting half from each end in order to keep the cutouts in the insert tracks roughly centered. I used a miter saw with a carbide fine tooth wood blade on it, and just a bit of WD-40 on the cut. For those that don't know, you can definitely cut aluminum with wood tools if you're slow and careful about it, and while I don't use WD-40 for much, it does make a good cutting oil for aluminum specifically.

    A friend gave me a folding solar panel for Xmas this year and it appears that I can adapt it to feed the controller I already specced out, so I may go ahead and order the controller and battery and start with the shell wiring in a week or so.
     
    Last edited: Jan 13, 2021
    TroutBum and davidstacoma like this.
To Top