1. Welcome to Tacoma World!

    You are currently viewing as a guest! To get full-access, you need to register for a FREE account.

    As a registered member, you’ll be able to:
    • Participate in all Tacoma discussion topics
    • Communicate privately with other Tacoma owners from around the world
    • Post your own photos in our Members Gallery
    • Access all special features of the site

Clean back-up camera install for 1st gen Tacomas

Discussion in '1st Gen. Tacomas (1995-2004)' started by Cutter_, Oct 4, 2020.

  1. Nov 29, 2020 at 5:19 AM
    #21
    nchiker1

    nchiker1 Well-Known Member

    Joined:
    Jun 1, 2020
    Member:
    #330014
    Messages:
    313
    Love it. I'll go this route. Mind sending the pic over to me as well? Or make a thread of your own ;)
     
    Geeoh43 likes this.
  2. Nov 29, 2020 at 7:38 AM
    #22
    Kevins60

    Kevins60 axle wrap tells me my rear brakes are working

    Joined:
    Dec 23, 2018
    Member:
    #276677
    Messages:
    1,215
    Gender:
    Male
    First Name:
    Kevin
    Odessa FL
    Vehicle:
    ‘04 4cyl SR5 AT Pre-runner Garage Queen
    SCS Cruise Westin step bars Lund tonneau Jensen HU
    I’ll post pics when I get home tonight or tomorrow. Don’t want to hijack Cutter_’s thread but don’t want to star a new one since it’s two slightly different ways to achieve the same results. In fact it appears we used the exact same camera.
     
    nchiker1[QUOTED] likes this.
  3. Nov 29, 2020 at 9:54 AM
    #23
    nchiker1

    nchiker1 Well-Known Member

    Joined:
    Jun 1, 2020
    Member:
    #330014
    Messages:
    313
    Looks that way. I ordered it this morning.
     
  4. Nov 29, 2020 at 3:09 PM
    #24
    Kevins60

    Kevins60 axle wrap tells me my rear brakes are working

    Joined:
    Dec 23, 2018
    Member:
    #276677
    Messages:
    1,215
    Gender:
    Male
    First Name:
    Kevin
    Odessa FL
    Vehicle:
    ‘04 4cyl SR5 AT Pre-runner Garage Queen
    SCS Cruise Westin step bars Lund tonneau Jensen HU
    987E9473-D34F-4D79-BBA5-8FEE1D94C1C9.jpg Here ya go

    B4A91F47-7818-4984-8AF6-485C0E0BF0EA.jpg

    I need to replace the 3/8” loom with 1/4” so it fits inside the grommet.

    here’s the camera in action. Haven’t messed with cutting the various wires to change the hash marks.

    987E9473-D34F-4D79-BBA5-8FEE1D94C1C9.jpg

    and here’s he camera

    40815A42-9F43-4C3D-81FD-E5BFDE9AA1D4.jpg
     
  5. Nov 29, 2020 at 6:18 PM
    #25
    nchiker1

    nchiker1 Well-Known Member

    Joined:
    Jun 1, 2020
    Member:
    #330014
    Messages:
    313
    Excellent! Makes a lot more sense with the pics. Really appreciate it!
     
  6. Dec 1, 2020 at 6:52 PM
    #26
    nchiker1

    nchiker1 Well-Known Member

    Joined:
    Jun 1, 2020
    Member:
    #330014
    Messages:
    313
    Did anyone follow a video or tutorial on the install? From opening up the dash to final product?
     
  7. Dec 2, 2020 at 9:58 AM
    #27
    4xdog

    4xdog Well-Known Member

    Joined:
    May 10, 2018
    Member:
    #253074
    Messages:
    1,160
    Gender:
    Male
    Santa Fe, NM
    Vehicle:
    03 DC TRD OR, 15 DC TRD OR, 08 RX350, 62 TR3B
    @Kevins60, you used the notch in the panel below the tailgate where the spare tire winch crank fits, yes? Any issues with accessing the spare with that routing?

    Is that the camera connector that is clipped to the tailgate? Is that a plastic clip adhesively mounted, or some sort of P-clip screwed in? My truck is in my garage in another state for the winter, so I can't check for the hole that you have the grommet mounted in. Did you drill that one or is there an existing access hole there? (It looks like clean routing, and a good way to build in strain relief.)
     
  8. Dec 2, 2020 at 10:59 AM
    #28
    nchiker1

    nchiker1 Well-Known Member

    Joined:
    Jun 1, 2020
    Member:
    #330014
    Messages:
    313
    Did you happen to take any pictures of the initial process? Hooking the wire up to your stereo and where you ran it from there?
     
  9. Dec 2, 2020 at 11:05 AM
    #29
    Cutter_

    Cutter_ [OP] I probably could have googled this

    Joined:
    Mar 17, 2017
    Member:
    #213600
    Messages:
    979
    Gender:
    Male
    Vehicle:
    2002 Super Air Nautique Build
    Old Man Emu lift, 2 10" JL subs
    There is a dedicated inlet for backup cameras on the stereo. I ran it above the steering column, under the kickpanel, and followed the harness that exits the truck under the seat
     
    nchiker1[QUOTED] likes this.
  10. Dec 2, 2020 at 11:12 AM
    #30
    nchiker1

    nchiker1 Well-Known Member

    Joined:
    Jun 1, 2020
    Member:
    #330014
    Messages:
    313
    You’re the man! I followed you until you got to the harness: what/where is that?
     
  11. Dec 2, 2020 at 11:29 AM
    #31
    Cutter_

    Cutter_ [OP] I probably could have googled this

    Joined:
    Mar 17, 2017
    Member:
    #213600
    Messages:
    979
    Gender:
    Male
    Vehicle:
    2002 Super Air Nautique Build
    Old Man Emu lift, 2 10" JL subs
    Here is the black wire that is for the camera. I ran it above the steering column.
    IMG_2409.jpg

    Here's the kick panel with all the harnesses. This is where the wire meets the harness
    IMG_2410.jpg
    You'll know which harness I am talking about once you pull this trim piece up. It is the only harness that runs underneath it. This is also where I tapped into the BLACK AND RED reverse trigger wire. It is the only black and red wire in the harness. Use T-Taps and not splice connectors. I tapped in right before the kick panel becomes the floor trim.
    IMG_2411.jpg

    The entire harness turns left here and goes through the floor firewall under the seat via a rubber grommet, then turns into loom that runs under the truck all the way to the back. Pull the camera wire through there. Don't try to run the wire in the existing harness loom, it's old and will crack. Use new loom and zip tie both looms together, all the way to the driver's side taillight.
    IMG_2412.jpg
     
    nchiker1[QUOTED] likes this.
  12. Dec 2, 2020 at 12:36 PM
    #32
    nchiker1

    nchiker1 Well-Known Member

    Joined:
    Jun 1, 2020
    Member:
    #330014
    Messages:
    313
    Excellent - just what I needed! One more question - did you use any tutorial for how to tap into the reverse trigger wire? And which parts to I need to do that? Guess that's two questions. :)
     
  13. Dec 2, 2020 at 12:39 PM
    #33
    Cutter_

    Cutter_ [OP] I probably could have googled this

    Joined:
    Mar 17, 2017
    Member:
    #213600
    Messages:
    979
    Gender:
    Male
    Vehicle:
    2002 Super Air Nautique Build
    Old Man Emu lift, 2 10" JL subs
    Here are T-Taps, they sell these at Lowe's. All you do is clamp it on tight, super easy. I didn't use a tutorial. Some poster on TW said it was the black/red wire in the harness, I went for it and it was correct.

    https://www.amazon.com/Bestgle-Self-Stripping-Electrical-Connectors-Terminal/dp/B071RL7J8J
     
    Godzilla619 and nchiker1[QUOTED] like this.
  14. Dec 2, 2020 at 12:51 PM
    #34
    nchiker1

    nchiker1 Well-Known Member

    Joined:
    Jun 1, 2020
    Member:
    #330014
    Messages:
    313
    Okay, so my understanding of the t-tap is that it runs the end of a wire into the middle of an existing wire. Right? So is there one wire that runs into the reverse black/red one, and then a second wire that I work back to the camera?

    Sorry for what's probably a basic question. Maybe that's explained in the install directions for the camera.
     
  15. Dec 2, 2020 at 1:04 PM
    #35
    Cutter_

    Cutter_ [OP] I probably could have googled this

    Joined:
    Mar 17, 2017
    Member:
    #213600
    Messages:
    979
    Gender:
    Male
    Vehicle:
    2002 Super Air Nautique Build
    Old Man Emu lift, 2 10" JL subs
    No worries the first time I saw a t tap was when I installed my camper shell's LED brake light.

    Here's a tutorial, the MILF from Wiring Products demonstrates. Don't rely on camera instructions, the camera is great but the instructions are chinese garbage. Take the camera wire that goes into the reverse trigger wire and crimp it into the male connector. Then take the female "tap" and put it on the red/black wire where you see fit (I did mine behind the kick panel, you won't have much room under the floor trim). And yes, IIRC there are two wires from the camera, one goes into the stereo and one goes into the reverse trigger wire. You'll know which one is which because the stereo wire will have a 3.5mm jack

    https://www.youtube.com/watch?v=ikZZBmvFEho
     
  16. Dec 2, 2020 at 2:50 PM
    #36
    nchiker1

    nchiker1 Well-Known Member

    Joined:
    Jun 1, 2020
    Member:
    #330014
    Messages:
    313
    Awesome, thanks for taking the time to explain all this! I really appreciate it.

    Going to give this a try in the next day or two.
     
    Jer270 and Cutter_[QUOTED][OP] like this.
  17. Dec 4, 2020 at 3:46 AM
    #37
    Kevins60

    Kevins60 axle wrap tells me my rear brakes are working

    Joined:
    Dec 23, 2018
    Member:
    #276677
    Messages:
    1,215
    Gender:
    Male
    First Name:
    Kevin
    Odessa FL
    Vehicle:
    ‘04 4cyl SR5 AT Pre-runner Garage Queen
    SCS Cruise Westin step bars Lund tonneau Jensen HU
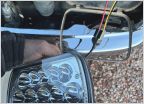
    Yes that is the camera connector clipped to the tailgate. The grommet and cable were run through an existing drain hole. I used a cable clamp I had laying around the garage and a small pan head sheet metal screw to secure it to the tailgate. I considered using double sided tape but figured it would not hold for long and I would wind up crushing the connector when closing the tailgate. I haven’t tried dropping the spare tire but there is enough play in the wire to move it out of the way. I popped out the driver’s side tail light and made my connections to the backup lights there. Those connections power on the camera whenever the backup lights come on and the HU automatically switches to camera input and then switches back when the backup lights go out. The wire taps for the backup lights came with the camera so I used them for the sake of expediency but I’m not a fan of vampire taps so I will probably solder and heat shrink the connections properly someday. Few of the things I considered when choosing my HU, I wanted front USB input, a knob for adjusting the volume and an easily defeated video bypass. My Jensen HU would not even play a CD because of the album cover artwork until I grounded the brake wire from the HU, but that’s all I had to do to get it to work. I followed the exact same route for the cable that Cutter_ did. Funny how great minds think alike.
     
    4xdog[QUOTED] and Cutter_[OP] like this.
  18. Dec 4, 2020 at 5:17 AM
    #38
    nchiker1

    nchiker1 Well-Known Member

    Joined:
    Jun 1, 2020
    Member:
    #330014
    Messages:
    313
    Do you have a closer shot of that?

    Also, to clarify: You put the hole through the existing handle's threaded hole, or a new hole just above it? If I put my hole through the existing bolt's threads on that side, it puts the camera too low and the bottom will be hanging off the black area.
     
  19. Dec 4, 2020 at 6:31 AM
    #39
    Kevins60

    Kevins60 axle wrap tells me my rear brakes are working

    Joined:
    Dec 23, 2018
    Member:
    #276677
    Messages:
    1,215
    Gender:
    Male
    First Name:
    Kevin
    Odessa FL
    Vehicle:
    ‘04 4cyl SR5 AT Pre-runner Garage Queen
    SCS Cruise Westin step bars Lund tonneau Jensen HU
    I think I ran into the same problem. After I drilled out the handle from the back I slipped the camera in and had an “oh shit” moment when it didn’t line up. I wound up drilling a second hole about 1/2 a hole higher on the tailgate handle. Then I had to do the same thing on the tailgate. I recall the nut for the camera nipple has a shoulder and I to turn the nut over to get enough threads to catch.
     
  20. Dec 4, 2020 at 6:36 AM
    #40
    nchiker1

    nchiker1 Well-Known Member

    Joined:
    Jun 1, 2020
    Member:
    #330014
    Messages:
    313
    Okay. Is the camera perfectly flush? I got the impression after drilling out that with the nut going on at a weird angle it wouldn't allow the camera to have a perfect seal on the outside, even if I opened up the hole a little higher.
     
To Top