1. Welcome to Tacoma World!

    You are currently viewing as a guest! To get full-access, you need to register for a FREE account.

    As a registered member, you’ll be able to:
    • Participate in all Tacoma discussion topics
    • Communicate privately with other Tacoma owners from around the world
    • Post your own photos in our Members Gallery
    • Access all special features of the site

How to: DIY Wedge Camper

Discussion in 'Tonneau Covers, Caps and Shells' started by Ripcord, Apr 15, 2019.

  1. Dec 11, 2020 at 10:17 AM
    #981
    Jarman02

    Jarman02 Well-Known Member

    Joined:
    Sep 17, 2018
    Member:
    #266568
    Messages:
    147
    Gender:
    Male
    Oregon
    Vehicle:
    2002 Tacoma Xtra Cab
    What weight would 1ft save you though? Is that compromise worth needing to remove a panel to get in and out? Just curious
     
  2. Dec 11, 2020 at 10:22 AM
    #982
    Wasatch

    Wasatch Well-Known Member

    Joined:
    Aug 6, 2010
    Member:
    #41303
    Messages:
    392
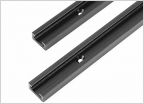
    Not worried about weight, just wondering if folks went shorter and didn't find it an issue. Also... there could be a pretty big cost savings with the extrusions being ~$1.50 per inch
     
  3. Dec 11, 2020 at 10:30 AM
    #983
    BaywatchDV

    BaywatchDV Well-Known Member

    Joined:
    Jun 7, 2018
    Member:
    #255759
    Messages:
    266
    Gender:
    Male
    Vehicle:
    2015 Tacoma TRD Sport
    My friend is making his along side me. He modified his to be a wedge only and changed the dimensions. He went shorter but wider because he will be mounting to bed bars on a Raptor. The extrusion came out considerably more in the end. For what it’s worth.
     
  4. Dec 12, 2020 at 5:32 AM
    #984
    jp_flynavy

    jp_flynavy IG: @TrailLimoOverland

    Joined:
    Dec 30, 2016
    Member:
    #206065
    Messages:
    1,013
    Vehicle:
    2015 Tacoma DCLB
    Anyone have close up photos on how the top wedge corners interact with the fabric? I am using the 4 hole corner bracket and wanted to see how others have mitigated the merge.
     
  5. Dec 12, 2020 at 12:13 PM
    #985
    jp_flynavy

    jp_flynavy IG: @TrailLimoOverland

    Joined:
    Dec 30, 2016
    Member:
    #206065
    Messages:
    1,013
    Vehicle:
    2015 Tacoma DCLB
    Fabric is on! Not too shabby for first time sewing machine user. By no means perfect, but it’s functional.

    5155F103-9C6C-4851-B77E-69632E6CC193.jpg CE00CF61-D725-4E5B-98FE-3D6F64466977.jpg
     
  6. Dec 12, 2020 at 12:38 PM
    #986
    Jarman02

    Jarman02 Well-Known Member

    Joined:
    Sep 17, 2018
    Member:
    #266568
    Messages:
    147
    Gender:
    Male
    Oregon
    Vehicle:
    2002 Tacoma Xtra Cab
    Sick! Mine is going on the truck this evening.
    54708FD7-40F0-4576-8FDE-4BFBC18E5938.jpg
     
    M61guru, Onemorodeo, POOLGUY and 2 others like this.
  7. Dec 12, 2020 at 12:41 PM
    #987
    jp_flynavy

    jp_flynavy IG: @TrailLimoOverland

    Joined:
    Dec 30, 2016
    Member:
    #206065
    Messages:
    1,013
    Vehicle:
    2015 Tacoma DCLB
    Looks sleek! Post more pictures of the modular floor please!
     
  8. Dec 12, 2020 at 12:46 PM
    #988
    MakoTaco17

    MakoTaco17 Member

    Joined:
    Dec 19, 2017
    Member:
    #238933
    Messages:
    19
    Gender:
    Male
    Vehicle:
    2017 Tacoma TRD Sport
    How many will that sleep?
     
  9. Dec 12, 2020 at 8:27 PM
    #989
    Jarman02

    Jarman02 Well-Known Member

    Joined:
    Sep 17, 2018
    Member:
    #266568
    Messages:
    147
    Gender:
    Male
    Oregon
    Vehicle:
    2002 Tacoma Xtra Cab
    will do tomorrow!
    2


    got it on the truck tonight, super stoked!

    034FEAC7-76FE-4799-A45A-65BBED99BCC3.jpg
     
  10. Dec 13, 2020 at 8:02 AM
    #990
    Ripcord

    Ripcord [OP] KM6PIM

    Joined:
    Mar 31, 2011
    Member:
    #54120
    Messages:
    1,464
    First Name:
    Jim
    Northglenn, Colorado
    Vehicle:
    Spruce Mica 2013 TRD-OR
    well done guys! Congrats on finishing the build
     
    Jarman02 and jp_flynavy like this.
  11. Dec 13, 2020 at 2:45 PM
    #991
    jp_flynavy

    jp_flynavy IG: @TrailLimoOverland

    Joined:
    Dec 30, 2016
    Member:
    #206065
    Messages:
    1,013
    Vehicle:
    2015 Tacoma DCLB
    Has anyone made their own wedge strut brackets so there is downwards pressure on the roof when closed?
     
  12. Dec 13, 2020 at 8:26 PM
    #992
    Jarman02

    Jarman02 Well-Known Member

    Joined:
    Sep 17, 2018
    Member:
    #266568
    Messages:
    147
    Gender:
    Male
    Oregon
    Vehicle:
    2002 Tacoma Xtra Cab
    So went out today and gave it a drive. Canopy clamps did really well!

    I drove through some pretty good driving rain and snow and have some leaks around the doors in some spots and then at the very front of the wedge.

    I have some 1/4 in foam flat bar coming tomorrow that I am gonna put on the space frame that should create a tighter seal on the doors and solve that leak.

    for the wedge, I think it’s just where my corners come together hopefully. So just gonna put some silicone in tomorrow and test again! Other than that, no other issues at this time. I expected some leaks to correct.

    AA5C7859-142C-412B-A467-59B0922C0D66.jpg
    133AE836-2C02-46AA-BC8F-AEF97DF9E7AB.jpg
     
    Last edited: Dec 13, 2020
  13. Dec 14, 2020 at 9:02 AM
    #993
    Jarman02

    Jarman02 Well-Known Member

    Joined:
    Sep 17, 2018
    Member:
    #266568
    Messages:
    147
    Gender:
    Male
    Oregon
    Vehicle:
    2002 Tacoma Xtra Cab
    Im a dummy, the water likely came in because the bolts for the large outside corner brackets werent even close to tight :rolleyes: Ran a little silicon anyways, so we will see. The roof was 100% watertight as were the sides, so it would be fishy if the seal between the floor and the extrusion at the front wasnt.
     
  14. Dec 14, 2020 at 9:21 AM
    #994
    plurpimpin

    plurpimpin Well-Known Member

    Joined:
    Jul 31, 2011
    Member:
    #60895
    Messages:
    2,971
    Gender:
    Male
    PDX
    Vehicle:
    2010 TRD Off Road 4x4
    I had sealing issues on the top, front, and rear edges of my side panels - the bottom was fine. I stepped up to the next size in bulb seal on the 3 problem edges and it fixed my leaks.

    https://www.mcmaster.com/93085K85/

    EDIT: I forgot to mention I had visible gaps on those 3 edges with the bulb seal spec'd in the BOM. Taller seal fixed it right up.

    I skipped the vents because with them being so small and the tent volume so large that I had a hard time seeing them doing much, I just crack the windows instead. I get alittle condensation on the hard roof panel but have yet to get any on the sides of the tent. I just wipe the roof off with a towel before closing it up.
     
    Last edited: Dec 14, 2020
    Rando_lurker likes this.
  15. Dec 14, 2020 at 9:28 AM
    #995
    Jarman02

    Jarman02 Well-Known Member

    Joined:
    Sep 17, 2018
    Member:
    #266568
    Messages:
    147
    Gender:
    Male
    Oregon
    Vehicle:
    2002 Tacoma Xtra Cab
    Awesome! I am going to try my 1/4 inch thick foam strip that I have coming in today (since I ordered 50ft) and stick that to the space frame, should accomplish the same thing.

    Yeah, I was seeing that the windows actually work quite well for a vent. I am thinking I might pick up a few yards of this for the ceiling and ill glue it to the roof to keep condensation from forming and adding some insulation.
     
  16. Dec 14, 2020 at 9:39 AM
    #996
    plurpimpin

    plurpimpin Well-Known Member

    Joined:
    Jul 31, 2011
    Member:
    #60895
    Messages:
    2,971
    Gender:
    Male
    PDX
    Vehicle:
    2010 TRD Off Road 4x4
    I'd be concerned more about that stuff holding condensation. I've looked at that quilted insulation as well but I was looking at it to make an insulated tent liner for winter use.

    In the end I got a diesel heater instead to avoid more sewing. Plus then I can crank the heater to dry gear out after a day of skiing or to dry things out before closing up the tent.

    I might eventually add a roof vent but will wait till next summer if I do. I want to use the camper more before I decide. I like the idea of it for camping but not so keen on making things even taller for wheeling. The trails are already plenty tight around here.
     
  17. Dec 14, 2020 at 9:51 AM
    #997
    vitodaniel

    vitodaniel Well-Known Member

    Joined:
    Nov 27, 2018
    Member:
    #273969
    Messages:
    82
    Gender:
    Male
    First Name:
    Vito
    Southern NH
    Vehicle:
    2016 Toyota Tacoma TRD Sport
    Cutting Dibond question.
    What did you guys use to cut aluminum composite panel? What would be better, a jigsaw or circular saw? Thanks!
     
  18. Dec 14, 2020 at 10:21 AM
    #998
    Jarman02

    Jarman02 Well-Known Member

    Joined:
    Sep 17, 2018
    Member:
    #266568
    Messages:
    147
    Gender:
    Male
    Oregon
    Vehicle:
    2002 Tacoma Xtra Cab
    Yeah I am concerned about the condensation getting behind it as well. But my roofnest tent had basically the same thing on the roof and it was always bone dry. I am also looking at a diesel heater in the future as well.

    Table saw and/or circular saw will give you a straighter line. Can use a router too.
     
    Rando_lurker likes this.
  19. Dec 14, 2020 at 11:17 AM
    #999
    Mattjaro

    Mattjaro Active Member

    Joined:
    Dec 11, 2013
    Member:
    #118375
    Messages:
    31
    Gender:
    Male
    First Name:
    Jaro
    Mammoth Lakes, CA
    Vehicle:
    2014 Tacoma Access Cab V6 M/T 4x4
    plasti-dip rims, storage/sleeping platform in bed, drivers seat flashlight attachment.
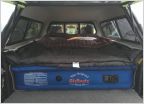
    Thanks @Ripcord for the build thread, this thing looks incredible. i really like the accessibility of the truss frame you designed but im really liking the AT habitat top and how you can have full standing room for cooking, Photo/Video editing or whatever work you need to do inside the bed while still having the sleeping platform separate ready to crawl into. also you have the additional "awning" from the flipped over habitat on the back side of the vehicle. This is why ill be building the "base" or Camper set up and allowing the measurements of the top 2" x 1" square tubing to support the AT habitat "mid" and "top" sections to bolt on. I have a 2014 Tacoma Access Cab and will be adding a prinsu rack on top of the access cab section in a couple weeks. i am 6'4" so i need to have a bit of extra height to stand freely without hitting my head when the AT habitat is flipped back, so the prinsu rack allows me to build a taller "base" and raises the sleeping platform height. you can see in the Prinsu design studios image i photoshop edited to understand what i mean by raising the base. i have also created a 3D image of the truss frame im making to support the AT habitat. the blue members are all 1.5" x 2", the yellow members are 1.5" x 1.5" and the red members are 1" x 1", you can see that i have 2 separate yellow vertical supports in the back and that will be a solid fixed wall because i have to make room for the hydraulic struts on the AT habitat mid and top, so if i put a door rather than the fixed wall there i wouldnt be able to open the side doors unless the habiat was opened up.

    please feel free to ask any questions about this build, ill be posting updates thoughout the build. i plan to pick up as many parts as i can throughout the next 2 months and then start welding the frame some time in February.

     
    Justintheegreat likes this.
  20. Dec 14, 2020 at 1:25 PM
    #1000
    Wasatch

    Wasatch Well-Known Member

    Joined:
    Aug 6, 2010
    Member:
    #41303
    Messages:
    392
    M61guru and jp_flynavy like this.

Products Discussed in

To Top