1. Welcome to Tacoma World!

    You are currently viewing as a guest! To get full-access, you need to register for a FREE account.

    As a registered member, you’ll be able to:
    • Participate in all Tacoma discussion topics
    • Communicate privately with other Tacoma owners from around the world
    • Post your own photos in our Members Gallery
    • Access all special features of the site

New Pioneer DMH-WC6600NEX flush mount install

Discussion in 'Audio & Video' started by PreRunnerSeth, May 27, 2020.

  1. Dec 25, 2020 at 10:53 AM
    #1321
    MGMSangTaco

    MGMSangTaco Colorado Toyota Tuning

    Joined:
    Mar 17, 2018
    Member:
    #247581
    Messages:
    1,996
    Gender:
    Male
    Denver, CO
    Vehicle:
    2017 TRD OR MGM DCLB
    Anyone have recommendations for speakers/sub/amp that will fit in our trucks? I am planning on a full gut of the JBL system and replacing everything.
     
    Last edited: Dec 25, 2020
  2. Dec 26, 2020 at 7:41 AM
    #1322
    j-utah

    j-utah Well-Known Member

    Joined:
    Nov 22, 2017
    Member:
    #236672
    Messages:
    573
    Gender:
    Male
    Vehicle:
    2024 Tundra SR5 Air Suspension
    I like what you’re thinking there. I did the same thing with a non JBL system. One thing to consider is whether you’re up for replacing all of the speaker wire. You can use the stock wire but I think you are limited to not more than 75 watts per channel RMS. That’s still a lot of power. For a new sub you would probably want a new wire. I don’t know what the stock sub wire is like. Running new speaker wire is a bit tricky but doable. For the amp I went with the NVX 5 channel with 80 watts RMS per channel and I think it’s 350 for the sub channel. Their RMS is also rated low so I decided to upgrade the speaker wire which is a big job. It rocks. There’s a lot of good feedback about the NVX line and the bang for the buck. I don’t know if the power is as clean as the more expensive offerings. My sense is that with some of the amps such as Alpine you are paying for the name a bit. For the amp rack the best solution I could find under the seat is the t-a-c-o-t-u-n-e-s amp rack which is needed for the 3rd gen to clear the duct vents. Check out their website. I can’t post their link. It worked great but there is a slight mod needed for the amp I chose. I have pics if you need them.
     
    Last edited: Dec 26, 2020
    MGMSangTaco[QUOTED] likes this.
  3. Dec 26, 2020 at 8:17 AM
    #1323
    j-utah

    j-utah Well-Known Member

    Joined:
    Nov 22, 2017
    Member:
    #236672
    Messages:
    573
    Gender:
    Male
    Vehicle:
    2024 Tundra SR5 Air Suspension
    Check out Sonic Electronics.
     
  4. Dec 26, 2020 at 8:22 AM
    #1324
    j-utah

    j-utah Well-Known Member

    Joined:
    Nov 22, 2017
    Member:
    #236672
    Messages:
    573
    Gender:
    Male
    Vehicle:
    2024 Tundra SR5 Air Suspension
    MGMSangTaco[QUOTED] likes this.
  5. Jan 3, 2021 at 10:53 AM
    #1325
    cvance383

    cvance383 Member

    Joined:
    Feb 25, 2020
    Member:
    #320373
    Messages:
    14
    Gender:
    Male
    Seem to have everything working now except the OBDII. I ran and connected the big black adapter down to the OBD port and then unplugged the smaller black adapter from the harness and plugged it into the other part of the maestro harness. But I don't get any info on the gauges or anywhere else for that matter. Would my SR not have that capability? Or did I screw up the wiring?

    Also how do I tell if the Pioneer GPS antenna I installed under the dash (don't have an OEM antenna) is working? Because doesn't android auto run off my phone's GPS anyways?
     
  6. Jan 3, 2021 at 11:37 AM
    #1326
    svermilyea

    svermilyea Well-Known Member

    Joined:
    Jul 31, 2018
    Member:
    #261213
    Messages:
    1,565
    Gender:
    Male
    First Name:
    Scott
    East Tennessee
    Vehicle:
    2018 Taco Sport (Cement)
    3in leveling lift (Coilovers and AAL) 285/65R18 tires 18" Fuel wheel/tire package Pro Grill, Morimoto XB LED Headlights, DD SS3 Pro Fogs Body Armor Front and Rear Bumpers Pioneer WC6600 head unit w/ OEM Audio + Reference 500 System with dedicated sub amp Meso signal lights, gas hole, led interior lights, ECT relocate, Chrome delete kits Meso Overhead Molle Rack, Seat Risers, Katzkin Leather seats (self installed...it was a fucking bitch) VFTuned .....KDMax Pro!
    STEP 4 of Instructions • Unplug the Black 2 pin connector near the 28 Pin connector of the TO2 T-harness. • Plug the Black 2 pin connector of the TO2 T-harness into the Black 2 pin connector on the OBDII harness. • Plug the male WHITE 2 pin connector of your TO2 T-harness into the OBDII harness. • Plug the OBDII connector into the OBDII of the vehicle

    The tacoma model makes no difference in the OBDII conneciton.
     
  7. Jan 3, 2021 at 1:11 PM
    #1327
    Caliasada Taco

    Caliasada Taco Well-Known Member

    Joined:
    Aug 11, 2019
    Member:
    #301919
    Messages:
    65
    Gender:
    Male
    Can someone help me on how to wire up a front camera for this unit? I already have the nakita camera installed on the truck from my old Daisata unit. Trying to figure how where to tap into for power source from the existing nakita wire. Thanks In advance
     
  8. Jan 3, 2021 at 2:55 PM
    #1328
    svermilyea

    svermilyea Well-Known Member

    Joined:
    Jul 31, 2018
    Member:
    #261213
    Messages:
    1,565
    Gender:
    Male
    First Name:
    Scott
    East Tennessee
    Vehicle:
    2018 Taco Sport (Cement)
    3in leveling lift (Coilovers and AAL) 285/65R18 tires 18" Fuel wheel/tire package Pro Grill, Morimoto XB LED Headlights, DD SS3 Pro Fogs Body Armor Front and Rear Bumpers Pioneer WC6600 head unit w/ OEM Audio + Reference 500 System with dedicated sub amp Meso signal lights, gas hole, led interior lights, ECT relocate, Chrome delete kits Meso Overhead Molle Rack, Seat Risers, Katzkin Leather seats (self installed...it was a fucking bitch) VFTuned .....KDMax Pro!
    Tap the power from the blue head unit harness wire.
     
    Caliasada Taco and daveeasa like this.
  9. Jan 3, 2021 at 3:04 PM
    #1329
    Caliasada Taco

    Caliasada Taco Well-Known Member

    Joined:
    Aug 11, 2019
    Member:
    #301919
    Messages:
    65
    Gender:
    Male
    The blue/white line (amp)?

    Thank you for the quick response, you’re the man!
     
    Last edited: Jan 3, 2021
    daveeasa likes this.
  10. Jan 3, 2021 at 5:04 PM
    #1330
    svermilyea

    svermilyea Well-Known Member

    Joined:
    Jul 31, 2018
    Member:
    #261213
    Messages:
    1,565
    Gender:
    Male
    First Name:
    Scott
    East Tennessee
    Vehicle:
    2018 Taco Sport (Cement)
    3in leveling lift (Coilovers and AAL) 285/65R18 tires 18" Fuel wheel/tire package Pro Grill, Morimoto XB LED Headlights, DD SS3 Pro Fogs Body Armor Front and Rear Bumpers Pioneer WC6600 head unit w/ OEM Audio + Reference 500 System with dedicated sub amp Meso signal lights, gas hole, led interior lights, ECT relocate, Chrome delete kits Meso Overhead Molle Rack, Seat Risers, Katzkin Leather seats (self installed...it was a fucking bitch) VFTuned .....KDMax Pro!
    yes. This is the headunit amp turnon wire. It will carry upto 10 amps of turn on with your head unit.
     
    Caliasada Taco and TA-5650 like this.
  11. Jan 3, 2021 at 5:18 PM
    #1331
    TA-5650

    TA-5650 Well-Known Member

    Joined:
    Nov 22, 2019
    Member:
    #311394
    Messages:
    250
    Gender:
    Male
    Wilmington, DE
    Vehicle:
    2017 TRD OR DCSB, Blazing Blue Pearl
    Would you use the head unit ground also?
     
  12. Jan 3, 2021 at 5:25 PM
    #1332
    svermilyea

    svermilyea Well-Known Member

    Joined:
    Jul 31, 2018
    Member:
    #261213
    Messages:
    1,565
    Gender:
    Male
    First Name:
    Scott
    East Tennessee
    Vehicle:
    2018 Taco Sport (Cement)
    3in leveling lift (Coilovers and AAL) 285/65R18 tires 18" Fuel wheel/tire package Pro Grill, Morimoto XB LED Headlights, DD SS3 Pro Fogs Body Armor Front and Rear Bumpers Pioneer WC6600 head unit w/ OEM Audio + Reference 500 System with dedicated sub amp Meso signal lights, gas hole, led interior lights, ECT relocate, Chrome delete kits Meso Overhead Molle Rack, Seat Risers, Katzkin Leather seats (self installed...it was a fucking bitch) VFTuned .....KDMax Pro!
    ground is ground. The head unit ground is fine.
     
    Caliasada Taco likes this.
  13. Jan 3, 2021 at 5:51 PM
    #1333
    daveeasa

    daveeasa FBC Harness Solutions

    Joined:
    May 14, 2020
    Member:
    #328079
    Messages:
    7,465
    Gender:
    Male
    First Name:
    David
    PNW
    Vehicle:
    2016 Tacoma OR DCSB 6MT, 2005 RC 5MT PreRunner, 2002 Tundra SR5 RCLB 4x4
    Woah, spec’d at 10 amps? Nuts. I thought it was lower.

    EDIT, you are the man but would you mind citing a source on that one? I just dug this up (on my phone in the minivan so hard to read big pdf’s but this matches what I remember.)

    EDIT2: None of this is any problem for a camera or any other very low current device.

    9F529F44-80B5-45F5-9AAB-73EB0A99BBD8.jpg
     
    Last edited: Jan 3, 2021
  14. Jan 3, 2021 at 7:37 PM
    #1334
    Caliasada Taco

    Caliasada Taco Well-Known Member

    Joined:
    Aug 11, 2019
    Member:
    #301919
    Messages:
    65
    Gender:
    Male
    This is frustrating, what am I doing wrong ?So I tapped into the amp wire and plugged it into the labeled secondary camera. But cannot get the front camera to pull up. The camera worked this morning so I doubt the camera is bad. Any help would be greatly appreciated.

    CDC5A5D2-8739-4CED-A3FD-DCCEE5FB92F9.jpg
    DA94B4C5-A61E-4BD1-A8FD-01295805BE0B.jpg
     
  15. Jan 3, 2021 at 7:52 PM
    #1335
    crashdb

    crashdb I break chainsaws

    Joined:
    Aug 16, 2017
    Member:
    #226954
    Messages:
    9,705
    Gender:
    Male
    First Name:
    Dave
    Manassas, VA
    Vehicle:
    2008 Toyota Matrix
    Rollin' hydrocarbons!
    There are two power wires for that camera more or less. Make sure they're spliced in correctly. Since you're pulling power off the remote turn on you can just splice both power wires into that.
     
  16. Jan 3, 2021 at 7:56 PM
    #1336
    Caliasada Taco

    Caliasada Taco Well-Known Member

    Joined:
    Aug 11, 2019
    Member:
    #301919
    Messages:
    65
    Gender:
    Male
    Ohhhh that’s right, I totally forgot about the other wire...I’ll give it a try tomorrow. I tucked it away so well I forgot about it. Thanks
     
  17. Jan 4, 2021 at 12:48 AM
    #1337
    Caliasada Taco

    Caliasada Taco Well-Known Member

    Joined:
    Aug 11, 2019
    Member:
    #301919
    Messages:
    65
    Gender:
    Male
    alright just went through 40 thread to find this what I was looking for. Hey Sver, if I post some pics of the Gems unit with wiring harness can you point me in the right direction on how to rig up the Gems for the 6600 unit. I’m a bit confuse since there’s the main piggy back adapter for factory main harness and then the small piggy back adapter that plugs into the Gems unit.

    I was going to set up front cam using touch screen and steering wheel reprogram. But after finding that I can use my old Car solution unit, it will be quicker method to switch front and back.
     
  18. Jan 4, 2021 at 6:07 AM
    #1338
    daveeasa

    daveeasa FBC Harness Solutions

    Joined:
    May 14, 2020
    Member:
    #328079
    Messages:
    7,465
    Gender:
    Male
    First Name:
    David
    PNW
    Vehicle:
    2016 Tacoma OR DCSB 6MT, 2005 RC 5MT PreRunner, 2002 Tundra SR5 RCLB 4x4
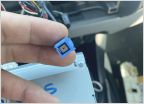
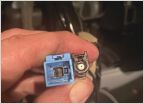
    You keep the T harnesses for the Germes to the OEM harnesses which exist. But one will not. It’s a square connector which plugs in just to tap power for the Germes when the head unit is on. You cut that guy off and tap the red to the blue / white remote out and the black to ground.

    I did mine using bullets so I could return to stock head unit in the future if I wanted to. Which is really rather silly because I can’t ever see doing that. This piece is wrapped in very sticky foam so the hardest part is removing enough of that stuff to crimp a connection.

    C57A89A2-11F6-4C0C-8A3B-915920412E77.jpg 2058655B-04F9-4B53-B4FD-CDD98A38D5FF.jpg
     
    Last edited: Jan 4, 2021
  19. Jan 4, 2021 at 10:26 AM
    #1339
    svermilyea

    svermilyea Well-Known Member

    Joined:
    Jul 31, 2018
    Member:
    #261213
    Messages:
    1,565
    Gender:
    Male
    First Name:
    Scott
    East Tennessee
    Vehicle:
    2018 Taco Sport (Cement)
    3in leveling lift (Coilovers and AAL) 285/65R18 tires 18" Fuel wheel/tire package Pro Grill, Morimoto XB LED Headlights, DD SS3 Pro Fogs Body Armor Front and Rear Bumpers Pioneer WC6600 head unit w/ OEM Audio + Reference 500 System with dedicated sub amp Meso signal lights, gas hole, led interior lights, ECT relocate, Chrome delete kits Meso Overhead Molle Rack, Seat Risers, Katzkin Leather seats (self installed...it was a fucking bitch) VFTuned .....KDMax Pro!
    You are correct about the AMP wire (300mv). I use that signal for a number of devices. I hooked mine up to a relay and a buss block with a 10amp fuse on the vehicle power side. This way, I know I will not be over driving the AMP On signal line.
     
  20. Jan 4, 2021 at 11:01 AM
    #1340
    svermilyea

    svermilyea Well-Known Member

    Joined:
    Jul 31, 2018
    Member:
    #261213
    Messages:
    1,565
    Gender:
    Male
    First Name:
    Scott
    East Tennessee
    Vehicle:
    2018 Taco Sport (Cement)
    3in leveling lift (Coilovers and AAL) 285/65R18 tires 18" Fuel wheel/tire package Pro Grill, Morimoto XB LED Headlights, DD SS3 Pro Fogs Body Armor Front and Rear Bumpers Pioneer WC6600 head unit w/ OEM Audio + Reference 500 System with dedicated sub amp Meso signal lights, gas hole, led interior lights, ECT relocate, Chrome delete kits Meso Overhead Molle Rack, Seat Risers, Katzkin Leather seats (self installed...it was a fucking bitch) VFTuned .....KDMax Pro!
    Ok....this pic is a little busy. The GEMS unit gets it's power from center small connector (bottom right). There are two wires on that connector (power - Red and ground - Black). That connector originally pugged into the XM unit on the factory Entune radio to get power to the GEMS. Cut those wires at the connector and provide them with AC power and ground (I discussed my solution in the previous post - #1339). The rear camera is powered and connected through the vehicle harness jumpers (two outer jumpers lower right of pic). The front camera should be plugged into the yellow RCA labeled FCAM. The 12V power on that connector is wired as labeled in the picture.

    Edit - The GEMS harness is connected to the factory wiring first. Then the Maestro harness is connected. This order will allow the GEMS controller to work as designed off the mode button on the left side of the steering wheel.

    D07FF888-9D68-4800-8A7D-F801917E5AA7.jpg
     
    Last edited: Jan 4, 2021

Products Discussed in

To Top