

-
Welcome to Tacoma World!
You are currently viewing as a guest! To get full-access, you need to register for a FREE account.
As a registered member, you’ll be able to:- Participate in all Tacoma discussion topics
- Communicate privately with other Tacoma owners from around the world
- Post your own photos in our Members Gallery
- Access all special features of the site
 JIS Screwdriver Set Recommendations
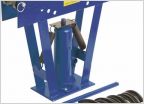 Good enough tubing bender?
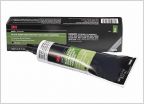 Adhesive to bond neoprene to metal (painted) that sees varying temps?
 Impact sockets or not...
 Plumbing issue achieved. What gremlin cut my pipe?
 High torque or mid torque
Preparing , preparing , you're always preparing . OZ-T's "Just build the damn shop already build ".
Discussion in 'Garage / Workshop' started by OZ-T, May 16, 2020.
Page 38 of 74
Page 38 of 74

