1. Welcome to Tacoma World!

    You are currently viewing as a guest! To get full-access, you need to register for a FREE account.

    As a registered member, you’ll be able to:
    • Participate in all Tacoma discussion topics
    • Communicate privately with other Tacoma owners from around the world
    • Post your own photos in our Members Gallery
    • Access all special features of the site

How to: DIY Wedge Camper

Discussion in 'Tonneau Covers, Caps and Shells' started by Ripcord, Apr 15, 2019.

  1. Feb 8, 2021 at 12:49 PM
    #1261
    howied

    howied Well-Known Member

    Joined:
    Apr 25, 2020
    Member:
    #325807
    Messages:
    92
    Gender:
    Male

    What bumper / tire carrier is that? Looks awesome
     
  2. Feb 8, 2021 at 2:30 PM
    #1262
    AbePDX

    AbePDX Well-Known Member

    Joined:
    Dec 27, 2016
    Member:
    #205804
    Messages:
    84
    Gender:
    Male
    First Name:
    Abe
    Portland OR
    Vehicle:
    2007 Silver Mica Tacoma TRD OR V6 MT 6

    The bumper is a PELFREYBILT and a friend made the swing-out for me. I'm actually contemplating taking the swing-out off (just remove for now).
     
  3. Feb 8, 2021 at 2:57 PM
    #1263
    howied

    howied Well-Known Member

    Joined:
    Apr 25, 2020
    Member:
    #325807
    Messages:
    92
    Gender:
    Male
    let me know if you end up selling it. Located in Seattle and could come down.
     
  4. Feb 9, 2021 at 8:27 AM
    #1264
    Wasatch

    Wasatch Well-Known Member

    Joined:
    Aug 6, 2010
    Member:
    #41303
    Messages:
    392
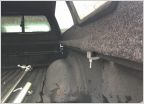
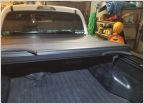
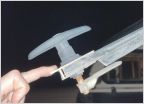
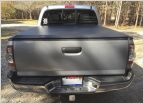
    Progress! This thread has been invaluable and I look forward to sharing the modifications needed to make it fit my needs:

    5245282849307978645.jpg 2050661367928376562.jpg PXL_20210209_153100860.jpg
     
  5. Feb 9, 2021 at 8:16 PM
    #1265
    foxrcing07

    foxrcing07 KO7FOX

    Joined:
    Aug 12, 2016
    Member:
    #194389
    Messages:
    4,025
    Gender:
    Male
    First Name:
    Morgan
    Modesto, CA
    Vehicle:
    2019 Raptard 2001 TJ
    Dirt
    NM but a camper for sale in Southern California Looks to be all aluminum too
     
    Last edited: Feb 9, 2021
    Afilao likes this.
  6. Feb 9, 2021 at 8:24 PM
    #1266
    Afilao

    Afilao Tacoma Driver

    Joined:
    May 30, 2020
    Member:
    #329818
    Messages:
    703
    Gender:
    Male
    SoCal
    Vehicle:
    ‘18 MGM DCSB Off-Road 6MT
    Looks like the sides don’t open... but not bad!
     
  7. Feb 10, 2021 at 7:42 AM
    #1267
    Wasatch

    Wasatch Well-Known Member

    Joined:
    Aug 6, 2010
    Member:
    #41303
    Messages:
    392
    Anyone have any tips/advice for mounting the panels / cutting the holes for the latches, etc?

    I'm guessing you'll want to orient the struts as vertical as possible when closed...

    I didn't pre-cut the holes for the southco latches as I didn't know exactly how high up I should mount them on the panel.. anyone care to share their measurements?
     
  8. Feb 10, 2021 at 9:40 AM
    #1268
    BaywatchDV

    BaywatchDV Well-Known Member

    Joined:
    Jun 7, 2018
    Member:
    #255759
    Messages:
    266
    Gender:
    Male
    Vehicle:
    2015 Tacoma TRD Sport
    Finally got started on this project! The easy part is done.
    45CE5B79-9CF2-4BCE-B8C0-7CF80B3543C9.jpg
    4FDABBF0-BBFC-4C23-9327-0909D2CB8B46.jpg
     
  9. Feb 10, 2021 at 10:54 AM
    #1269
    howied

    howied Well-Known Member

    Joined:
    Apr 25, 2020
    Member:
    #325807
    Messages:
    92
    Gender:
    Male
    I just temp attached the doors to the space frame and lined up the latch from the inside. Marked it and made the cuts. Worked out great
     
  10. Feb 10, 2021 at 11:46 AM
    #1270
    81435

    81435 Well-Known Member

    Joined:
    Oct 10, 2015
    Member:
    #166346
    Messages:
    179
    Gender:
    Male
    Colorado
    Vehicle:
    2016 TRD OR AC MGM
    3/2 lift, TRD Pro wheels, 275/70/17 KO2's
    My plan is to use a piece of cardboard to get the measurements dialed for the latches, then transfer that to the panel. I’m still waiting on my panels to be cut, so hopefully I’ll get to see if this works next week.
     
    Rando_lurker likes this.
  11. Feb 11, 2021 at 2:50 PM
    #1271
    barrsurf

    barrsurf Member

    Joined:
    Feb 11, 2021
    Member:
    #355827
    Messages:
    5
    Gender:
    Male
    How are y’all dealing with the inside tent corners? The keder rail is 48” and my inside width is 50”. Does anyone have a closeup pic of that area?

    thanks!
     
  12. Feb 14, 2021 at 5:53 AM
    #1272
    chequamegon

    chequamegon Well-Known Member

    Joined:
    Dec 27, 2012
    Member:
    #93827
    Messages:
    60
    Gender:
    Male
    First Name:
    Tim
    Minneapolis, MN
    Vehicle:
    2013 Super White DCLB
    White DCLB w/ Fox 2.5 Adj Resis, 32" Duratracs on TRD 17s, SuperPacific camper, 4.56 Nitros, ARB Front bumper, CBI rock slides, dual rear swingout rear bumper, solar, fridge, electrical
    Hey guys - Has everyone sewed their own tent? This looks like a good time, but the only skill I lack in this project is sewing, and I doubt I could figure it out enough to make it look decent. Anyone found a company that would do it?
     
  13. Feb 14, 2021 at 6:12 AM
    #1273
    jowybyo

    jowybyo Well-Known Member

    Joined:
    Nov 19, 2013
    Member:
    #116863
    Messages:
    6,092
    Gender:
    Male
    First Name:
    Joe
    Baltimore, MD
    Vehicle:
    '14 MGM DCSB Postrunner 4wd Conversion, Debadged
    An upholstery shop, especially a marine upholster should be able to do it no problem.
     
  14. Feb 14, 2021 at 6:37 AM
    #1274
    chequamegon

    chequamegon Well-Known Member

    Joined:
    Dec 27, 2012
    Member:
    #93827
    Messages:
    60
    Gender:
    Male
    First Name:
    Tim
    Minneapolis, MN
    Vehicle:
    2013 Super White DCLB
    White DCLB w/ Fox 2.5 Adj Resis, 32" Duratracs on TRD 17s, SuperPacific camper, 4.56 Nitros, ARB Front bumper, CBI rock slides, dual rear swingout rear bumper, solar, fridge, electrical
    Yeah, thats what Ive thought. Im in Minnesota with lots of marine places around, and each one I called said they didn't want to mess with it. They must be too busy with boats. Has anyone had any luck with any particular shops they could name?
     
  15. Feb 14, 2021 at 8:04 AM
    #1275
    Jarman02

    Jarman02 Well-Known Member

    Joined:
    Sep 17, 2018
    Member:
    #266568
    Messages:
    147
    Gender:
    Male
    Oregon
    Vehicle:
    2002 Tacoma Xtra Cab
    I sewed mine with zero experience. There aren't any crazy things to stitch, more so it's just a good amount of stitching and the zippers are the hardest part to get right. It would be faaaarrr easier if you just did straight zippers
     
    overlandozzy1 likes this.
  16. Feb 14, 2021 at 2:11 PM
    #1276
    Andersob85

    Andersob85 Active Member

    Joined:
    Dec 28, 2019
    Member:
    #314413
    Messages:
    29
    Gender:
    Male
    First Name:
    Brandon
    I did mine no problem. Stitching looks a bit rough in places but it works. Uses the double sided tape whenever possible. The screens are thr worst part.
     
  17. Feb 15, 2021 at 5:35 AM
    #1277
    JMcFly

    JMcFly Well-Known Member

    Joined:
    Aug 11, 2020
    Member:
    #337348
    Messages:
    1,338
    Central FL
    Vehicle:
    2012 Tacoma SR5 4x4
    8E64F4DA-22F3-4601-A892-BC882E794F7E.jpg
    its coming along. Should hopefully have it done next weekend. I’m waiting on the mounting brackets to be cut and bent from OSH, send cut send couldn’t do the bending part
     
  18. Feb 15, 2021 at 8:56 AM
    #1278
    Wasatch

    Wasatch Well-Known Member

    Joined:
    Aug 6, 2010
    Member:
    #41303
    Messages:
    392
    Just wanted to post a helpful update for anyone working on their panels. I found positioning the stiffeners 3'' from the panel edge ('L' bracket facing outward) was just about perfect for strut placement. I used 1x1'' 1/16 aluminum angle.

    For the side panels, the latch (southco) holes (3 3/8'' x 1'') fit really well on the 1 1/2'' tubing with the bottom cut of the latch hole 2'' up from the bottom the the panel.

    For the rear panel, as the tubing was at an angle, the measurements were a little different. I found that 1 3/4'' in from the side for the latch fit best, but everyone's frame angle will vary so yours may be a little different.

    Hope this helps!
     
    Rando_lurker likes this.
  19. Feb 15, 2021 at 9:12 AM
    #1279
    vitodaniel

    vitodaniel Well-Known Member

    Joined:
    Nov 27, 2018
    Member:
    #273969
    Messages:
    82
    Gender:
    Male
    First Name:
    Vito
    Southern NH
    Vehicle:
    2016 Toyota Tacoma TRD Sport
    Got the photo of your l brackets by chance? I went ahead and used aluminum rod brazing but not sure if it’s a good idea. Have to do lots of cuts... considering other options

    thanks! EB483FE9-D497-4EE6-9172-19492FF0214F.jpg
     
  20. Feb 15, 2021 at 9:24 AM
    #1280
    Wasatch

    Wasatch Well-Known Member

    Joined:
    Aug 6, 2010
    Member:
    #41303
    Messages:
    392
    Here's one of the side panels (long bed). It's stiff enough for now. I may create a bracket later to bridge the section behind the latch.

    PXL_20210215_172218425.jpg
     
    Ripcord[OP] likes this.

Products Discussed in

To Top