1. Welcome to Tacoma World!

    You are currently viewing as a guest! To get full-access, you need to register for a FREE account.

    As a registered member, you’ll be able to:
    • Participate in all Tacoma discussion topics
    • Communicate privately with other Tacoma owners from around the world
    • Post your own photos in our Members Gallery
    • Access all special features of the site

GHOST SHIP: Custom Chingaderas

Discussion in 'Southern California' started by GHOST SHIP, Oct 31, 2019.

  1. Feb 23, 2021 at 3:38 PM
    #981
    GHOST SHIP

    GHOST SHIP [OP] hates you.

    Joined:
    Mar 9, 2015
    Member:
    #150537
    Messages:
    22,388
    First Name:
    GHOST
    I didn’t see the bolts until I had already cut the fenders off.

    :anonymous:
     
  2. Feb 23, 2021 at 3:50 PM
    #982
    mud

    mud Djentleman

    Joined:
    Dec 21, 2018
    Member:
    #276560
    Messages:
    1,339
    Gender:
    Male
    SoCal
    Vehicle:
    2019 TRD OR DCSB LMNOP QRS TUVWXYZ
    "Work harder not smarter!"
     
  3. Feb 23, 2021 at 3:58 PM
    #983
    tcjacado

    tcjacado Well-Known Member

    Joined:
    Aug 29, 2016
    Member:
    #195947
    Messages:
    41,586
    That's why we are men:anonymous:
     
  4. Feb 23, 2021 at 4:36 PM
    #984
    SixthSnail

    SixthSnail I have no idea what I'm doing

    Joined:
    Oct 3, 2014
    Member:
    #139599
    Messages:
    13,291
    Gender:
    Male
    First Name:
    Matt
    Los Angeles
    Vehicle:
    '14 Tacoma Sport
    See Build in Sig
    Hell yeah!
     
  5. Feb 26, 2021 at 9:56 PM
    #985
    Georgeth1022

    Georgeth1022 Well-Known Member

    Joined:
    Nov 1, 2014
    Member:
    #141491
    Messages:
    1,181
    Gender:
    Male
    First Name:
    Shaun
    West Hills CA
    Vehicle:
    2013 BAJA w/ too many mods
    Too many to list
    Just want to thank Sergio for the install on my fathers 4Runner today. He did a great job yet again. My dad said the difference was night and day, he’s very happy.
     
    GHOST SHIP[OP] and CR2014Sport like this.
  6. Feb 27, 2021 at 7:06 AM
    #986
    GHOST SHIP

    GHOST SHIP [OP] hates you.

    Joined:
    Mar 9, 2015
    Member:
    #150537
    Messages:
    22,388
    First Name:
    GHOST
    You got it Shaun! The XREAS delete was long overdue on his truck so it should feel brand new.

    for those that don’t know, the XREAS system is the precursor to KDSS on 4Runners where instead of a hydraulic sway bar, all 4 shocks are interconnected with two hydraulic cylinders. When the vehicle flexes, it transfers fluid to the shock at the opposite corner to stabilize the vehicle and prevent body roll. The problem with the system is that you can’t just swap out shocks yourself because they’re hydraulically charged and you’d need to recharge the system. The other issue is that if you blow one shock, it’s equivalent to blowing two because the fluid moves from one corner to the other. Deleting the system completely allows you to run traditional struts or coilovers, but you have to remove two hydraulic pumps, all 4 shocks and all the lines connecting the 4 corners together. It’s a messy job to say the least.

    Fun fact: the XREAS system was manufactured for Toyota by Yamaha. Yes, piano and dirt bike making Yamaha.
     
    AY_ARONTRD and Drainbung like this.
  7. Feb 27, 2021 at 7:16 AM
    #987
    AY_ARONTRD

    AY_ARONTRD Well-Known Member

    Joined:
    Sep 25, 2017
    Member:
    #231065
    Messages:
    4,041
    Gender:
    Male
    First Name:
    Aaron
    Murrieta ,CA
    Vehicle:
    2019 DCLB Cement OR 4x4
    Interesting. :popcorn:

    speaking of 4runners, I gotta go visit you soon :)
     
  8. Feb 27, 2021 at 10:29 AM
    #988
    farmtacoma

    farmtacoma Date Farmer

    Joined:
    Jan 3, 2021
    Member:
    #351582
    Messages:
    2,125
    Gender:
    Female
    First Name:
    Julia
    Twentynine Palms, California
    Vehicle:
    2021 Cement TRD OR DCLB 4x4 & 2018 Silver SR ACLB 4x2
    PM sent for appointment
     
    Afilao and GHOST SHIP[OP] like this.
  9. Feb 27, 2021 at 4:52 PM
    #989
    GHOST SHIP

    GHOST SHIP [OP] hates you.

    Joined:
    Mar 9, 2015
    Member:
    #150537
    Messages:
    22,388
    First Name:
    GHOST
    Replied!
     
    Drainbung likes this.
  10. Feb 27, 2021 at 5:17 PM
    #990
    GHOST SHIP

    GHOST SHIP [OP] hates you.

    Joined:
    Mar 9, 2015
    Member:
    #150537
    Messages:
    22,388
    First Name:
    GHOST
    Getting glittery today. @sicki was in for a CMC to fit 33s and a BAMF hanger install. I figured I’d show how I install these because I’ve seen a bunch of people showing a bunch of different ways to get the job done. As long as the job is done correctly in the end it doesn’t really matter how you do it, just depends on what tools you have at your disposal.

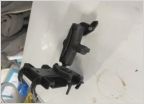
    Here’s the stock hanger. 4 rivets hold it to the frame- Two outboard and two underneath per side.

    38ABB552-59F9-41F1-AAA0-FD7671CF2748.jpg

    My preferred method of removal is to use a cut off wheel to cut the head of the rivet off. Get in there as close as you can flush to the hanger. Even if you have to cut at a slight angle, you can stay safely away from the frame since the thickness of the hanger itself is your buffer zone.

    85E86130-5518-4581-8A28-28902EAF5572.jpg


    Then you can reach for Mjölnir or whatever legendary weapon you have at your disposal.

    DC43626B-52E0-493F-A5B5-C8A2FAAF7938.jpg


    a couple good swings outward from inside the frame and the whole hanger comes off in one piece with a satisfying “clank” as it hits the ground.
    EA856579-B280-4598-9D8F-4AADFC2D7E91.jpg

    You’ll be left with about 1/8” of rivet still protruding from the frame. Hit those with a flap disc and level them out.
    B331C323-B4BD-47A3-A306-A2FE89975C10.jpg

    Then you can use a center punch and you’re going to start drilling. Now here’s where I see a lot of people working harder than they need to. You don’t have to drill all the way through the rivet to get them out. You just have to get through the part that is effectively encapsulated in the frame. The goal is to thin out and thus weaken the amount of metal that has mushroomed into the frame. Once it’s thin enough, it’s strength is compromised enough that you can take a center punch and pop them out. Here’s all I drill out- about half way through the rivet up to a 3/8” bit.
    52A2F634-B387-49B4-9632-47FE63E51D17.jpg

    Center punch and Mjölnir in hand, the offending rivets are removed.
    45856912-39D3-4237-8A4E-BF7EF1F2E98C.jpg

    By not drilling all the way through the rivet you actually give yourself a small cup that holds the center punch in place while you swing your hammer. The two rivets that are under the frame are also holding the rear x-member that also holds your spare tire hoist. They’re pictured above with the washers attached- sometimes the washers stay in place and the rivet pops out without them. It doesn’t really matter either way as long as your new hardware is able to be installed properly.

    then you can drill out the holes to 1/2” for the new supplied hardware and give everything a quick coat of paint. Bonus points if you actually know how to use spray paint and don’t get any runs in your finish.

    AA1D8C91-B454-4FF7-82AB-7127704E311A.jpg


    Then you bolt the new beefier hangers in place and reinstall your leaf pack. Easy-peasy, lemon squeezy.


    F0E83621-6BC9-4805-ACA7-09DA4910FAD7.jpg


    I didn’t get finished install pictures but you all know what they look like by now. I also built a crossbar support and installed that as well.


    The above job isn’t hard for someone that’s mechanically inclined but it is labor intensive. Your comfort level and available tools will determine if you can do it yourself with limited curse words.

    Now get out there and be somebody! I believe in you!
     
    4WDTrout, SUMOTNK, patdeezy and 7 others like this.
  11. Feb 27, 2021 at 6:45 PM
    #991
    Mista_G

    Mista_G Well-Known Member

    Joined:
    Jan 20, 2015
    Member:
    #146796
    Messages:
    1,064
    Gender:
    Male
    First Name:
    Matt
    Costa Mesa, CA
    Vehicle:
    '13 DCLB 4x4
    Kings F/R 2.5" EXT w/700lb springs, JD Fab UCA’s w/ Lower Pivot Kit, Icon Progressive AAL (with TSB and overload in), CB drop, 285/75-17 nitto ridge grapplers, SCS Deep Dish Ray Dimes, Snugtop Rebel Shell, Prinsu Toprac, Gibson SS Catback Exhaust, ATH front /rear steel bumpers, CVT awning, Airflow snorkel, @ Shmellmopwho sliders, SC w/ @justdsm HPtune, 3° Cam Gears @mightytacoman, 2.8 smooth flow pulley, StopTech BBK
    You can be my somebody when it’s tim for be leafs
     
  12. Mar 1, 2021 at 7:35 AM
    #992
    sicki

    sicki Well-Known Member

    Joined:
    Jun 13, 2015
    Member:
    #157339
    Messages:
    1,147
    Gender:
    Male
    Thanks for all your hardwork. The CMC and 33 clearance job came out vere nice , super clean. I cant wait to get my 33s on now to match my Tune from @TWTaco . The BAMF hangers/ shackles and crossbar made the truck feel so planted and also smoother in the rear. Looking forward to taking it to the dirt again. Well worth the money to have a Professional like Sergio do the work. The only cursing I had was when i almost fell on my face exploring a nearby hike with my lady.
     
  13. Mar 2, 2021 at 10:41 AM
    #993
    Old Marine Cal

    Old Marine Cal Well-Known Member

    Joined:
    Mar 21, 2017
    Member:
    #213937
    Messages:
    6,001
    Gender:
    Male
    Vehicle:
    2015 MGM DBLCAB

    You misspelled "Sergio pushed me"

    :D
     
    mud likes this.
  14. Mar 2, 2021 at 10:56 AM
    #994
    GHOST SHIP

    GHOST SHIP [OP] hates you.

    Joined:
    Mar 9, 2015
    Member:
    #150537
    Messages:
    22,388
    First Name:
    GHOST
    Bumper is back from powder. Here’s some in progress pics and the finished install. Before anyone asks, I’m not building this as a production bumper. It’s something I wanted for myself that nobody really offered- a hybrid rear bumper that matches my hybrid front. Special shout to @WarFab Armor and @JLee for their help and inspiration.


    here’s where I started. Bolted up the frame plates and got the general profile that I wanted for the bumper. Skinned it with 3/16” plate and cut out the openings for the pass through recovery points.
    E1BAA355-616E-4E27-A2C1-3274CD593893.jpg

    60E75273-3A6A-4767-886A-8FD40705098B.jpg

    After some measuring, I cut back the recess for the license plate.

    F9DF55AA-D954-481D-8D37-52BA8021C062.jpg

    Here’s a shot from the rear of the recovery points. Welded them to the frame plates and on both sides of the bumper skin. Some of these areas had to be fully welded as I was building because once the bumper was put together they’d be covered and harder to get to comfortably.

    44E1575D-320C-4AF5-8CCF-620391C53FBD.jpg

    I finish welded the seams, moving around the bumper as I went to mitigate warping. Once I started to smooth everything out I noticed divots where I didn’t build up the weld puddle enough to blend the radius.

    4BB742CA-75D6-495A-9492-9F3B0C276530.jpg

    No problem. A little more weld in those area to fill them in and more time with a flap wheel and sander and we get a smooth finish.

    A8FCCCC3-1273-4907-8E3E-78601274EC36.jpg 8EFAB80E-A925-422D-9D98-22DB84BC528F.jpg

    Test fitting the bumper I didn’t like how boxy the lower corners looked so I made some adjustments.

    D64CBEF7-C0AC-48D7-A2BE-3135C03551FE.jpg

    Cut my bedsides. No turning back now. One thing I found interesting was that the body line just below the taillight isn’t parallel to the bed rails. It has a slight downward slope as it goes forward so my OCD had to make a decision to follow the body line or follow the bed rails. Either way one of the two lines would appear off. It was just a matter of which one bothered me more. Spoiler alert: following the bed rails made for a better look since the wings of the bumper looked stupid sloping downward- it looked like the bumper was installed out of alignment and didn’t look intentional.
    #measure four times, cut twice.

    123D268C-30D9-4144-AC9E-C91D82CE8587.jpg

    Hidden hitch behind the license plate. I don’t tow, nor do I ever intend to. Because I built the bumper to be low profile and close to the back of the truck, I didn’t have a lot of room to reinforce it for maximum strength before I ran into interference with the stock spare tire I keep under the bed. This hitch isn’t built to tow a boat but will be used for my hitch mounted tire carrier and I reinforced it to where I feel confident that it’ll support the weight of the carrier and full sized spare tire.

    0FCF5010-70DA-44D5-B0C8-FE8C67CB86F8.jpg

    Last looks before I send it off to powder.

    E645C267-9812-407D-B5AF-D5D4E76776E2.jpg 44C790C2-5802-49A4-AC0E-0D14C1B99813.jpg

    Finally mounted. I’m super happy with the way it came out and it matches my front bumper just like I wanted. Here you can see the clear inspiration from @WarFab Armor ‘s phantom bumper which Ive always really liked. I just wanted a steel center section out back.

    2F0995DB-B81F-4B56-B986-13E071B089C0.jpg C7D0F2D5-4D25-4A8C-A1E5-33CE1EAF64FB.jpg 34EDABFC-BE0D-48C9-8862-FB6CA732C4E8.jpg

    Here’s a close up of a small detail I added. I didn’t want side shooting license plate lights so I made a small bracket for an overhead led strip that plugs into the factory light socket. I made the light myself too. Nothing fancy just a small piece of LED strip and some solder.

    C4F31DF6-00E2-46A8-ABD5-9B81046AC0BA.jpg EBBFAC3A-F75C-416A-8E87-192D41EC0EBB.jpg
     
  15. Mar 2, 2021 at 11:01 AM
    #995
    GHOST SHIP

    GHOST SHIP [OP] hates you.

    Joined:
    Mar 9, 2015
    Member:
    #150537
    Messages:
    22,388
    First Name:
    GHOST
    Now I need to do something about the dinky stock leaf hangers. They look extra weak now that they’re exposed. Guess I’ll have to order my BAMF hangers soon.
     
    notlefty, Mista_G, mud and 1 other person like this.
  16. Mar 2, 2021 at 11:04 AM
    #996
    GHOST SHIP

    GHOST SHIP [OP] hates you.

    Joined:
    Mar 9, 2015
    Member:
    #150537
    Messages:
    22,388
    First Name:
    GHOST
    Here’s a detail for how I reinforced the hitch. It’s just a piece of plate that acts as a spanner to spread the load out a bit. Nothing fancy and definitely not tow rated but it’ll serve my purposes just fine.
    365CEAC8-F11C-4724-A436-E884E37DECE9.jpg
     
  17. Mar 2, 2021 at 11:16 AM
    #997
    mud

    mud Djentleman

    Joined:
    Dec 21, 2018
    Member:
    #276560
    Messages:
    1,339
    Gender:
    Male
    SoCal
    Vehicle:
    2019 TRD OR DCSB LMNOP QRS TUVWXYZ
    Damn that came out clean.
     
  18. Mar 2, 2021 at 11:29 AM
    #998
    Mista_G

    Mista_G Well-Known Member

    Joined:
    Jan 20, 2015
    Member:
    #146796
    Messages:
    1,064
    Gender:
    Male
    First Name:
    Matt
    Costa Mesa, CA
    Vehicle:
    '13 DCLB 4x4
    Kings F/R 2.5" EXT w/700lb springs, JD Fab UCA’s w/ Lower Pivot Kit, Icon Progressive AAL (with TSB and overload in), CB drop, 285/75-17 nitto ridge grapplers, SCS Deep Dish Ray Dimes, Snugtop Rebel Shell, Prinsu Toprac, Gibson SS Catback Exhaust, ATH front /rear steel bumpers, CVT awning, Airflow snorkel, @ Shmellmopwho sliders, SC w/ @justdsm HPtune, 3° Cam Gears @mightytacoman, 2.8 smooth flow pulley, StopTech BBK
    I shall reserve judgment until I see you Saturday. Then I will give you my honest opinion...face to face.
     
  19. Mar 2, 2021 at 11:32 AM
    #999
    SixthSnail

    SixthSnail I have no idea what I'm doing

    Joined:
    Oct 3, 2014
    Member:
    #139599
    Messages:
    13,291
    Gender:
    Male
    First Name:
    Matt
    Los Angeles
    Vehicle:
    '14 Tacoma Sport
    See Build in Sig
    Lets split shipping? haha
     
  20. Mar 2, 2021 at 11:32 AM
    #1000
    SixthSnail

    SixthSnail I have no idea what I'm doing

    Joined:
    Oct 3, 2014
    Member:
    #139599
    Messages:
    13,291
    Gender:
    Male
    First Name:
    Matt
    Los Angeles
    Vehicle:
    '14 Tacoma Sport
    See Build in Sig
    Looks amazing man!
     
    GHOST SHIP[OP] likes this.

Products Discussed in

To Top