1. Welcome to Tacoma World!

    You are currently viewing as a guest! To get full-access, you need to register for a FREE account.

    As a registered member, you’ll be able to:
    • Participate in all Tacoma discussion topics
    • Communicate privately with other Tacoma owners from around the world
    • Post your own photos in our Members Gallery
    • Access all special features of the site

The G3 Black Box - Recording the build and not the receipts

Discussion in '2nd Gen. Builds (2005-2015)' started by G3Fab, Apr 14, 2021.

  1. Apr 14, 2021 at 8:10 AM
    #1
    G3Fab

    G3Fab [OP] Eric @ G3 Fabrication

    Joined:
    Mar 31, 2019
    Member:
    #288609
    Messages:
    156
    Gender:
    Male
    First Name:
    Eric
    Northern Illinois
    Vehicle:
    '12 TRD Off Road DC
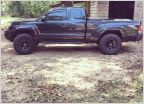
    Figure it's time to start a build thread on my '12 TRDOR. After years of Jeeps, I decided it was time to get truck. I had always liked the Tacoma so here we are! Picked it up n April of 2019 with 62k miles.

    Specs

    2012 TRDOR DCSB
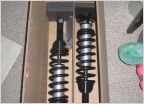
    5100s - stock front coils set high
    Icon full packs out back
    US Offroad front winch mount
    Warn M8 with synthetic line and F55
    RCI Aluminum skids and steel rear diff skid
    Power Tray with SwitchPros
    OGE Aux battery tray
    Leer 100XL - SOLD
    G3 Cap Rack - SOLD
    Uniden CB
    Midland GMRS/FRS
    Yeasu FT8900

    G3 Aluminum Flatbed in process

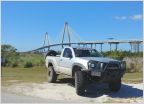
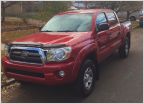
    Pics when I bought the truck.


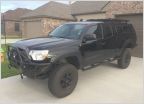
    Current Photo


    I'll be adding the pics throughout the day.
     
    Last edited: Apr 14, 2021
    Blackout Z7 and tacoma16 like this.
  2. Apr 14, 2021 at 8:10 AM
    #2
    G3Fab

    G3Fab [OP] Eric @ G3 Fabrication

    Joined:
    Mar 31, 2019
    Member:
    #288609
    Messages:
    156
    Gender:
    Male
    First Name:
    Eric
    Northern Illinois
    Vehicle:
    '12 TRD Off Road DC
    Saving post for updates and pics from the last year.

    5100's
    Icon rear springs
    Power Tray
    Switch Pros
    Other misc stuff
     
    Last edited: Apr 14, 2021
  3. Apr 14, 2021 at 8:10 AM
    #3
    G3Fab

    G3Fab [OP] Eric @ G3 Fabrication

    Joined:
    Mar 31, 2019
    Member:
    #288609
    Messages:
    156
    Gender:
    Male
    First Name:
    Eric
    Northern Illinois
    Vehicle:
    '12 TRD Off Road DC
    After getting into a traffic altercation with a garbage truck, that caused me to smash another car...


    I decided it was time to work on the flatbed idea I had been kicking around for some time. Fast forward 18 months and I am now finally getting around to it. More to follow in the next post.
     
    Last edited: Apr 14, 2021
  4. Apr 14, 2021 at 8:42 AM
    #4
    G3Fab

    G3Fab [OP] Eric @ G3 Fabrication

    Joined:
    Mar 31, 2019
    Member:
    #288609
    Messages:
    156
    Gender:
    Male
    First Name:
    Eric
    Northern Illinois
    Vehicle:
    '12 TRD Off Road DC
    Got the bed pulled off and started laying out my aluminum on the table. Truck looks pretty silly without a bed on it. Since this was going to take a couple days I removed the rear brace from the spare bed I had purchased awhile back so I could keep the tail lights functional and easy to remove/install if I needed to go someplace.


    Overall width is 72"
    Overall length is


    Tomorrow I should be finishing the rear for lights and such.
     
    Blackout Z7 and infinity like this.
  5. Apr 14, 2021 at 9:12 AM
    #5
    Ralf

    Ralf Summit Expedition Trucks Ltd.

    Joined:
    Feb 16, 2014
    Member:
    #123199
    Messages:
    300
    Gender:
    Male
    First Name:
    Ralf
    Fort McMurray, AB
    Vehicle:
    '17 TRD Off-Road
    ARB Summit Bar Safari Snorkel
    Looking good! All aluminum?
     
  6. Apr 14, 2021 at 9:15 AM
    #6
    G3Fab

    G3Fab [OP] Eric @ G3 Fabrication

    Joined:
    Mar 31, 2019
    Member:
    #288609
    Messages:
    156
    Gender:
    Male
    First Name:
    Eric
    Northern Illinois
    Vehicle:
    '12 TRD Off Road DC
    It is. If I had a serious press brake or access to one I have a design similar to what you have going. Nice work on your setup BTW!
     
    Ralf[QUOTED] likes this.
  7. Apr 14, 2021 at 9:22 AM
    #7
    infinity

    infinity and beyond

    Joined:
    Nov 29, 2019
    Member:
    #312001
    Messages:
    123
    Gender:
    Male
    First Name:
    Alex
    Northeast
    Vehicle:
    2019 Tacoma SR V6 AT 4wd
    7’ Aluma Flatbed, firestone airbags
    That sounds like the perfect width for our trucks. My aluma bed is only 68” wide, the next size up was 78” IIRC.
    What’s the overall length?

    I’ll be following this thread, for sure. I love a good flatbed build, especially aluminum.

    How do you have it attached to the frame? Got some close up pics?
     
    G3Fab[QUOTED][OP] and Ralf like this.
  8. Apr 14, 2021 at 9:26 AM
    #8
    Ralf

    Ralf Summit Expedition Trucks Ltd.

    Joined:
    Feb 16, 2014
    Member:
    #123199
    Messages:
    300
    Gender:
    Male
    First Name:
    Ralf
    Fort McMurray, AB
    Vehicle:
    '17 TRD Off-Road
    ARB Summit Bar Safari Snorkel
    Excellent! Thank you, once you go flatbed, you'll wish you've done it sooner (I did at least) :muscleflexing:
     
    G3Fab[QUOTED][OP] likes this.
  9. Apr 14, 2021 at 9:37 AM
    #9
    G3Fab

    G3Fab [OP] Eric @ G3 Fabrication

    Joined:
    Mar 31, 2019
    Member:
    #288609
    Messages:
    156
    Gender:
    Male
    First Name:
    Eric
    Northern Illinois
    Vehicle:
    '12 TRD Off Road DC
    100% agree! I wish I would've started it way back after the accident.
     
    Ralf[QUOTED] likes this.
  10. Apr 14, 2021 at 11:22 AM
    #10
    G3Fab

    G3Fab [OP] Eric @ G3 Fabrication

    Joined:
    Mar 31, 2019
    Member:
    #288609
    Messages:
    156
    Gender:
    Male
    First Name:
    Eric
    Northern Illinois
    Vehicle:
    '12 TRD Off Road DC
    The overall length is 69". Works out really well considering my truck is the short bed.
    I'll add some pics of how I have it mounted. Using 4" aluminum angle with a 3/8" thick wall. Then the main rails of the bed are 2x4x.25 wall tube with sleeves in the 8 mounting locations. It is extremely sturdy.
     
    infinity[QUOTED] and Ralf like this.
  11. Apr 14, 2021 at 4:07 PM
    #11
    infinity

    infinity and beyond

    Joined:
    Nov 29, 2019
    Member:
    #312001
    Messages:
    123
    Gender:
    Male
    First Name:
    Alex
    Northeast
    Vehicle:
    2019 Tacoma SR V6 AT 4wd
    7’ Aluma Flatbed, firestone airbags

    Awesome, can’t wait. When I inevitably break my Aluma, I want you to build me one :cool:
     
    G3Fab[QUOTED][OP] and Ralf like this.
  12. Apr 16, 2021 at 8:30 AM
    #12
    G3Fab

    G3Fab [OP] Eric @ G3 Fabrication

    Joined:
    Mar 31, 2019
    Member:
    #288609
    Messages:
    156
    Gender:
    Male
    First Name:
    Eric
    Northern Illinois
    Vehicle:
    '12 TRD Off Road DC
    I would be happy to build more of these once I am satisfied with how this one ends up.

    Here are some other pics. You can see how I have it mounted. Still plan on adding some gussets into the angle and cleaning up the look a bit. You can also see the fuel fill neck that will stay in the stock location and incorporate into the headache rack when I get to that part. Some other angles to view and my very temporary wiring for lights. I have the rear just about ready to be added on. Just waiting for the final lights to arrive.

     
  13. Apr 16, 2021 at 9:07 AM
    #13
    infinity

    infinity and beyond

    Joined:
    Nov 29, 2019
    Member:
    #312001
    Messages:
    123
    Gender:
    Male
    First Name:
    Alex
    Northeast
    Vehicle:
    2019 Tacoma SR V6 AT 4wd
    7’ Aluma Flatbed, firestone airbags
    Wow, great work so far. Can’t wait to see more updates on this.

    So are you going to be welding any of the aluminum, or is it all getting bolted and riveted together?

    The fuel filler neck is one advantage you have with your short bed. With the long bed, it really has to be relocated somehow to work. (Though mine is still sitting below the bed, zip-tied to the rub rail. It makes filling up a real pain)
     
  14. Apr 16, 2021 at 9:12 AM
    #14
    infinity

    infinity and beyond

    Joined:
    Nov 29, 2019
    Member:
    #312001
    Messages:
    123
    Gender:
    Male
    First Name:
    Alex
    Northeast
    Vehicle:
    2019 Tacoma SR V6 AT 4wd
    7’ Aluma Flatbed, firestone airbags
    Just out of curiosity, are the two longitudinal support rails parallel to each other, or do they splay out a bit to follow the frame of the truck?
     
  15. Apr 16, 2021 at 9:15 AM
    #15
    G3Fab

    G3Fab [OP] Eric @ G3 Fabrication

    Joined:
    Mar 31, 2019
    Member:
    #288609
    Messages:
    156
    Gender:
    Male
    First Name:
    Eric
    Northern Illinois
    Vehicle:
    '12 TRD Off Road DC
    The rear "bumper" is a welded assembly. It is removable however. The main frame/body is assembled using BOM Fasteners from ALCOA/Arconic. This is the same method you see used by Schutt Industries on their Military and XVenture trailers. There will be more fasteners than what you currently see. I haven't locked everything down yet. Wanted to be happy with everything first.

    I figured the fuel fill on a long bed would require some more work and creativity. LOL.
     
    infinity likes this.
  16. Apr 16, 2021 at 9:17 AM
    #16
    G3Fab

    G3Fab [OP] Eric @ G3 Fabrication

    Joined:
    Mar 31, 2019
    Member:
    #288609
    Messages:
    156
    Gender:
    Male
    First Name:
    Eric
    Northern Illinois
    Vehicle:
    '12 TRD Off Road DC
    No. They are parallel to each other. I did this because I will also be mounting a rear drawer between them as well as air tank and perhaps water tank. I also just like how it makes it easy to keep everything square.
     
    Blackout Z7 and infinity[QUOTED] like this.
  17. Apr 16, 2021 at 9:19 AM
    #17
    infinity

    infinity and beyond

    Joined:
    Nov 29, 2019
    Member:
    #312001
    Messages:
    123
    Gender:
    Male
    First Name:
    Alex
    Northeast
    Vehicle:
    2019 Tacoma SR V6 AT 4wd
    7’ Aluma Flatbed, firestone airbags
    https://youtu.be/PvsjLkbIm_4

    these look awesome. Mind me asking how much the tool was?

    actually, would love to get a sense of how much all of your materials on this project are running
     
    G3Fab[QUOTED][OP] likes this.
  18. Apr 16, 2021 at 9:20 AM
    #18
    infinity

    infinity and beyond

    Joined:
    Nov 29, 2019
    Member:
    #312001
    Messages:
    123
    Gender:
    Male
    First Name:
    Alex
    Northeast
    Vehicle:
    2019 Tacoma SR V6 AT 4wd
    7’ Aluma Flatbed, firestone airbags
    that makes a lot of sense. I wish I had an under-tray drawer.
     
    G3Fab[QUOTED][OP] and Ralf like this.
  19. Apr 19, 2021 at 4:26 PM
    #19
    G3Fab

    G3Fab [OP] Eric @ G3 Fabrication

    Joined:
    Mar 31, 2019
    Member:
    #288609
    Messages:
    156
    Gender:
    Male
    First Name:
    Eric
    Northern Illinois
    Vehicle:
    '12 TRD Off Road DC
    IIRC the tool itself was around 2K. I bought it refurbished. The nose assemblies run around 3-400$ each for the different fasteners. I use the 1/4" BOM and the 3/16 MagnaLok. It was a hefty investment but it makes things super fast and smooth. Plus, I'm not putting any heat into the aluminum on the frames. If you want to go this route. DO NOT buy anything other than the correct HUCK tool. Model 246 or 256. I tried an off brand tool first because the company claimed it would pull the fasteners. It didn't... And they wouldn't take it back...

    I'll have to look back at the material cost.
     
    infinity[QUOTED] likes this.
  20. Apr 19, 2021 at 4:31 PM
    #20
    G3Fab

    G3Fab [OP] Eric @ G3 Fabrication

    Joined:
    Mar 31, 2019
    Member:
    #288609
    Messages:
    156
    Gender:
    Male
    First Name:
    Eric
    Northern Illinois
    Vehicle:
    '12 TRD Off Road DC
    Some updates from the last couple days.

    Made some work fitting the deck aluminum.

    Hauled some junk off to the town dumpster!

    Worked on the rear.

    Clamped the L Track in and marked/drilled the holes to mount it. Still waiting on the taillights to arrive. Working on the wiring this week. I'll be setting it up to use the factory plugs into a junction box. Then out to the new lights.
     
    ERG80, Windigo, Blackout Z7 and 2 others like this.

Products Discussed in

To Top