

-
Welcome to Tacoma World!
You are currently viewing as a guest! To get full-access, you need to register for a FREE account.
As a registered member, you’ll be able to:- Participate in all Tacoma discussion topics
- Communicate privately with other Tacoma owners from around the world
- Post your own photos in our Members Gallery
- Access all special features of the site
 Installing Kicker hideaway sub... which of these are speaker wires and +/-?
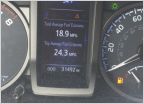 New exhaust. Better mpg?
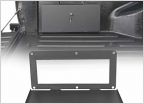 Bed cubby sealed replacement
 Looking to install a fridge/ freezer
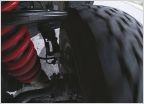 (Solved) Metallic clunk from front end (with video)
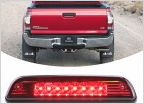 3rd Gen AC LED Third brake light
Running wiring to above head console
Discussion in '3rd Gen. Tacomas (2016-2023)' started by tommyzito, May 7, 2021.


