

-
Welcome to Tacoma World!
You are currently viewing as a guest! To get full-access, you need to register for a FREE account.
As a registered member, you’ll be able to:- Participate in all Tacoma discussion topics
- Communicate privately with other Tacoma owners from around the world
- Post your own photos in our Members Gallery
- Access all special features of the site
 Compressor Question
 Oil pan drain bolt repair
 Plumbing issue achieved. What gremlin cut my pipe?
 UPDATED [finished product] 3/4" birch plywood "Box" as washing-machine stand?
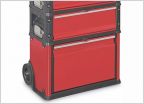 Rolling toolbox recommendations
 Which wet/dry shop vac?
Anything welding
Discussion in 'Garage / Workshop' started by EL TACOROJO, Sep 17, 2010.
Page 1106 of 1507
Page 1106 of 1507
Products Discussed in


