

-
Welcome to Tacoma World!
You are currently viewing as a guest! To get full-access, you need to register for a FREE account.
As a registered member, you’ll be able to:- Participate in all Tacoma discussion topics
- Communicate privately with other Tacoma owners from around the world
- Post your own photos in our Members Gallery
- Access all special features of the site
 Is $335 a good price for dealer to install a timing belt kit?
 Transfer case replacement seals?
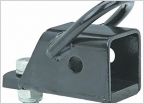 Converting a ball hitch to a 2" receiver
 Extended sway bar end link
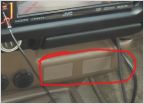 Usb and Aux inserts for under radio
Front Cv axle inboard seal install
Discussion in '1st Gen. Tacomas (1995-2004)' started by Kristi with a K, Jul 9, 2022.
Page 1 of 2
Page 1 of 2


