

-
Welcome to Tacoma World!
You are currently viewing as a guest! To get full-access, you need to register for a FREE account.
As a registered member, you’ll be able to:- Participate in all Tacoma discussion topics
- Communicate privately with other Tacoma owners from around the world
- Post your own photos in our Members Gallery
- Access all special features of the site
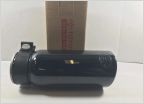 Exhaust tips recommendations
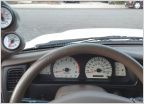 03 Supercharged with URD 7th Injector Wideband & Boost Readings? (Pics)
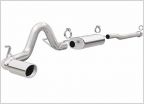 Quieter aftermarket exhaust
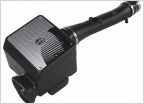 Help with CAI order....
 Can't decide on a muffler!!
3rd Gen Tacoma 3.5L Twin Turbo Kit Improvements and Fixes
Discussion in 'Performance and Tuning' started by JamesT, Jan 10, 2022.
Page 3 of 3
Page 3 of 3


