

-
Welcome to Tacoma World!
You are currently viewing as a guest! To get full-access, you need to register for a FREE account.
As a registered member, you’ll be able to:- Participate in all Tacoma discussion topics
- Communicate privately with other Tacoma owners from around the world
- Post your own photos in our Members Gallery
- Access all special features of the site
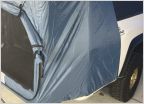 Tent and bed mattress
 Just Sharing an experience
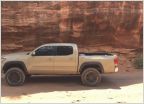 How to transport Kayaks
 Custom Double Reverse Camera + Front Cam How-To Thread
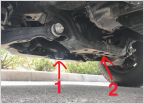 Jacking front with full aluminum skids
 Compressing caliper pistons, changing piston boots.
Another Around the World Tacoma
Discussion in '3rd Gen. Tacomas (2016-2023)' started by MR E30, Nov 30, 2021.
Page 6 of 31
Page 6 of 31
Products Discussed in


