

-
Welcome to Tacoma World!
You are currently viewing as a guest! To get full-access, you need to register for a FREE account.
As a registered member, you’ll be able to:- Participate in all Tacoma discussion topics
- Communicate privately with other Tacoma owners from around the world
- Post your own photos in our Members Gallery
- Access all special features of the site
 How to install bike racks on factory tonneau cover
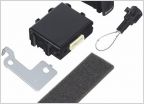 Glass break sensor on 2018 TRD Sport
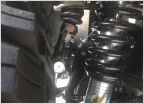 255/85/16 Rubbing SPC UCAs?
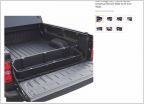 Any ideas for a cheaper version?
 Access Cab rear seat covers?
20-23 Anytime front/backup camera
Discussion in '3rd Gen. Tacomas (2016-2023)' started by bigssa, Oct 17, 2022.
Page 3 of 5
Page 3 of 5
Products Discussed in


