1. Welcome to Tacoma World!

    You are currently viewing as a guest! To get full-access, you need to register for a FREE account.

    As a registered member, you’ll be able to:
    • Participate in all Tacoma discussion topics
    • Communicate privately with other Tacoma owners from around the world
    • Post your own photos in our Members Gallery
    • Access all special features of the site

Tpp4's No Nonsense Guide to Kicker Key T-Harness (16-19)

Discussion in 'Audio & Video' started by tpp4, Dec 11, 2019.

  1. Apr 22, 2023 at 7:12 PM
    #461
    kodaco771

    kodaco771 Well-Known Member

    Joined:
    Jul 28, 2017
    Member:
    #225231
    Messages:
    131
    Gender:
    Male
    So Cal
    Vehicle:
    2017 OR DCLB 4x4
    6112/5160's & Wheeler's Progressive 3AAL SCS SR8’s
    I did this upgrade a few years ago & it’s great, I definitely recommend it to anyone. I now want to upgrade the head unit to something with Apple CarPlay because the factory GPS really sucks. Does anyone know if this harness would be plug & play with an aftermarket head unit using the kit in the below link?

    https://www.crutchfield.com/p_249TY61N/Crux-SWRTY-61N-Wiring-Interface.html
     
  2. Apr 23, 2023 at 11:43 AM
    #462
    destin_meeks

    destin_meeks I used to fix people's crappy stereos

    Joined:
    Jul 14, 2017
    Member:
    #223997
    Messages:
    3,933
    Gender:
    Male
    First Name:
    Destin
    Tuscaloosa, AL
    Vehicle:
    2017 SSM DoubleCab TRD Off-Road 4x4
    Will it work? Yes

    should you do it? No

    since you’re going aftermarket, you’ll want to chop the input side of the key harness and put RCA tips back on so you can use the radio’s rca outputs
     
  3. Apr 23, 2023 at 4:57 PM
    #463
    kodaco771

    kodaco771 Well-Known Member

    Joined:
    Jul 28, 2017
    Member:
    #225231
    Messages:
    131
    Gender:
    Male
    So Cal
    Vehicle:
    2017 OR DCLB 4x4
    6112/5160's & Wheeler's Progressive 3AAL SCS SR8’s
    Thank you for the help. When I hook up the key harness to the head unit with the RCA’s, what do I do with the grey & white speaker wires on the metra harness that the key harness was originally connected to?
     
  4. Apr 24, 2023 at 11:07 AM
    #464
    destin_meeks

    destin_meeks I used to fix people's crappy stereos

    Joined:
    Jul 14, 2017
    Member:
    #223997
    Messages:
    3,933
    Gender:
    Male
    First Name:
    Destin
    Tuscaloosa, AL
    Vehicle:
    2017 SSM DoubleCab TRD Off-Road 4x4
    Cap them off
     
  5. Apr 24, 2023 at 11:47 AM
    #465
    kodaco771

    kodaco771 Well-Known Member

    Joined:
    Jul 28, 2017
    Member:
    #225231
    Messages:
    131
    Gender:
    Male
    So Cal
    Vehicle:
    2017 OR DCLB 4x4
    6112/5160's & Wheeler's Progressive 3AAL SCS SR8’s
    Thank you!
     
  6. Mar 12, 2024 at 9:23 AM
    #466
    Rednecktacoma22

    Rednecktacoma22 Well-Known Member

    Joined:
    Oct 25, 2022
    Member:
    #408957
    Messages:
    206
    Gender:
    Male
    Logan, UT
    Vehicle:
    22 TRD OR 6MT
    I know this is an old thread, but it seems to be really close to what I'm looking for. I am hoping that some of you pros like @destin_meeks would still be willing to help me out. I am looking to add the Key Amp under my passenger seat to finish my audio upgrades. I am not sure how I would go about wiring it with my current set up.

    2022 TRD OR DCSB 6MT - Non JBL

    Stock HU
    Subaru tweeters
    Kicker CS on all doors
    10" Kicker Comp Sub w/ box - behind the driver rear seat
    Kicker CXA400.1 400W Mono Amp - under driver's seat
    This PNP wire harness from Amazon for sub hook up
    https://www.amazon.com/gp/product/B087Z1794K?ie=UTF8

    I am hoping there would be a way to have a PNP harness (don't want to splice into factory) to add the Key without messing with the harness that has already been added for the sub. Or if there is a way to add the key to that harness (I'm pretty sure there is, but wouldn't know where to start). Seems like it's pretty well documented on the <19' MY's, but seems it different after that. Also since I have a sub and amp already instead of the hideaway, not sure how different wiring would be on top of that.

    Any help is appreciated.

    Thanks,
     
  7. Mar 12, 2024 at 11:07 AM
    #467
    destin_meeks

    destin_meeks I used to fix people's crappy stereos

    Joined:
    Jul 14, 2017
    Member:
    #223997
    Messages:
    3,933
    Gender:
    Male
    First Name:
    Destin
    Tuscaloosa, AL
    Vehicle:
    2017 SSM DoubleCab TRD Off-Road 4x4
    Grab the redwolf harness you’ve seen here and just make it with that. Then disconnect the factory wiring from the current adapter you have, and add in the new harness as well
     
  8. Mar 12, 2024 at 5:07 PM
    #468
    Rednecktacoma22

    Rednecktacoma22 Well-Known Member

    Joined:
    Oct 25, 2022
    Member:
    #408957
    Messages:
    206
    Gender:
    Male
    Logan, UT
    Vehicle:
    22 TRD OR 6MT
    Thanks, I am assuming I would have to chop the two harnesses together and they would not be plugged into separate ports in the HU? I don't believe I can follow the instructions for the <19 on this thread for my 22. I wouldn't know where to start by splicing the two together if this is the case.
     
  9. Mar 12, 2024 at 5:24 PM
    #469
    destin_meeks

    destin_meeks I used to fix people's crappy stereos

    Joined:
    Jul 14, 2017
    Member:
    #223997
    Messages:
    3,933
    Gender:
    Male
    First Name:
    Destin
    Tuscaloosa, AL
    Vehicle:
    2017 SSM DoubleCab TRD Off-Road 4x4
    You can follow the instructions for the 2020+ (or maybe it’s 2019? Whatever year it changed to the smaller black connector)

    a brief rundown of what your install should look like

    -red wolf harness from Amazon

    -1 roll of speed wire (multi-conductor speaker wire)

    -10awg amp power kit, or even better, a fused distribution block placed near your sub amp, and you can just split the existing power wire to both amps, as long as it’s at least 8awg. This will save money and lots of time

    Cut the redwood harness in half.
    Cut the speedwire in half.
    Splice one side of the harness to one half of speedwire.
    Splice the other side of harness to the other half of speedwire.
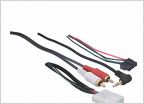
    For the part you just spliced the MALE redwolf end to, splice the SMALL key harness to. Cut the RCA’s off if they are on there.
    For the part with the FEMALE redwolf end, splice the LARGE key harness to.

    route your two newly formed wires from the radio cavity down into the dash and under the center console. You may want to pull up some panels around the gear shift and e-brake, but it’s very easy.
    Feed them down the center console, and under the passenger seat.
    Splice a few feet of 12 or 10 awg power and ground wires to the key harness and run them under the console and over to the distribution block.
    Plug in key
    Pull sub fuse, run key auto setup.
    Put sub fuse back
    Rock out
     
  10. Mar 13, 2024 at 9:14 AM
    #470
    Rednecktacoma22

    Rednecktacoma22 Well-Known Member

    Joined:
    Oct 25, 2022
    Member:
    #408957
    Messages:
    206
    Gender:
    Male
    Logan, UT
    Vehicle:
    22 TRD OR 6MT
    Wow, you truly are the man! Love the suggestion of splitting the sub amp wire over to the key. It is 8 gauge, for that sub amp and I believe I have a decent amount leftover somewhere...

    Regarding connecting the parts of the redwolf harness to the HU, the add an amp harness I have likely already takes that space. It sound like I could connect them as so: HU > Add an Amp Harness I already have attached connected to the Sub Amp > Redwolf harness > factory harness? So essentially a double tap? haha I also should be able to hook both remote turn on wires for the sub amp and the key amp to the same factory wire that I already have the sub amp remote wire on?

    Thanks,
     
  11. Mar 13, 2024 at 9:24 AM
    #471
    destin_meeks

    destin_meeks I used to fix people's crappy stereos

    Joined:
    Jul 14, 2017
    Member:
    #223997
    Messages:
    3,933
    Gender:
    Male
    First Name:
    Destin
    Tuscaloosa, AL
    Vehicle:
    2017 SSM DoubleCab TRD Off-Road 4x4
    Yes, you’ll do a double-tap.
    Radio > add-an-amp > redwolf > factory

    you could extend the remote wire from the sun over to the key if you want to, or just use the auto-turn-on feature
     
  12. Mar 13, 2024 at 10:11 AM
    #472
    Rednecktacoma22

    Rednecktacoma22 Well-Known Member

    Joined:
    Oct 25, 2022
    Member:
    #408957
    Messages:
    206
    Gender:
    Male
    Logan, UT
    Vehicle:
    22 TRD OR 6MT
    And here I was stressing over combining the harnesses by chopping them up and studying wiring pin outs of the harnesses :rofl::facepalm: You have just given me the same confidence I had when I installed the sub. I was over-complicating it in mind!
     
    destin_meeks[QUOTED] likes this.
  13. May 8, 2024 at 9:20 PM
    #473
    SIK99Tacoma

    SIK99Tacoma Well-Known Member

    Joined:
    Oct 14, 2011
    Member:
    #65193
    Messages:
    245
    Gender:
    Male
    First Name:
    Taylor
    Big Sur
    Vehicle:
    2020 OR DCLB
    FOX IFP front 2nd clip 1/2" spacer, FOX 2.0 adjustable resi rear, RXT leaf pack, SSO slimline front w/ baricade 9500lb and amber light bar, ARE Cap, allpro steps, TRD pro style wheels w/ Kenda Klevar skins
    anyone know what thread this is talking about?? I've seen the step by step harness builds with pictures for the 2016-19 and mention of the 2020+. But I can't actually find a step by step with images/diagram like for the 19 and below. Am I just missing it?? I'm a noob and need visuals as my dumbass was never good at word problems.
     
  14. May 8, 2024 at 10:34 PM
    #474
    Integerdy

    Integerdy Aspiring "SR5 Pro"

    Joined:
    Jul 31, 2021
    Member:
    #372781
    Messages:
    867
    Gender:
    Male
    First Name:
    Eric
    So-Lame, Oregon
    Vehicle:
    21 SR5 Silver Sky DCSB
    I just installed the kicker key 200.4 in my 2021 tacoma w/ premium entune headunit (NON JBL). Buy this harness, cut it in half, match wires to each end of the kicker key. Male to male, female to female, since this will insert between your headunit and the factory speaker wires harness. MAKE SURE you color match every single wire, I'm dumb and didn't do this correctly the first time. There's 2 wires for every color, on both the female and Male ends between the redwolf harness and the kicker key harness. So each end will have 2 purple, 2 white, 2 gray, and 2 green totally 16 different wires total you need to butt splice or solder separately between both harnesses. Set all your dip switches on kicker key to up except the first one, that one should be down. You will also need a power and ground kit to run through your firewall to the battery, ideally the power wire should have a dedicated 10A maxi fuse between the kicker key and the battery terminal FYI. I chose to ground to the passenger kick panel near the passengers right foot. Also tape off the blue wire, you won't need it with a factory head unit

    Fire it up and adjust your gains on kicker key to where you can barely hear the white noise. Run your auto eq with the microphone. If you did it right you should hear happy noises. Tuck it in behind the head unit and button her back up. Donezo. Attaching some pics I took during my process

    Screenshot_20240411_122838_Amazon Shopping.jpg
    Screenshot_20240401_184816_Amazon Shopping.jpg
    20240407_153702.jpg
    20240409_190151.jpg
    20240409_190206.jpg
     
  15. May 8, 2024 at 10:38 PM
    #475
    Integerdy

    Integerdy Aspiring "SR5 Pro"

    Joined:
    Jul 31, 2021
    Member:
    #372781
    Messages:
    867
    Gender:
    Male
    First Name:
    Eric
    So-Lame, Oregon
    Vehicle:
    21 SR5 Silver Sky DCSB
    Don't make this mistake. I didn't split the 4 wires apart intially, which means I connected the power and ground wires together causing them to short out immediately when firing up the vehicle. Each color had a solid color and a color with black stripes down the middle.

    20240410_163333.jpg
     
  16. May 9, 2024 at 9:57 AM
    #476
    SIK99Tacoma

    SIK99Tacoma Well-Known Member

    Joined:
    Oct 14, 2011
    Member:
    #65193
    Messages:
    245
    Gender:
    Male
    First Name:
    Taylor
    Big Sur
    Vehicle:
    2020 OR DCLB
    FOX IFP front 2nd clip 1/2" spacer, FOX 2.0 adjustable resi rear, RXT leaf pack, SSO slimline front w/ baricade 9500lb and amber light bar, ARE Cap, allpro steps, TRD pro style wheels w/ Kenda Klevar skins
    thanks. couple questions.
    your third dip is down in the picture not just first. personal preference or should that one be down too?

    I dont have the key yet, its still in transit. But in the image why are there 2 red wires running from key to your single fused battery power?

    Similar question for ground, why 2 from the key to one solid? mpt as critical as pos side bc its a ground, but still ??

    Thanks!
     
    Last edited: May 9, 2024
  17. May 9, 2024 at 10:07 AM
    #477
    destin_meeks

    destin_meeks I used to fix people's crappy stereos

    Joined:
    Jul 14, 2017
    Member:
    #223997
    Messages:
    3,933
    Gender:
    Male
    First Name:
    Destin
    Tuscaloosa, AL
    Vehicle:
    2017 SSM DoubleCab TRD Off-Road 4x4
    For the power and ground, they do 2 of each but they are tied together on the circuit board. This allows them to get the correct power without needing a separate connection. Those wires fit in the plug
     
  18. May 9, 2024 at 5:32 PM
    #478
    Integerdy

    Integerdy Aspiring "SR5 Pro"

    Joined:
    Jul 31, 2021
    Member:
    #372781
    Messages:
    867
    Gender:
    Male
    First Name:
    Eric
    So-Lame, Oregon
    Vehicle:
    21 SR5 Silver Sky DCSB
    3rd switch is the compressor dip switch. I was trying not to blow out my speakers initially when installing because i had no idea what I was doing and struggled to get it to work for like 3 days because I was combining the power and ground for each color (white + white/black, green+green/black, etc) on both sides between key and where key connects to each half of red wolf harness. I basically had 4 connections on each of the key when it needed to be 8 (16 total). Also I now just have the first dip switch down for DC Turn on
     
    SIK99Tacoma likes this.
  19. May 10, 2024 at 2:06 PM
    #479
    SIK99Tacoma

    SIK99Tacoma Well-Known Member

    Joined:
    Oct 14, 2011
    Member:
    #65193
    Messages:
    245
    Gender:
    Male
    First Name:
    Taylor
    Big Sur
    Vehicle:
    2020 OR DCLB
    FOX IFP front 2nd clip 1/2" spacer, FOX 2.0 adjustable resi rear, RXT leaf pack, SSO slimline front w/ baricade 9500lb and amber light bar, ARE Cap, allpro steps, TRD pro style wheels w/ Kenda Klevar skins
    Thanks everyone. I guess I was unnecessarily worried bc there aren't as many clips as the 2016-19 haness after being built. I figured I was missing something
     
  20. May 14, 2024 at 9:10 AM
    #480
    2010HDFatboy

    2010HDFatboy Well-Known Member

    Joined:
    Sep 15, 2015
    Member:
    #164312
    Messages:
    89
    Gender:
    Male
    Maryland
    Vehicle:
    2021 TRD Sport DCSB 4WD Auto in Voodoo Blue
    IMG_1959.jpg

    @destin_meeks, is the configuration, using the cut in half Red Wolf harness, in the above photo correct? I do realize the RCA connectors need to be cut off before I proceed further.

    @Integerdy, after soldering the pre amp and post amp harnesses, did you have enough length in each harness to comfortably put the amp behind, under, beside, etc. the head unit or did you add additional wire to the two harnesses?
     

Products Discussed in

To Top