

-
Welcome to Tacoma World!
You are currently viewing as a guest! To get full-access, you need to register for a FREE account.
As a registered member, you’ll be able to:- Participate in all Tacoma discussion topics
- Communicate privately with other Tacoma owners from around the world
- Post your own photos in our Members Gallery
- Access all special features of the site
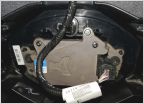 2018 TRD PRO Grille w/ TSS-P Radar Info/DIY
 I just ordered a 2021 TRD OR DCLB... I have some Questions
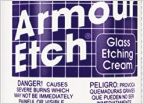 Window VIN etching
 Slide in camper setup.
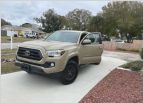 Upgrade head unit and speakers or just the speakers?
 Hood deflector
ARB Rated Recovery Point
Discussion in '3rd Gen. Tacomas (2016-2023)' started by Joe23, May 26, 2017.
Page 10 of 12
Page 10 of 12

