

-
Welcome to Tacoma World!
You are currently viewing as a guest! To get full-access, you need to register for a FREE account.
As a registered member, you’ll be able to:- Participate in all Tacoma discussion topics
- Communicate privately with other Tacoma owners from around the world
- Post your own photos in our Members Gallery
- Access all special features of the site
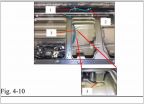 2019 Tailgate Lock - PN: PK3B6-35JS0
 Looking to buy some accessories for my ‘22 taco limited, need input
 Auto headlights
 Hi lift jack and stock tacoma 2016
 CB specifics
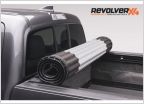 Dirt bike in back of short box with cover?
Redarc trailer brake controller
Discussion in '3rd Gen. Tacomas (2016-2023)' started by Jack C, Aug 20, 2023.


