1. Welcome to Tacoma World!

    You are currently viewing as a guest! To get full-access, you need to register for a FREE account.

    As a registered member, you’ll be able to:
    • Participate in all Tacoma discussion topics
    • Communicate privately with other Tacoma owners from around the world
    • Post your own photos in our Members Gallery
    • Access all special features of the site

1980 HydroStream Vamp resto-mod

Discussion in 'Boating & Fishing' started by 5nahalf, Oct 8, 2023.

  1. Jan 28, 2024 at 5:14 PM
    #201
    5nahalf

    5nahalf [OP] I build dumb things

    Joined:
    Sep 22, 2018
    Member:
    #267058
    Messages:
    10,919
    Gender:
    Male
    First Name:
    Erik
    Minnesota
    Vehicle:
    2018 Inferno Longbed
    Just to ensure that all my alignments were good, I started cleaning up the splashwell and test fitting it.
    Last owner cut a giant hole in it to fit a gas tank that was too big, they put in the gas tank, put a trash bag over it then dumped like 2 gallons of fiberglass resin over it (there was no actual fiberglass cloth in it, just straight resin). I have been cutting the resin off, but some spots its a inch thick. Trying to figure out a good way for me to rebuild this giant hole, I think I am going to get some lexan and duct tape. Using the lexan I will just tape it to the backside and that should give me the general shape I need. Then just some fiberglass and some filler and it should be good to go.

    Luckily the area that they cut is pretty flat, so the contours are not huge that I need to match.

    [​IMG]
     
    RustyGreen likes this.
  2. Jan 28, 2024 at 5:35 PM
    #202
    RustyGreen

    RustyGreen A breaker point guy in a Bluetooth world

    Joined:
    Aug 12, 2020
    Member:
    #337468
    Messages:
    14,030
    Gender:
    Male
    sleeping in a chair
    Vehicle:
    2017 AC 4x4 Sport 6M Inferno
    Pavement Princess

    The gray/metal flake is gelcoat, yes?

    I am under the impression that boats are built by spraying gelcoat first (on the mould) and then the thickness is built up with resin and cloth.
    Do you buy a matching gelcoat and spray/roll it over the repair?
     
  3. Jan 28, 2024 at 6:35 PM
    #203
    5nahalf

    5nahalf [OP] I build dumb things

    Joined:
    Sep 22, 2018
    Member:
    #267058
    Messages:
    10,919
    Gender:
    Male
    First Name:
    Erik
    Minnesota
    Vehicle:
    2018 Inferno Longbed
    Yes that is the gelcoat, its actually brown glitter in brown gelcoat. But yes, when they first make a boat, the mold is sprayed in the colors they want, then the fiberglass is built on top of that. So when it pops out of the mold its a a painted boat.

    I am sanding down the old gelcoat and will be respraying the whole boat in black gelcoat followed by clear gelcoat with black glitter in it, followed by more clear gelcoat without any glitter in it.

    There are a few ways to apply gelcoat depending on the finish your looking for. The "roll and tip" method is great for single colors without clear coat or glitter. Its just a paint roller followed by using a paint brush.
    Spraying gets the best results when using glitter though or when you want to add a clear coat to it.
     
    RustyGreen[QUOTED] likes this.
  4. Jan 29, 2024 at 4:03 PM
    #204
    5nahalf

    5nahalf [OP] I build dumb things

    Joined:
    Sep 22, 2018
    Member:
    #267058
    Messages:
    10,919
    Gender:
    Male
    First Name:
    Erik
    Minnesota
    Vehicle:
    2018 Inferno Longbed
    Transom bonding in process right now. I put thickened resin along the bottom, then all along the skin, then clamped the top with a board on one side, then clamped further down with another board and some lag bolts. Tomorrow I will begin the process of tabbing in the edges and cutting the last bit of floor to fit.

    [​IMG]

    [​IMG]
     
    RustyGreen likes this.
  5. Jan 30, 2024 at 1:07 PM
    #205
    5nahalf

    5nahalf [OP] I build dumb things

    Joined:
    Sep 22, 2018
    Member:
    #267058
    Messages:
    10,919
    Gender:
    Male
    First Name:
    Erik
    Minnesota
    Vehicle:
    2018 Inferno Longbed
    Final test fit before I start putting the the jigsaw puzzle back together. I am going to use wood blocks and screws to hold the body lines flat together. This will ensure that I dont have any weird ridges and miss aligned panels. The panels will be bonded together in the following order. Caps will be bonded to the center transom cap to make one long part there. Then the center transom cap will be bonded to the transom and the caps will be bonded to the top hull. Finally the splash well will be put back in along with 2 reinforcement beams down the center.

    That big hole in the splash well needs to be repaired, but I want to repair it after the splash well is bonded in so I dont have to worry about that panel being twisted when I do the patch job. I still do have a fair amount of grinding on the splash well to clean up the fiberglass the last owner put down.

    [​IMG]
     
    RustyGreen likes this.
  6. Jan 31, 2024 at 11:59 AM
    #206
    5nahalf

    5nahalf [OP] I build dumb things

    Joined:
    Sep 22, 2018
    Member:
    #267058
    Messages:
    10,919
    Gender:
    Male
    First Name:
    Erik
    Minnesota
    Vehicle:
    2018 Inferno Longbed
    Ok, after reading the bones, I have changed the way the caps are going on. The corner caps will be put on first, I will make sure those body lines are straight and perfect. This will let me build up the center cap joints better.
     
    RustyGreen likes this.
  7. Jan 31, 2024 at 1:07 PM
    #207
    5nahalf

    5nahalf [OP] I build dumb things

    Joined:
    Sep 22, 2018
    Member:
    #267058
    Messages:
    10,919
    Gender:
    Male
    First Name:
    Erik
    Minnesota
    Vehicle:
    2018 Inferno Longbed
    Splashwell is also getting a slight change to improve strength. Going with a shallow splash well, this one will just drain out the top instead of needing a hole through the transom to drain out of. This will also give me extra space to put more support beams in without hitting the fuel tank.
    This is a rough cut of some scrap wood, real one will be made tonight with better measurements.

    Plans on how I will make this:
    I will glass in the corner caps, then using this rough cut as a template to cut the sides of the stock splash well fiberglass. From there I can make a new template that goes in from the underside and butts right up against the transom, front splashwell bulkhead and the side support beams. This will box in the the whole thing and make for absurdly over strength transom area. As a bonus, this flat area will be strong enough to stand on.

    [​IMG]
    [​IMG]
     
    Last edited: Jan 31, 2024
    thomasburk and RustyGreen like this.
  8. Jan 31, 2024 at 3:44 PM
    #208
    RustyGreen

    RustyGreen A breaker point guy in a Bluetooth world

    Joined:
    Aug 12, 2020
    Member:
    #337468
    Messages:
    14,030
    Gender:
    Male
    sleeping in a chair
    Vehicle:
    2017 AC 4x4 Sport 6M Inferno
    Pavement Princess
    Will this complicate mounting the engine?
     
  9. Jan 31, 2024 at 4:14 PM
    #209
    5nahalf

    5nahalf [OP] I build dumb things

    Joined:
    Sep 22, 2018
    Member:
    #267058
    Messages:
    10,919
    Gender:
    Male
    First Name:
    Erik
    Minnesota
    Vehicle:
    2018 Inferno Longbed

    Kinda. It will all depend on a few things, so most motors have a upside down L shape for the mounting, the top just rests on the top of the transom, then bolts go through it. Older motors have a upside down J for the mount, so it actually hooks onto the top of the transom, then clamps on from the backside.

    Luckily, all motors in the past 50 years have the same mounting bolt pattern, and that bolt pattern is the same as my tilt and trim plate too.

    Iin the future I plan to swap the motor out for a 1980s evinrude 115, that motor will fit without the tilt and trim plate. My current motor requires the tilt and trip plate to fit on the boat with the splash well removed.

    My plan is to put the tilt and trim plate on, put my 85hp motor on and run it until I can find a good price on a evinrude 115.
     
  10. Feb 1, 2024 at 11:49 AM
    #210
    5nahalf

    5nahalf [OP] I build dumb things

    Joined:
    Sep 22, 2018
    Member:
    #267058
    Messages:
    10,919
    Gender:
    Male
    First Name:
    Erik
    Minnesota
    Vehicle:
    2018 Inferno Longbed
    Bottom of the transom has been tabbed in and the floor bonded down. I also tabbed the sides of the transom and back pockets. Now that its tabbed and floor is in I can move on to glassing the corner caps back on.

    The topside of the rear floor will be glassed like the front half, but I will bring the sheet of glass up the transom to the top. This will make it a seamless transition between the 2 parts.

    [​IMG]

    [​IMG]
     
    RustyGreen likes this.
  11. Feb 1, 2024 at 3:35 PM
    #211
    5nahalf

    5nahalf [OP] I build dumb things

    Joined:
    Sep 22, 2018
    Member:
    #267058
    Messages:
    10,919
    Gender:
    Male
    First Name:
    Erik
    Minnesota
    Vehicle:
    2018 Inferno Longbed
    2 giant sheets of 1808 fiberglass are now precut and ready to go on. Each one goes the full width of the transom, top to bottom and then extend 10 inches into the floor. I need to clear out some more foam on the left side before I lay it down though. But I will be laying 1 layer of 1808 down, letting it cure then the next layer will go on after I put the support beams so I can sandwich the support beams between layers of 1808.

    Once the 1808 sheet of glass is layed down, I will spend a bunch of time grinding and cleaning surfaces for bonding the caps back on. But I also need to get some more resin, im down to my last gallon and the 1808 glass takes a ton of resin.
     
    RustyGreen and Front sight like this.
  12. Feb 1, 2024 at 7:32 PM
    #212
    5nahalf

    5nahalf [OP] I build dumb things

    Joined:
    Sep 22, 2018
    Member:
    #267058
    Messages:
    10,919
    Gender:
    Male
    First Name:
    Erik
    Minnesota
    Vehicle:
    2018 Inferno Longbed
    Clearing out some more foam, had to stop though as the fiberglass resin is still tacky and the foam dust was sticking to it. But the goal is to clear out the entire float box without cutting any more of it. I am trying to figure out a way to get to the foam once I get past where I can reach. Im thinking of using a drain snake with a metal wire brush head, this should just turn the foam to powder that I can vacuum out.

    [​IMG]
    [​IMG]
    [​IMG]
     
    RustyGreen likes this.
  13. Feb 2, 2024 at 7:07 AM
    #213
    5nahalf

    5nahalf [OP] I build dumb things

    Joined:
    Sep 22, 2018
    Member:
    #267058
    Messages:
    10,919
    Gender:
    Male
    First Name:
    Erik
    Minnesota
    Vehicle:
    2018 Inferno Longbed
    Glass going on in about an hour, just waiting for the heater to bring the garage temp up a little more.

    [​IMG]
    [​IMG]
     
    thomasburk and RustyGreen like this.
  14. Feb 2, 2024 at 9:09 AM
    #214
    5nahalf

    5nahalf [OP] I build dumb things

    Joined:
    Sep 22, 2018
    Member:
    #267058
    Messages:
    10,919
    Gender:
    Male
    First Name:
    Erik
    Minnesota
    Vehicle:
    2018 Inferno Longbed
    Alright, transom is glassed in. We let this cure, then get back on to cleaning up foam, grinding surfaces, then putting the rear caps back on.

    I also checked out marine carpet yesterday. I got samples of dark gray and black. Im thinking the dark gray will be my choice. Im going to measure out my area and order some soon.

    [​IMG]
     
    RustyGreen likes this.
  15. Feb 3, 2024 at 1:13 PM
    #215
    5nahalf

    5nahalf [OP] I build dumb things

    Joined:
    Sep 22, 2018
    Member:
    #267058
    Messages:
    10,919
    Gender:
    Male
    First Name:
    Erik
    Minnesota
    Vehicle:
    2018 Inferno Longbed
    Since ice fishing season is pretty much done for, I removed my soft topper (its only ever used in the winter so I can haul my ice gear without it getting snowed in). While its off I was able to put one of my christmas gifts from my mother inlaw on. She got me this cool hydrostream sticker!

    [​IMG]
     
    RustyGreen likes this.
  16. Feb 4, 2024 at 5:05 PM
    #216
    5nahalf

    5nahalf [OP] I build dumb things

    Joined:
    Sep 22, 2018
    Member:
    #267058
    Messages:
    10,919
    Gender:
    Male
    First Name:
    Erik
    Minnesota
    Vehicle:
    2018 Inferno Longbed
    I think I got the foam removal figured out.... wire brush on a drill turns the foam into dust very very very fast.... I got more foam out in 5 minutes than I did with the saw and prybar in 30 minutes.

     
  17. Feb 4, 2024 at 5:12 PM
    #217
    RustyGreen

    RustyGreen A breaker point guy in a Bluetooth world

    Joined:
    Aug 12, 2020
    Member:
    #337468
    Messages:
    14,030
    Gender:
    Male
    sleeping in a chair
    Vehicle:
    2017 AC 4x4 Sport 6M Inferno
    Pavement Princess
    Looks like it works good -- and also looks like a miserable job.
     
    5nahalf[QUOTED][OP] likes this.
  18. Feb 4, 2024 at 5:16 PM
    #218
    5nahalf

    5nahalf [OP] I build dumb things

    Joined:
    Sep 22, 2018
    Member:
    #267058
    Messages:
    10,919
    Gender:
    Male
    First Name:
    Erik
    Minnesota
    Vehicle:
    2018 Inferno Longbed

    Its now less miserable, though my arm is all cut up from rubbing in on open fiberglass transom parts.... I need to make some extensions for this so I can go all the way forward. Thinking about welding a nut to the brush, then using threaded rod I can add 1 foot extensions until I reach the front.
     
    RustyGreen[QUOTED] likes this.
  19. Feb 5, 2024 at 4:07 PM
    #219
    5nahalf

    5nahalf [OP] I build dumb things

    Joined:
    Sep 22, 2018
    Member:
    #267058
    Messages:
    10,919
    Gender:
    Male
    First Name:
    Erik
    Minnesota
    Vehicle:
    2018 Inferno Longbed
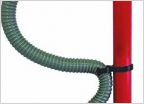
    Had to get creative for putting my float pods back together. I started by screwing some scrap wood to the pods then trying to screw them to the repair parts... wasnt working great so I did what any normal man does... break out the zip ties! The zip ties are just holding the parts together so the glass can cure, then I can layer on more until its rock solid.

    The support beams actually cut into part of the float pod, I was going to put the skins back on after I put in the beams, but I decided I am going to install the pods, then I will cut where the beams go into the pods and glass the pods and the beams as one part.

    [​IMG]
    [​IMG]
    [​IMG]

    [​IMG]
    [​IMG]
     
    RustyGreen likes this.
  20. Feb 5, 2024 at 5:33 PM
    #220
    RustyGreen

    RustyGreen A breaker point guy in a Bluetooth world

    Joined:
    Aug 12, 2020
    Member:
    #337468
    Messages:
    14,030
    Gender:
    Male
    sleeping in a chair
    Vehicle:
    2017 AC 4x4 Sport 6M Inferno
    Pavement Princess
    Will they be filled with foam when done?
     
To Top