

-
Welcome to Tacoma World!
You are currently viewing as a guest! To get full-access, you need to register for a FREE account.
As a registered member, you’ll be able to:- Participate in all Tacoma discussion topics
- Communicate privately with other Tacoma owners from around the world
- Post your own photos in our Members Gallery
- Access all special features of the site
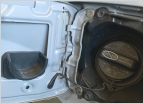 Gas Cap Holder
 Which One of You Boneheads Was This?
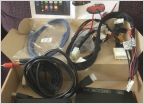 CarPlay up and running on my 2016 Tacoma
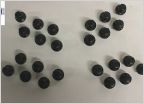 Lug Nut OEM Part Number
 Truck lost all electrical power
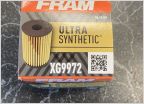 Oil Filter Housing Drain Hack
Rear Seat Delete Decks
Discussion in '3rd Gen. Tacomas (2016-2023)' started by ExploreBackcountry, Oct 2, 2019.
Page 41 of 45
Page 41 of 45
Products Discussed in


