

-
Welcome to Tacoma World!
You are currently viewing as a guest! To get full-access, you need to register for a FREE account.
As a registered member, you’ll be able to:- Participate in all Tacoma discussion topics
- Communicate privately with other Tacoma owners from around the world
- Post your own photos in our Members Gallery
- Access all special features of the site
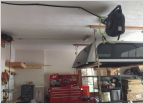 How Do You Store Your Cap/Topper?
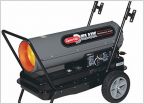 Salvage old diesel fuel (heating oil) that has been seating for many years.
 Recommend an electric impact wrench
 Bump in the...garage
 Ideas for heating a Condo in New England
 Air tools - rotary union
Any woodworkers?
Discussion in 'Garage / Workshop' started by Forster46, Mar 31, 2013.
Page 651 of 760
Page 651 of 760


