1. Welcome to Tacoma World!

    You are currently viewing as a guest! To get full-access, you need to register for a FREE account.

    As a registered member, you’ll be able to:
    • Participate in all Tacoma discussion topics
    • Communicate privately with other Tacoma owners from around the world
    • Post your own photos in our Members Gallery
    • Access all special features of the site

On Board Air install (lots o' pics)

Discussion in '2nd Gen. Tacomas (2005-2015)' started by tooblutacoma06, Apr 6, 2011.

  1. Apr 6, 2011 at 8:15 PM
    #1
    tooblutacoma06

    tooblutacoma06 [OP] Member

    Joined:
    Apr 26, 2007
    Member:
    #1426
    Messages:
    288
    Gender:
    Male
    First Name:
    Kellon
    Houston
    Finally getting around to doing a write-up on this. It's been completed for a few months now. Atleast this way I can give a little feedback on the functionality:D

    Compressor: From seller SafeVehicleProducts on eBay. Evidently he's not selling compressors anymore but its identical (specs and looks) to the VIAIR 350C. 100% duty cycle with ~1.2cfm. Although it states it's 200psi capable, I won't ever need to drive it that high.

    Tank: VIAIR 2.5 gallon 200 psi tank. VIAIR 2.5gal tank The perfect size to fit in the spare tire cavity

    Wiring: 10 AWG since wiring long runs

    Hose: 3/8" ID hose (from Lowe's)

    Fittings: All types. These things suck to find and plan for. They are never as cheap as you would want them to be either. I did find some quick connect couplers that I like though. They are made by Legacy: Legacy ColorConnex couplers

    And lots of other miscellaneous stuff.

    On to some pictures:

    Started by finding a place to mount the compressor. I've seen this done before and it was the best place I could find to put it. Where it would be mostly protected and would be in my way under the hood.

    IMG_6488_75b9d51b6096faf014e09788fb7117e26c9affae.jpg

    IMG_6490_4f0e314086af367ced94348dff2f9dc03d71eaab.jpg

    IMG_6491_b109903d209115f5d148981a1c37f96ac6bc8fe2.jpg

    IMG_6494_bdc2be5b7732d9800b132e636ba0e6d9f2bf5f63.jpg

    And back in the truck:
    IMG_6496_2f1929892519289222695ffa46bb5b5896e16084.jpg

    Wired in the relay:
    IMG_7459_09353120e345c8bc59a2c6d68020759acd648c17.jpg

    IMG_7458_b4867d81bcb3831f5aad41830e8ac413f0d0450d.jpg

    Needed to find a place to put the switch, so I came up with this location. I actually like the location alot. Can't be seen from the rest of the vehicle's seats so it's kinda stealthy, atleast until you open the driver's door.
    IMG_7462_a0cfb56f9fc60e82b1ed1f2f6255e36752a8ee8a.jpg

    IMG_7461_811bff37cfcfb77400a330f10743448158c5fab2.jpg

    Now I needed to mount the tank. Removed the spare since that is really the only place, besides the bed, that can handle a tank of useful size. Fabbed up some brackets of 3/16" steel, and it mounted up easily. It's tucked up out of the way but still easy to get to for draining.
    IMG_7465_99a648d3bd4ce7559b76afb808f1dc6970e1a665.jpg

    IMG_7467_e3bb4a66d90b83b3cd4c00b9edd029fc12aa58d0.jpg

    IMG_7470_34e85dfed08f9a6a2ff00737fc953025a408fa0b.jpg

    Can barely seem them in the picture, but I cut some spacers (white in the picture) that mount between the tank and the bracket on the drain side. This is so that the moisture will make it to the drain. It's a very slight angle. The spacers might be 1/4".
    IMG_7480_86ae4cac9376da6668362bf45f0c1cd1d0094927.jpg

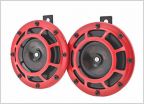
    Now the business end of the system. I fabbed up yet another bracket to hold a manifold in the engine bay. It mounts to the pre-tapped holes in the fender. Manifold is 2x 3/8", 3x 1/4"NPT. The 3/8" in comes from the tank in the back, the 3/8" out goes to my horns, 1 1/4" goes to the regulator, 1 1/4" goes to gauge, and the last one is capped for now. This setup has worked awesome so far. Oh, the black thing on the end of the coupler is just a little rubber cap to keep dirt out.
    IMG_8541_35aca1d028132b962c0241c4cb4042375d51f9bc.jpg

    IMG_8543_93cf9c6191c25f1d519d7dc4571f80af38ca8ea6.jpg

    IMG_8542_2d1d2ba841ea3f0efba0aee2af4f6ebc0a7138a4.jpg

    The air pressure gauge inside the cab is from GlowShift: GlowShift gauge Honestly, the gauge is cheap. The bezel is flimsy and easily dented, the wiring is silly, and overall feel is a 6-7/10. Haven't tested its accuracy though. It's an OK buy for an inexpensive gauge, but if I were doing multiple gauges, I would probably invest in a little more well built unit. The color adaptability is a nice feature though.

    So you'll notice that the gauge is tilted here. That's because I'm still working on my pillar pod and the fit is really tight with the gauge. I'm living with it for now.
    IMG_8552_03d41bef086bdaf3be54d385616ce631d3631941.jpg

    IMG_8553_c7c91a782cf75796e54c29fde83c262eb99e1dbf.jpg

    That's it for now. The system has been used several times. I've aired up several tires and used the blowgun with it several times and it has performed well. Don't have times though. I haven't run any air tools with it, mainly because I don't own any, but I plan to test some out on it.

    That's it for now. Let me know what you think!
     
    This site contains affiliate links for which the site may be compensated.
    #1
    Benson X, Toynado, Biscuits and 3 others like this.
  2. Apr 6, 2011 at 8:18 PM
    #2
    REVHARD25

    REVHARD25 Well-Known Member

    Joined:
    Mar 5, 2008
    Member:
    #5113
    Messages:
    850
    Gender:
    Male
    so cal
    Vehicle:
    RUGGED TRAIL PACKAGE
    Tint on front windows. Dnx7120 kenwood. Rear tsb springs. Wet okoles seat covers UWS truck box Weathertech floor mats TSB floor mat hook grommets Satoshi grill AFE drop in filter Fumoto drain valve Bed mat
    Great job..looks nice
     
  3. Apr 6, 2011 at 8:19 PM
    #3
    Dark Knight

    Dark Knight Well-Known Member

    Joined:
    Jul 18, 2008
    Member:
    #8006
    Messages:
    9,804
    Gender:
    Male
    First Name:
    Jeff
    NC/SC
    Vehicle:
    4Runner Trail, 88 pickup, Tundra Platinum
    A few bolts are different.
    nice job man!
     
  4. Apr 6, 2011 at 8:21 PM
    #4
    ttran

    ttran Expert Mallcrawler

    Joined:
    Jan 9, 2011
    Member:
    #48975
    Messages:
    964
    Gender:
    Male
    First Name:
    Tim
    Cary, NC
    Vehicle:
    06 DCLB Prerunner Sport
    TRD Sport Prerunner
    Looks pretty good! I'm planning on getting on board air on my tacoma soon, just building up the funds now :D
     
  5. Apr 6, 2011 at 8:21 PM
    #5
    bjmoose

    bjmoose Bullwinkle J. Moose

    Joined:
    Aug 31, 2010
    Member:
    #42529
    Messages:
    6,009
    Gender:
    Male
    First Name:
    Steve
    San Jose CA
    Vehicle:
    '11 Std Cab 4x4 5sp
    OME suspension, ARB Air Lockers, CBI/Relentless/Pelfrey armor, HAM radio
    Looks nice. Good writeup.

    Where is your spare going to go? Does it end up taking more space than the air tank would have?
     
  6. Apr 6, 2011 at 8:24 PM
    #6
    ilovetacos

    ilovetacos Well-Known Member

    Joined:
    Jan 27, 2008
    Member:
    #4464
    Messages:
    2,308
    Gender:
    Male
    First Name:
    Gavin
    Sacramento/Woodland
    Vehicle:
    2006 TRD Sport 4x4 DC
    Sold!
    Nice man! As always a well detailed write up!
     
  7. Apr 6, 2011 at 8:25 PM
    #7
    ruslanus

    ruslanus Well-Known Member

    Joined:
    May 5, 2010
    Member:
    #36608
    Messages:
    330
    Gender:
    Male
    First Name:
    Rus
    Wasilla, AK
    Nice write-up, thanks for taking your time. Onboard air system is on my list of things to do, but will have to wait for now. There are a lot of things I would like to do first
     
  8. Apr 6, 2011 at 8:39 PM
    #8
    tooblutacoma06

    tooblutacoma06 [OP] Member

    Joined:
    Apr 26, 2007
    Member:
    #1426
    Messages:
    288
    Gender:
    Male
    First Name:
    Kellon
    Houston
    Thanks guys! Hopefully it will be of use to someone in the future. That's why I take so many pictures! I always need more info than I can find it seems.

    Since you asked...Custom tiregate build :D

    So nope, doesn't take up any of my bed space. Before the gate, I had the spare in the basket on top.
     
  9. Apr 6, 2011 at 8:55 PM
    #9
    flightcancled

    flightcancled Addicted

    Joined:
    Feb 7, 2010
    Member:
    #30917
    Messages:
    1,462
    Gender:
    Male
    Syracuse NY/ Nantucket MA
    Camper top with racks, Custom fogs behind lower bumper. Interior LED lighting, Rock Lights, Hella 500s with upraged bulbs behind black billet grill, AAL, Front 5100s
    Nice! very clean!
     
  10. Apr 6, 2011 at 8:55 PM
    #10
    kinkrider101

    kinkrider101 Well-Known Member

    Joined:
    Sep 29, 2009
    Member:
    #23497
    Messages:
    2,658
    Gender:
    Male
    santa barbara
    Vehicle:
    2007 cummins/2007 tacoma
    wheels and tires
    Were did you run the compressor wires? Did you go under the drivers seat?
     
  11. Apr 6, 2011 at 9:05 PM
    #11
    tooblutacoma06

    tooblutacoma06 [OP] Member

    Joined:
    Apr 26, 2007
    Member:
    #1426
    Messages:
    288
    Gender:
    Male
    First Name:
    Kellon
    Houston
    Yep, through one of the rubber grommets. Sealed it with some RTV. Then along the frame bundled up in some loom.
     
  12. Apr 6, 2011 at 9:11 PM
    #12
    kinkrider101

    kinkrider101 Well-Known Member

    Joined:
    Sep 29, 2009
    Member:
    #23497
    Messages:
    2,658
    Gender:
    Male
    santa barbara
    Vehicle:
    2007 cummins/2007 tacoma
    wheels and tires
    Did you run the power wire for the switch and the compressor through firewall that leads to the engine bay? I ask because I can't find a way to wire something from the bed and have the wires directly lead to the engine bay
     
  13. Apr 6, 2011 at 9:37 PM
    #13
    tooblutacoma06

    tooblutacoma06 [OP] Member

    Joined:
    Apr 26, 2007
    Member:
    #1426
    Messages:
    288
    Gender:
    Male
    First Name:
    Kellon
    Houston
    The switch in the cab only activates the relay. I'm pretty sure I ran the power wire up the inside of the fender, keeping it away from any hot surfaces, and loomed it ofcourse. It's been a little while since I did it! Haha, I'll have to check and make sure, but I'm about 98% sure that's what I did.
     
  14. Apr 6, 2011 at 10:27 PM
    #14
    toku58

    toku58 Well-Known Member

    Joined:
    Oct 10, 2008
    Member:
    #9882
    Messages:
    2,534
    Gender:
    Male
    On a Rock in the middle of the Pacific
    Vehicle:
    Mall Crawler!
    21' TRD OffRoad 2" 887 OME on Bilstein 5100's. 285/70R17 General Grabbers G3 17x8.5" Icon TRD wheels (Gun metal gray) 4.75" BS
    From the picture it looks like when you rear squats it might hit the tank? Or is it just the angle of the picture?


    IMG_7480_86ae4cac9376da6668362bf45f0c1cd1d0094927.jpg
     
  15. Apr 7, 2011 at 7:32 AM
    #15
    tooblutacoma06

    tooblutacoma06 [OP] Member

    Joined:
    Apr 26, 2007
    Member:
    #1426
    Messages:
    288
    Gender:
    Male
    First Name:
    Kellon
    Houston
    Just the angle. It's away from the axle enough to where it wont hit. I'll try and get some more pictures of the clearance.
     
  16. Apr 7, 2011 at 12:36 PM
    #16
    THExBUSxDRIVER

    THExBUSxDRIVER Victory is reserved...

    Joined:
    Mar 19, 2010
    Member:
    #33508
    Messages:
    4,139
    First Name:
    GOO5E
    Vehicle:
    Old Man Tan!
    Not enough.
    I NEED on board air...sometimes
     
    Sterling_vH111 likes this.
  17. Aug 20, 2011 at 12:28 AM
    #17
    Hayes

    Hayes Well-Known Member

    Joined:
    Aug 1, 2011
    Member:
    #60946
    Messages:
    631
    Gender:
    Male
    First Name:
    Brandon
    Denver, CO
    Vehicle:
    2011 Regular Cab Tacoma 4x4
    Any updates on how well this works? I have a different mounting idea, but this is the system that I would like to run.
     
  18. Aug 20, 2011 at 5:06 AM
    #18
    Hanz

    Hanz Well-Known Member

    Joined:
    Feb 22, 2008
    Member:
    #4883
    Messages:
    139
    Gender:
    Male
    First Name:
    Doug
    Long Island, NY
    Vehicle:
    2003 Tacoma DC 4X4 TRD
    LED Instrument lights
    I haven't seen this thread before. Really nice job with the write up and install. Very well thought out project.
     
  19. Aug 20, 2011 at 5:50 AM
    #19
    HomerTaco

    HomerTaco also HomerTaco Vendor

    Joined:
    Mar 28, 2010
    Member:
    #34129
    Messages:
    45,766
    Gender:
    Male
    First Name:
    HomerTaco
    HomerTaco
    Vehicle:
    HomerTaco
    HomerTaco ...................................................................................................................................................... Core-Hurst short throw shifter & T-handle / Carbon Fiber Interior / custom console light / De-badged / leather interior / Heated Front seats / Red Line Hood Struts / Painted speaker grills /one-off TRD Satoshi Grill with 12-15 front-end swap/ Pioneer AVIC-X920BT HU / Scangauge II / Black LED Tails / Dash Mount for iPad mini / Safari Snorkel / Auto-pilot mode / Leer 100XQ Cap / 4x Innovations sliders / Rear Diff Breather Mod / front windows tinted to 35% / Brute Force Fab Hybrid Front Bumper / BAMF Rear Diff Skid / Budbuilt Skids / CBI Trail Master 2.0 rear hybrid bumper / Fox rr coils/ TC UCA's/ TC spindle gussets/ TC Cam Tab gussets / Dakar leafs / Defined Engineering shackles / All pro U bolt flip / Timbren Rear Bumpstops / BAMF LCA skids / Exhaust re-route / Fog Light anytime Mod / LowRange Off Road extended rear brake lines / ATO Shackle Flip / sectioned Bushwhacker flares / re-geared to 4.56 / ARB Front & Rear Locking Diff / ARB CKMA12 compressor / PrInSu full rack system / 1" body lift / Inchworm 4.7 crawlbox / twin stick FJ t-case / Davez off-road triple-stick kit/
    This thread is WIN!

    I just read through your other write-ups as well.:cool:

    You have some excellent fab skills buddy. :bowdown:

    Here are some more green squares for ya...;)

    +1 for mad skills.:D
     
  20. Aug 20, 2011 at 12:22 PM
    #20
    ItalynStylion

    ItalynStylion Sounds Gooooood

    Joined:
    Jun 15, 2009
    Member:
    #18467
    Messages:
    5,926
    Gender:
    Male
    First Name:
    Steven
    DFW, Tx.
    Vehicle:
    09 Double Cab TRD Sport 4x4
    Can't you just run a pressure regulator relay? That way the pump just comes on when the air pressure gets low to a certain point? I would think that would be better than running a dedicated switch no?
     

Products Discussed in

To Top