

-
Welcome to Tacoma World!
You are currently viewing as a guest! To get full-access, you need to register for a FREE account.
As a registered member, you’ll be able to:- Participate in all Tacoma discussion topics
- Communicate privately with other Tacoma owners from around the world
- Post your own photos in our Members Gallery
- Access all special features of the site
 Off-roading in a stock Tacoma?
 Beach Off Roading?
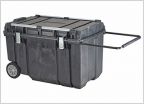 Weather Proof Storage Bins Camping
 Best GPS for off roading?
 What air compressor are you using?
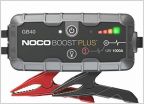 New to Offroading. What hand tools are you carrying, and in what?
3rd Gen/ 2nd Gen Engine bay Splash Guard/ Rock guards Template.
Discussion in 'Off-Roading & Trails' started by Shveet, Jul 28, 2019.
Page 6 of 7
Page 6 of 7
Products Discussed in


