

-
Welcome to Tacoma World!
You are currently viewing as a guest! To get full-access, you need to register for a FREE account.
As a registered member, you’ll be able to:- Participate in all Tacoma discussion topics
- Communicate privately with other Tacoma owners from around the world
- Post your own photos in our Members Gallery
- Access all special features of the site
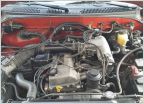 Chasing the 2200 rpm ping (2.7)
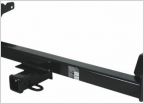 Need Tow Hitch for 1st Gen (1997) Tacoma
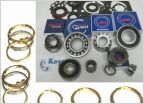 Aisin vs EXEDY vs Luk clutch replacement kits
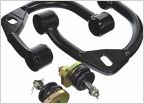 SPC UCA bushing clunk, anyone experience this?
 Stock air box or aftermarket
 Truck starts then dies
2000 Toyota Tacoma Project Truck
Discussion in '1st Gen. Tacomas (1995-2004)' started by SantaCruzScotty, Jul 13, 2024.
Page 2 of 2
Page 2 of 2


