1. Welcome to Tacoma World!

    You are currently viewing as a guest! To get full-access, you need to register for a FREE account.

    As a registered member, you’ll be able to:
    • Participate in all Tacoma discussion topics
    • Communicate privately with other Tacoma owners from around the world
    • Post your own photos in our Members Gallery
    • Access all special features of the site

Finally down to a decent height

Discussion in 'Street Trucks' started by gstodd, May 20, 2024.

  1. May 20, 2024 at 11:00 AM
    #1
    gstodd

    gstodd [OP] Well-Known Member

    Joined:
    Jan 17, 2023
    Member:
    #415649
    Messages:
    422
    Gender:
    Male
    Vehicle:
    2005 2wd base 5-lug
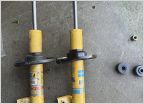
    Spent the weekend putting on the DJM 3/3 kit. Over all not too bad though the rivets for the passenger side rear bump stop bracket DID NOT want to come out. Took a little extra grinding and a lot of hitting with the sledge and punch to get them out. Already had the 4x4 leaf springs in the rear and Viking coil overs up front. Discovered that the DJM kit is not designed with after market coil overs in mind. Had to take about a 1/4" off the tabs for the shock mount to clear the bottom of the shock. Also discovered that you should not have the sparks from a grinder constantly hitting one spot on your shirt. Had to stop for a minute and put the fire on my shirt out. lol

    I'll probably raise the front about 1/2" as I'm rubbing the wheel well liner on every medium sized bump and don't feel like removing them. Just need to get an alignment tomorrow morning and then decide if I'm going to need to get the TechnoToyTuning tie rods to deal wit the bump steer.

    Here is how it currently sits.

    PXL_20240519_230754611.jpg PXL_20240520_172938304.jpg

    And the remains of my shirt.

    PXL_20240520_010144362.jpg
     
  2. May 20, 2024 at 12:18 PM
    #2
    hemitruk

    hemitruk Old man , young boi truk

    Joined:
    Oct 17, 2009
    Member:
    #24461
    Messages:
    2,302
    Gender:
    Male
    First Name:
    Kurt
    Hawaii
    Vehicle:
    2010 Dbl Cab Sport,
    A few
    Maybe try heating up wheel linner with heat gun and push out of way if not rubbing too much . Looking good though.
     
  3. May 23, 2024 at 10:16 AM
    #3
    gstodd

    gstodd [OP] Well-Known Member

    Joined:
    Jan 17, 2023
    Member:
    #415649
    Messages:
    422
    Gender:
    Male
    Vehicle:
    2005 2wd base 5-lug
    Yeah, I ended up raising it up a bit as there was metal under the ridge in the liner that I was hitting. Going to pull the 4x4 leaf springs and put the stocks back on to even it out. While it looked good that low it was just too low for daily rough road use. Had to clamp the right e-brake cable up a bit higher where it enters the cab as it was rubbing on the driveshaft and even had to flip the grommet just behind it as it would rub under full compression. Still sorting out a few other little noises but overall I'm really happy with how it's come out. Also have Viking shocks on order for the rear. Stocks are completely gone.
     
  4. May 23, 2024 at 10:24 AM
    #4
    inwood customs

    inwood customs Roaming potato

    Joined:
    Sep 11, 2016
    Member:
    #197024
    Messages:
    4,715
    First Name:
    Dave
    Vehicle:
    2006 v6 potato bugTuRD
    K&n, flowmaster, plastidip, chipped, hids, daves
    I like it, looks good
     
  5. May 23, 2024 at 11:52 AM
    #5
    hemitruk

    hemitruk Old man , young boi truk

    Joined:
    Oct 17, 2009
    Member:
    #24461
    Messages:
    2,302
    Gender:
    Male
    First Name:
    Kurt
    Hawaii
    Vehicle:
    2010 Dbl Cab Sport,
    A few
    Sounds like a good compromise. While looking cool is nice but ride quality important too for me anyway. :thumbsup:
     
    gstodd[QUOTED][OP] likes this.
  6. Jun 5, 2024 at 9:49 AM
    #6
    gstodd

    gstodd [OP] Well-Known Member

    Joined:
    Jan 17, 2023
    Member:
    #415649
    Messages:
    422
    Gender:
    Male
    Vehicle:
    2005 2wd base 5-lug
    Well, put the stock rear leaf spring back on the other day, also had the Techno Toy Tuning ultimate tie rods installed yesterday and put the Energy Suspension front sway bar bushing on this morning. And of course had it all aligned so it's not driving sideways any more.

    New ride height. I'd like the rear to be a bit lower but I'm good for now.

    PXL_20240602_201055085.MP.jpg

    The tie rods and bushings. Tie rods still aren't parallel to the ground. I'm going to check with the Techno Toy Tuning guys to see if they make longer end to get it down a bit more. I suspect these are only that long so they fit with the stock 18s on the X-runner.

    PXL_20240605_164034939.jpg

    And figured out where it was rubbing when the front was lower. If I really want to get back down that low looks like I'll need to tub the wheel well a bit, might also try playing with the wheel offset too.

    PXL_20240604_155314223.jpg
     
  7. Jun 5, 2024 at 11:45 AM
    #7
    nightcrawler

    nightcrawler Well-Known Member

    Joined:
    Apr 8, 2009
    Member:
    #15733
    Messages:
    368
    Vehicle:
    ‘17pro
    Humming bird approves. You got a link for those sway bar bushings? Are they stiff?

    I replaced mine with Moog, but quality seems cheap
     
  8. Jun 5, 2024 at 11:54 AM
    #8
    gstodd

    gstodd [OP] Well-Known Member

    Joined:
    Jan 17, 2023
    Member:
    #415649
    Messages:
    422
    Gender:
    Male
    Vehicle:
    2005 2wd base 5-lug
    Here's the part number, Energy Suspension 8.5153R. I picked them up off of Summit, but lots of places carry them online. It's a bit stiffer but not substantially, just a nicer feel in the corners.

    The humming bird DOES NOT approve, she's pissed at me. Her nest is in the plant directly in front of my driver's side headlight. lol
     
    nightcrawler[QUOTED] likes this.
  9. Jun 6, 2024 at 11:09 AM
    #9
    2Runner

    2Runner Well-Known Member

    Joined:
    Jan 20, 2020
    Member:
    #316661
    Messages:
    1,042
    First Name:
    Scott
    So Cal
    Vehicle:
    2002 Regular Cab 2.4L MT 2WD
    [QUOTE="And figured out where it was rubbing when the front was lower. If I really want to get back down that low looks like I'll need to tub the wheel well a bit, might also try playing with the wheel offset too.

    [/QUOTE]

    I like what I am seeing here!!

    Mine is a 1st gen, but looks like you may be able to make enough clearance in your fender wells bending that scrubbed area into submission. I used the floor jack with a body dolly from harbor fright to resolve a lot more rubbing issues I had!
    20220528_145304 (1).jpg

    A lot of bending, driving, rubbing, and repeating the process was necessary, the more I fixed the more other areas would rub. Had to trim the plastic pieces too but left the mounts in place.
    20220624_130913.jpg

    Bent metal up to the frontal point where it was rubbing the portion that holds the battery above.
    20220720_123236 (1).jpg

    Oh yeah, cant forget the pinch weld mod seen on many 4WDs.. My twist - I trimmed back the plastic, then bent the weld over the plastic to hold it together with all the plastic in place still.
    20220624_130242.jpg

    From my experience, I suggest to use the jack and dolly vs a hammer as seen in the first pic. This will bend the metal smoothly inches at a time in an arch creating more clearance, doesnt wear out the liner coating spray stuff, and avoids scratching your fenders. It seemed the hammer would create dings and chip the paint, and took too much effort as well.

    Nothing moved too much and is still in the factory mounting locations in the engine bay. Pop the hood and the inner fenders are intact and everything appears OEM fresh!
    20220725_134411 (1).jpg

    Sure hope you dont need to do this much for your rubbing issue, but in case it helps you and others get the stance you desire.

    Here's old Trudy, why not?!
    20220605_192622.jpg

    I'd say it was worth it!

    Keep up the great work :thumbsup:
     
    nightcrawler and hemitruk like this.
  10. Jun 6, 2024 at 11:17 AM
    #10
    gstodd

    gstodd [OP] Well-Known Member

    Joined:
    Jan 17, 2023
    Member:
    #415649
    Messages:
    422
    Gender:
    Male
    Vehicle:
    2005 2wd base 5-lug
    Thanks for the tip, I may try the dolly trick. I know my set is buried somewhere in my tool box.
     
    2Runner likes this.
  11. Jul 22, 2024 at 1:30 PM
    #11
    gstodd

    gstodd [OP] Well-Known Member

    Joined:
    Jan 17, 2023
    Member:
    #415649
    Messages:
    422
    Gender:
    Male
    Vehicle:
    2005 2wd base 5-lug
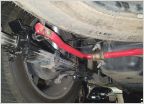
    Well, I finally got the rear end dialed in where I want it. It just took swapping out the whole rear suspension again. This time around I put the 4x4 leaf springs back in, took out the 3" DJM blocks and put in a set of 2" blocks, installed a set of Viking Shocks and added a rear sway bar I picked up from a member on here.

    PXL_20240722_194401086.jpg

    Then proceeded to tweak the front suspension to get rid of the bump steer from the drop. The Techno Toy Tuning tie rods helped but they really are made for no more than 2" of drop. And since I have 3" DJM arms and Viking coil overs I'm well past that. Added 3/4" spacer between the steering rack and the subframe and then replaced the tie rod adapters with an adjustable set made for a Ford Pinto. Between raising the steering rack and the longer adapters I finally have the toe rods almost parallel with the LCAs.

    PXL_20240721_211210803.jpg

    Much better than the previous angle

    PXL_20240610_181458233.jpg

    I think I am now happy with how everything sits. Just need to get it aligned again since I was screwing with the steering.

    PXL_20240722_194438572.MP.jpg


    Now that I'm happy with how it sits, anyone want a lightly used set of 3" DJM blocks and U-bolts and/or a set of 4x2 leaf springs with 55K miles on them? $50 each plus shipping from Socal. Just PM me if you're interested.
     
  12. Sep 4, 2024 at 8:11 PM
    #12
    Slowtaco97

    Slowtaco97 Active Member

    Joined:
    Oct 28, 2021
    Member:
    #380758
    Messages:
    29
    Gender:
    Male
    @gstodd sweet truck.
    What is your compression and rebound settings for your daily drives? I just got my vikings in my X for the front and reat and dont seem to have the suspension quite dialed in due to bouncy-ness.
     
  13. Sep 5, 2024 at 10:18 AM
    #13
    gstodd

    gstodd [OP] Well-Known Member

    Joined:
    Jan 17, 2023
    Member:
    #415649
    Messages:
    422
    Gender:
    Male
    Vehicle:
    2005 2wd base 5-lug
    2 and 4 front
    0 and 2 rear

    I could go one higher on compression in the front to tighten it up but I'm taking the softness hit for a bit more comfort. Oh, and I'm on 550 lbs. springs up front.

    Also remember that I've got the 4 banger so my front end weight is a bit less than yours and I'm running 4x4 springs out back which are a bit softer than my stocks.
     
  14. Sep 25, 2024 at 10:34 PM
    #14
    legatho

    legatho Member

    Joined:
    Sep 22, 2014
    Member:
    #138917
    Messages:
    7
    Gender:
    Male
    Az
    Vehicle:
    02 Double Cab
    Just wanted to say thank you for this thread! My son recently purchased a 2014 single cab 2wd taco that we are going to make into a mini x runner. I had decided on a DJM complete 3'' kit up front and originally thought a mini c notch and 4'' blocks in the rear.

    Based on this post it sounds like I will still need the notch kit but also order a set of 2'' blocks with my complete 3/3 drop kit vs 3/4

    Are the 4x4 leafs from any 2005-2015 taco or is there a certain cab configuration that is ideal?

    Do you have a link or part number for the pinto tie rod ends?

    Also looking to go the Viking route on all 4 corners... Do you have any photos of what had to be ground down? Not afraid of it... just curious!

    Thanks for your time man!

    -Tom

    0BB8E012-43F3-4383-906E-7370D7F6AE25_1_105_c.jpg
     
    Last edited: Sep 25, 2024
  15. Sep 26, 2024 at 3:04 AM
    #15
    gstodd

    gstodd [OP] Well-Known Member

    Joined:
    Jan 17, 2023
    Member:
    #415649
    Messages:
    422
    Gender:
    Male
    Vehicle:
    2005 2wd base 5-lug
    My 4x4 leaf springs are the old design which gives a lot more drop than the redesigned ones. You would probably be fine doing the 3/3 with current 4x4 leaf springs.

    Sorry no photos of what I ground but it's immediately obvious when doing the install.

    Don't have the part number for the Pinto tie rod ends as I'm currently in Seoul on my way to the Philippines. I got them from Summit Racing so they should be easy to find. You still need the tie rods and outer shaft replacements from Techno Toyota Tuning.
     
  16. Dec 12, 2024 at 7:01 PM
    #16
    legatho

    legatho Member

    Joined:
    Sep 22, 2014
    Member:
    #138917
    Messages:
    7
    Gender:
    Male
    Az
    Vehicle:
    02 Double Cab
    What size tires are you running? I have the DJM kit in the garage waiting...

    IMG_3878.HEIC.jpg
     
  17. Dec 13, 2024 at 10:29 AM
    #17
    gstodd

    gstodd [OP] Well-Known Member

    Joined:
    Jan 17, 2023
    Member:
    #415649
    Messages:
    422
    Gender:
    Male
    Vehicle:
    2005 2wd base 5-lug
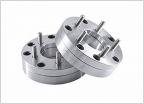
    I'm running 255/35R20 tires on 20 x 8.5 +48 wheels. The rear fits great, the front needs something closer to a +35 as I rub about an 1/8 turn from full lock. I'll eventually through a 10mm spacer on there to take care of it.
     

Products Discussed in

To Top