

-
Welcome to Tacoma World!
You are currently viewing as a guest! To get full-access, you need to register for a FREE account.
As a registered member, you’ll be able to:- Participate in all Tacoma discussion topics
- Communicate privately with other Tacoma owners from around the world
- Post your own photos in our Members Gallery
- Access all special features of the site
 Whats the one power/hand tool you could not do w/out?
 Solved! - Identifying Plumbing Fittings for Water Tank for my Rig
 UPDATED [finished product] 3/4" birch plywood "Box" as washing-machine stand?
 Getting heavy tires back on truck in garage
 Flashlight Help
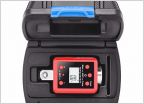 Digital torque adapter
Anything Manufacturing - Small to Medium Scale Metal Work (CAD/CAM included!)
Discussion in 'Garage / Workshop' started by Kwikvette, Oct 5, 2024.
Page 3 of 36
Page 3 of 36


