

-
Welcome to Tacoma World!
You are currently viewing as a guest! To get full-access, you need to register for a FREE account.
As a registered member, you’ll be able to:- Participate in all Tacoma discussion topics
- Communicate privately with other Tacoma owners from around the world
- Post your own photos in our Members Gallery
- Access all special features of the site
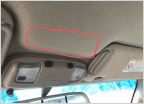 Ceiling Switch Panel?
 Bad gas cap even after replacing?
 Fuel filter replacement
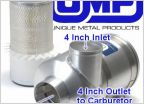 R2C/UMP offroad filters/canisters. Anyone running one? Thoughts?
 Voltage to camshaft position sensor?
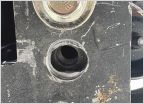 Tapping 16mm or other options?
Front End Rebuild Help
Discussion in '1st Gen. Tacomas (1995-2004)' started by illum91, Dec 25, 2024.
Page 1 of 3
Page 1 of 3
Products Discussed in


