

-
Welcome to Tacoma World!
You are currently viewing as a guest! To get full-access, you need to register for a FREE account.
As a registered member, you’ll be able to:- Participate in all Tacoma discussion topics
- Communicate privately with other Tacoma owners from around the world
- Post your own photos in our Members Gallery
- Access all special features of the site
 Gears and Air lockers .. Working up pricing
 HI LIFT Feeler
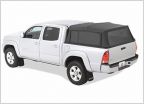 Bestop Softopper ROUND 2
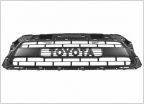 GB Feeler - Pro Grille insert for 12-15
 ECGS Gears, Install Kits and Locker Group Buy
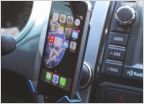 Aluminum iPhone mount for off-road & daily use
KATZKIN Leather Seat Group Buy
Discussion in 'Group Buys' started by Andrew H, Feb 15, 2011.
- Thread Status:
- Not open for further replies.
Page 19 of 50
Page 19 of 50
- Thread Status:
- Not open for further replies.


