

-
Welcome to Tacoma World!
You are currently viewing as a guest! To get full-access, you need to register for a FREE account.
As a registered member, you’ll be able to:- Participate in all Tacoma discussion topics
- Communicate privately with other Tacoma owners from around the world
- Post your own photos in our Members Gallery
- Access all special features of the site
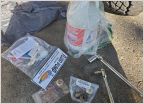 1999 Tacoma 2.7L 4x4 Manual Tranny and Diff Fluid Change
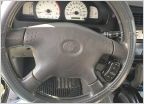 Adding steering wheel audio controls for $50
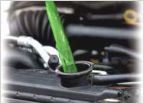 Toyota OE Red vs. Zerex Asian coolant
 What else is needed with Dakar leaf pack?
 Brake rotor
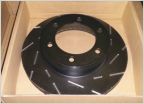 Which brake rotors should I get?
Which leaf packs should I get.
Discussion in '1st Gen. Tacomas (1995-2004)' started by Madams, Jun 20, 2011.
Page 1 of 2
Page 1 of 2


