

-
Welcome to Tacoma World!
You are currently viewing as a guest! To get full-access, you need to register for a FREE account.
As a registered member, you’ll be able to:- Participate in all Tacoma discussion topics
- Communicate privately with other Tacoma owners from around the world
- Post your own photos in our Members Gallery
- Access all special features of the site
 Dual square recessed USB outlet ?
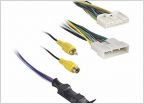 Factory rearview camera to pioneer head unit.
 Need Help With Choosing Stereo Poll
 Upgrade sound system in access cab?
 Kenwood DDX-370 6.1" Head Unit
MOD: Radio on after Ignition is turned off
Discussion in 'Audio & Video' started by CtryBoyInMT, Feb 13, 2008.
Page 1 of 2
Page 1 of 2


