1. Welcome to Tacoma World!

    You are currently viewing as a guest! To get full-access, you need to register for a FREE account.

    As a registered member, you’ll be able to:
    • Participate in all Tacoma discussion topics
    • Communicate privately with other Tacoma owners from around the world
    • Post your own photos in our Members Gallery
    • Access all special features of the site

Tacoma Lift FAQ/Guide - READ THIS

Discussion in 'Suspension' started by Khaos, Jul 10, 2008.

  1. Nov 6, 2011 at 12:41 AM
    #221
    Konaborne

    Konaborne Pineapples on pizza Hawaiian does not it make.

    Joined:
    Nov 21, 2010
    Member:
    #46536
    Messages:
    31,906
    Gender:
    Male
    First Name:
    Cody
    Kealakekua, Hawaii
    Vehicle:
    Lifted 00 TRD Off-Road
    fox extended travel remote resivoir coilovers, 14" eibach 600lb coils, All Pro tubular chromoly 1" uniball upper control arms, All Pro expedition leaf packs, 10" bilstein 5150 piggyback reservoir shocks 265/75r16 Goodyear wrangler MT/R kevlars wrapped around 16" Helo 791 gloss black, Mini H1 retrofits with 6000k bulbs, 18" magnaflow w/custom exhaust reroute various decals, Sockmonkey retro hood stripes

    I'll leave this here too. taken from another thread
    The Ultimate Tacoma Lift Kit Guide


    Jason | Nov 29, 2010 | Comments 19
    Leveling kits are a very popular accessory with truck owners, and the Tacoma is no exception. Yet despite the popularity of lift kits, there is an incredible amount of misinformation about lift kits. What follows is a good-faith attempt to explain the benefits and disadvantages of every basic lift-kit type.
    [​IMG]2005-2010 Tacoma 3 inch Lift Kit from Rough Country Suspension Systems (RoughCountry.com)

    First, let’s address some basic lift-leveling kit concepts:
    - Most lift or leveling kits do not increase ground clearance. On most kits, additional ground clearance comes from increased tire size only.
    - Almost all lift kits involve some sort of compromise. The trick is to make sure that compromise doesn’t impact your intended use.
    - There are a lot of very smart people who have differing opinions on the long-term durability of various lift-leveling kit designs. While there is a lot of room for debate, one thing is clear: durability is directly related to use. Heavy off-road users have to be much more concerned with these questions than someone who occasionally drives down a dirt road on the way to a fishing spot.
    - You always need an alignment after installing a lift or leveling kit.
    - All front-end lift kits over 1.5″ should also include a differential drop kit. This will keep the CV joint angles as close to stock as possible during normal driving conditions. Some companies don’t include a diff. drop in their basic package – be sure to add one on.
    - Whatever kit you buy, make sure it’s quality and backed by a warranty.
    Different Types of Leveling and Lift Kits

    [​IMG]
    Essentially, there are seven different types of front-end lift kits for the Tacoma:

    1. Above coil spacer lift kits (aka strut extension kits)
    2. In-coil spacer lift kits (aka “preload” kits)
    3. Combo kits that use both above and in-coil spacers (including adjustable shock spring seat kits such as the Bilstein 5100 leveling shock)
    4. Coilover kits that include new springs, and/or replacement springs
    5. Drop bracket kits
    6. Body lift kits
    7. Long travel kits and solid axle swaps
    To lift the rear of the Tacoma, there are four different types of kits:

    1. Blocks
    2. Add-a-leafs
    3. New leaf packs
    4. New shackles (95-04.5 Tacomas only)
    What follows is a good-faith attempt to describe each front and rear lift method in brief detail.
    Tacoma Front End Lift Kit Methods
    [​IMG]
    Above coil kits increase the length of the coil assembly, which in turn increases distance between the wheel hub and the upper control arm and raises the static ride height. Above coil kits are popular because:

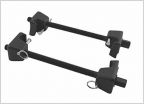
    • they don’t require a spring compressor to install (a tool that most home mechanics don’t have) and
    • they’re usually the most inexpensive option
    Unfortunately, despite their low cost and ease of install, above-coil kits can cause suspension damage at full down travel (aka full droop). This is because the increased length of the coil assembly isn’t 100% compatible with the stock suspension – ball joints, cv joints, cv axles, the sway bar, and the control arms should all be changed or lengthened if the coil length changes. Otherwise, they are all outside of factory design limits at full down-travel.
    Also, anyone who has installed one of these kits will tell you that they’re fairly hard to pry into place – a large pry-bar and/or a ratchet strap are usually required to get the new longer coil assembly to fit.
    [​IMG]
    In-coil spacer kits do not increase the length of the coil assembly to accomplish lift. Instead, they reduce the amount the factory coil can compress by “taking up space” in the coil pack. This is commonly (and incorrectly) referred to as spring “preload.” In-coil spacer kits are well-liked because:

    • Provided you have access to a quality spring compressor (or a local shop that has one), in-coil spacer kits are very easy to install and do not require any prying like above-coil kits
    • They are usually very inexpensive
    The downsides to this type of kit are reduced up-travel and, arguably, reduced ride quality. Since the spring isn’t technically being “loaded” (it’s just losing some compression height), ride quality isn’t effected by a suddenly stiffer spring. While it is true that reducing the amount of compression distance slightly changes the spring rate, the difference in ride is likely very small on most vehicles. Many people who have installed in-coil spacer kits have not noticed a decrease in ride quality.
    However, the reduced up-travel is an issue with in-coil spacer kits. By reducing the up-travel, the truck is more likely to hit the bump-stops during hard use. Obviously, hitting the bump stops results in a severe jolt and – if done excessively – can have multiple negative ramifications.
    [​IMG]
    Combo kits use both an in-coil and above coil spacer to accomplish lift. By using both types of lift, these kits minimize the downsides of both designs while also gaining the benefits of both. In truth, most in-coil spacer kits – as well as adjustable “leveling shocks” like the Rancho quickLIFT or Bilstein 5100 – fit into the combo kit category.
    Shock-based leveling kits offer quite a bit of value. They cost about the same amount as a quality above-coil or in-coil spacer, yet they also include new shocks. The main limitation of these kits is that they max out at about 2.5″ of lift.
    Remember: Spacer lifts are the most popular type of front-end lift / leveling kit. Provided your truck doesn’t see much off-road use, it’s unlikely that any of the issues associated with spacer lift kits will ever cause you a problem.
    A Note About Spacer Kit Sizes
    Since the Tacoma doesn’t have a tremendous amount of rake, a very slight spacer kit is sufficient to level out the truck (only 1-2″ of front-end lift is needed to level a 95′ or newer Tacoma). Since most people are looking for a way to install larger tires on their trucks, pure leveling kits that raise the front end 2″ aren’t nearly as popular as 3″ spacer lift kits that raise both the front and rear of the truck.
    Coilover kits and/or new coil springs are often said to be the best lift kit option available short of a long-travel kit. A new coilover kit (which typically includes a spring, shock with spring seat, and all-new mounting gear) can increase lift by using an adjustable ring that will decrease the amount of spring compression height.
    Coilover kits are inherently better than spacer kits because they include a new coil spring that is designed for the specific application. The new coil spring is tuned to account for reduced travel, which decreases the chances of suspension damage occurring during heavy off-road use.
    [​IMG]
    Drop bracket lift kits are easy to visualize. Imagine adding a new section of frame to the bottom of your truck’s existing frame, and then mounting all your suspension parts to that new section and you’ve got it. The main advantage of a drop bracket kit is size – they’re a reasonably simple mechanism for grabbing 5-6″ of lift, an amount that is impossible to acquire using a spacer lift kit alone. They also preserve the factory ride.
    The main disadvantages of drop-bracket kits are:

    • Cost – $2500 is not an uncommon figure for parts, not to mention labor
    • Challenging install (especially for the average home mechanic)
    • Higher center of gravity
    • They’re essentially irreversible
    Despite these disadvantages, most of the “big” lifted trucks you see driving down the road are riding on a drop bracket lift kit. This is often because of economics.
    Body lift kits are just what they sound like – a kit that lifts the body of the vehicle 1-4″ off the frame using a series of spacers (also known as “pucks”). The main disadvantage to a body lift kit is the install – most kits have 20+ spacers to install – and some can take the better part of two days to install. The main advantage of a body lift is that it can be installed alongside almost any other lift kit. SO, if you’re doing the math at home, adding a 3″ body lift to a truck with a 6″ drop bracket lift = 9 inches of lift!
    If you’ve got time and not a lot of money, combining a 3″ body lift kit with a 3″ spacer lift kit is a low-cost alternative to a 6″ drop bracket kit. Another advantage is that adding a body lift kit to a spacer lift kit results in a lower center of gravity than a drop bracket kit, a nice benefit for anyone concerned about handling and/or rollovers.
    Long-travel kits are perhaps the very best suspension lift option available. Essentially, a long-travel kit is a new front suspension system. The critical components (upper and lower a-arms, uniball, coils, and shocks) are all replaced and/or upgraded. Some kits also include new axles, although Tacoma owners can modify Tundra CV axles to work with long-travel kits. Once all these parts are installed, the Tacoma’s ride height is increased while the factory suspension travel and geometry are maintained. In fact, since most long-travel kits use better quality components than Toyota uses at the factory, a Tacoma with a long-travel kit will perform considerably better than a stock Tacoma in almost all situations.
    [​IMG]Toyota Tacoma with a Total Chaos Long Travel Suspension Kit. Click the image above for more info.

    Long-travel kits are awesome in terms of performance, but they come with an awesome price tag too. Not only are the parts expensive (figure $2,000 minimum) but the labor involved is significant. It’s not uncommon to spend more money on installation than on the kit itself. Of course, if you have the tools, the time, and the know-how, labor is something you can provide yourself.
    Most long-travel kits require body panel modification too. The Total Chaos 96000 kit, for example, requires Tacoma owners to install new fiberglass fenders. A set of fiberglass fenders installed and painted to match your truck will cost about $1,000 (less if you can do the fender install and light bodywork yourself). Long-travel kits are the best possible way to raise your truck’s ride height, but many people have spent over $5,000 to install one…which is why long-travel kits aren’t even 1/10th as popular as spacer kits.
    [​IMG]The Dana 44 solid axle is a popular starting point for Tacoma solid axle swaps

    Finally, we come to solid axle swaps (SAS). These kits are major modifications that require quite a bit of explanation. The big picture is that solid axles are most popular in the rock-crawling community, where there strength, durability and simple maintenance and repair requirements are major assets. If this is your area of interest, check out popular rock crawling forums like Pirate 4×4 as well as rock-crawling threads on popular Tacoma forums. Solid-axle swaps usually involve considerable labor and a very high-level understanding of vehicle suspension design, so it might be a good idea to speak with some local 4×4 shops if you’re interested in a SAS for your Tacoma.
    The Great Spacer Lift Kit Debate

    Many off-road purists detest spacer lift kits and berate anyone who installs one, citing the fact that spacer lifts negatively impact both suspension geometry and travel. While the purists are correct – spacer lifts reduce travel and negatively impact geometry – these changes may or may not impact your particular use. The fact is that, for many Tacoma owners, spacer lifts are a perfectly acceptable option.
    On the other hand, many spacer lift-kit manufacturers will attempt to gloss over the compromises inherent in using their product. While this behavior likely comes from a good place, there’s no denying that spacer lifts reduce suspension performance in many measurable ways. Spacer kits are not the best way to increase ride height in terms of suspension performance.
    So, are spacer lift kits bad?
    In a perfect world, no on would install a spacer lift to increase ride height. Instead, they would opt for a long travel kit with a new coilover, new upper and lower a-arms, new axles, tie-rod extenders, etc. Of course, these things cost money. A quality long-travel suspension kit that will increase ride height 3-4″ while retaining factory suspension performance costs in excess of $2,000. Installation costs can sometimes equal the cost of the kit, and then many long-travel kits require other modifications (new fenders, for example) that have a cost as well.
    Which brings us back to spacer lifts. For significantly less money ($200-300 for parts, $200-300 for labor), a spacer lift can increase ride height 2-3″. While they do reduce the overall performance of the suspension system, many “average” truck owners never notice the difference.
    Should you use a spacer lift kit? Hopefully the information in this article will help you make that decision.
    Tacoma Rear End Lift Kit Methods

    [​IMG]
    The standard leaf spring suspension is conceptually very simple – the spring pack mounts to the frame, and the axle attaches to the spring. However, don’t let the simplicity of the concept fool you – this suspension must resist axle wrap, allow the axle to articulate, and also carry your truck’s payload.
    [​IMG]
    Block lifts are just what they sound like – hunks of steel or (more commonly) aluminum that rest between the axle and the leaf spring. Along with a new set of u-bolts, a rear end block lift can be used to add 1-3″ of lift. Unfortunately, despite their low cost, block lifts are the least desirable of all rear-end lift methods because they increase axle wrap…which leads to a myriad of other problems including broken blocks, broken drive shafts, busted shocks, shackles, leaf springs, etc.
    Having said all of this, a small block lift (1″) doesn’t appreciably increase axle wrap and associated risks, and many Tacoma owners have no problems with 2″ block lifts. Still, this is the most undesirable rear-end lift option. Anything else would be better.
    [​IMG]
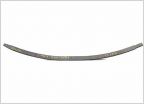
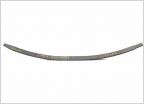
    Add-a-leafs are the next best rear end lift option. While not as good as new leaf spring packs, they offer many of the same benefits. They increase lift by increasing the rear leaf spring pack stiffness, but many people find that add-a-leafs deteriorate over time. Because you’re changing the stiffness of the spring, new shocks are recommended.
    [​IMG]
    A new leaf spring pack is the best way to lift the rear-end of your Tacoma. Replacing the stock springs with stronger, stiffer after-market springs further enhances resistance to axle wrap as well as providing lift. Unfortunately, new leaf spring packs can be pricey – four to five times as much as an add-a-leaf kit. Also, just like an add-a-leaf, new shocks are needed here too.
    [​IMG]
    Older Tacoma owners (95′ – 04.5′) can also use new shackles to gain suspension lift. This is a commonly accepted lift method that doesn’t change the existing spring stiffness, and provided the new shackles aren’t too long (2″ or less), you may be able to get away with using OEM shocks. Still, new leaf packs are the first choice.
    The Best Lift Kit Is…

    In a perfect world, every 05+ Tacoma owner would choose new coilovers and a new rear leaf pack to gain about 1.5″ of lift because:

    • 1.5″ is enough to install a solid tire upgrade – nothing massive mind you, but definitely capable (learn more about tire sizes for lifted Tacomas)
    • Going with such a small amount of lift keeps most of the factory suspension geometry – your suspension will perform as it was designed to, yet your upgraded components will give you excellent performance
    • The handling and ride will not degrade – in fact, both handing and ride may improve
    • Mostly stock vehicles with only mild lifts, new coilovers, new rear leaf packs complete the Baja 1000 every year
    However, a lot of people aren’t satisfied with 1.5″ of lift. While some of these people are looking for better off-road performance (improved clearance, bigger tires), a lot of these people just want to go BIG. Whatever you buy, the most important thing is to match your intended use with your lift kit. Buying a spacer lift and then jumping your truck off sand dunes is going to cost you a lot of money, but buying a set of coilovers for your strictly pavement truck is a waste of money too.
    In truth, there are a lot of arguments about the ‘best’ option. Read what you can, ask lots of questions, and take your time before buying.
    Lift Kits and Factory Warranty

    Many truck owners are understandably concerned about how a leveling kit or lift kit will effect their warranty. There are two answers to this question:
    1. The law protects vehicle owners. The Magnusson-Moss act makes it illegal for an auto manufacturer or auto dealer to void a warranty just because a vehicle has been modified. The only way that a vehicle warranty can be effected is if the lift or leveling kit is the direct cause of a failure.
    2. Some dealers are “cooler” about lift kits than others. Some Toyota dealers view themselves as the keepers of the sacred warranty flame, and they refuse to warranty anything unless a customer yells and screams. Other dealers, wise to the ways of the world, embrace owners who install lift kits and even install after-market lift kits themselves. If you can do your new vehicle service work at a dealer who sells brand-new lifted trucks, you’ll probably never have a warranty argument about your lift kit.
    Resource: Learn more about your legal protections warranty rights.
    Driveline Vibrations

    Often times when Tacoma owners install a new lift kit that’s 3″ or greater in size, they find that their truck has some sort of vibration that it didn’t have before. This is because the geometry of the driveline has been changed. There are three common solutions to these problems described in detail in the following articles:

    On popular forums, some Tacoma owners will guarantee that one of the items above will solve your vibration problem. But unless they’re running the same setup or they’ve gotten under your truck and taken a look at your specific geometry, they’re only guessing. The experts we’ve talked to – Tom Wood’s Custom Drive Shafts and KLM Performance – say that every truck is a little different. So, you should try one solution at a time and/or you should work with a 4×4 shop to get a professional opinion.
    It’s also worth noting that often times new wheels and tires are installed alongside a new lift kit. A poorly balanced wheel can mimic a driveline vibration, so it’s a good idea to verify wheel balance when diagnosing this problem.
     
  2. Nov 6, 2011 at 3:13 AM
    #222
    4Wheelin4Banger

    4Wheelin4Banger Supercharged Toyman

    Joined:
    Jun 15, 2011
    Member:
    #58306
    Messages:
    7,295
    Gender:
    Male
    First Name:
    Randy
    Ferntucky, NV Halfway between Reno & Falabama
    Vehicle:
    2011 4x4 Access Cab Supercharged Silver State Edition 245WHP
    3" OME lift 885s & Dakars riding on 33" KM2s
    Nice find Cody.
    I give it[​IMG][​IMG][​IMG][​IMG][​IMG]out of five.


    [​IMG]
     
    Montanahunter likes this.
  3. Nov 8, 2011 at 3:18 PM
    #223
    qb6fire

    qb6fire Well-Known Member

    Joined:
    Jul 27, 2011
    Member:
    #60653
    Messages:
    422
    Gender:
    Male
    First Name:
    Josh
    Anaheim,CA
    Vehicle:
    02 tacoma 2.7L 4 banger
    2011 alloys painted black
    rear shocks,

    bilstien 5100 vs the 5125

    would it be bad to go the 5125 rout considering the price is much cheaper?
    or is the 5100 route the way to go
     
  4. Nov 9, 2011 at 6:05 AM
    #224
    TexasTacoma37

    TexasTacoma37 Well-Known Member

    Joined:
    Sep 3, 2009
    Member:
    #22227
    Messages:
    31,174
    Gender:
    Male
    They are exactly same shock, except the 5125's come in custom lengths.
     
  5. Nov 9, 2011 at 9:10 AM
    #225
    TMW

    TMW Well-Known Member

    Joined:
    Apr 21, 2011
    Member:
    #55300
    Messages:
    317
    Gender:
    Male
    First Name:
    Tom
    Bakersfield, CA
    Vehicle:
    04 Tacoma 4x4 SR5
    Light bar and bumper guard, 3/16 steel skid plates for engine, tranny and transfer box, OME 881 springs with 5100 shocks at mid clip. AAL in rear. Positraction rear diff.
    I went with the 5125 on the rear of my 2004, I needed a longer shock due to the lift. However you will need to switch the rubber insert bushings. The 5125 comes with a 5/8 hole and the truck has a larger mounting pin or whatever it's called. I used a screw driver and pushed it in beside the rubber and applied a little WD40 on 2 sides and then drove them out with a socket and hammer. Then put the stock shock rubber in the new shocks. Leave the WD 40 on the rubber and it drives into the new shock easy. I looked at the Bilstein data on the 5125 and could not find it they will fit them with the larger rubber hole.
     
  6. Nov 29, 2011 at 7:32 PM
    #226
    PhishPhryer

    PhishPhryer Well-Known Member

    Joined:
    Nov 24, 2011
    Member:
    #67608
    Messages:
    89
    Gender:
    Male
    First Name:
    John
    Lewisberry
    Vehicle:
    '09 Tacoma SR5
    Very new to this. Thanks for all the info guys. If I'm understanding this correctly, I can put these and an AAL in the rear to achieve a 2.5" lift? Thanks again.
     
  7. Nov 29, 2011 at 7:35 PM
    #227
    Konaborne

    Konaborne Pineapples on pizza Hawaiian does not it make.

    Joined:
    Nov 21, 2010
    Member:
    #46536
    Messages:
    31,906
    Gender:
    Male
    First Name:
    Cody
    Kealakekua, Hawaii
    Vehicle:
    Lifted 00 TRD Off-Road
    fox extended travel remote resivoir coilovers, 14" eibach 600lb coils, All Pro tubular chromoly 1" uniball upper control arms, All Pro expedition leaf packs, 10" bilstein 5150 piggyback reservoir shocks 265/75r16 Goodyear wrangler MT/R kevlars wrapped around 16" Helo 791 gloss black, Mini H1 retrofits with 6000k bulbs, 18" magnaflow w/custom exhaust reroute various decals, Sockmonkey retro hood stripes
    yes

    the 5100's are cheaper from downsouthmotorsports.com though
     
  8. Nov 29, 2011 at 7:49 PM
    #228
    scocar

    scocar hypotenoper

    Joined:
    Nov 11, 2009
    Member:
    #25814
    Messages:
    39,417
    Nice job, Poi Boi. :thumbsup:
     
  9. Dec 4, 2011 at 6:40 AM
    #229
    JessysBabyGirl

    JessysBabyGirl Active Member

    Joined:
    Mar 28, 2011
    Member:
    #53900
    Messages:
    43
    Gender:
    Female
    First Name:
    Jessica
    New Jersey
    Vehicle:
    under construction
    33in terra grapplers, 10inch wide black xd addicts, 3in toytec lift, chrome painted silver around grille
    I have the toytec 3 inch lift with the front spacers. My front end still sits kind of low for my liking. Is there a way to level my truck out on top of this lift or any easy replacement?
     
  10. Dec 4, 2011 at 7:01 AM
    #230
    TexasTacoma37

    TexasTacoma37 Well-Known Member

    Joined:
    Sep 3, 2009
    Member:
    #22227
    Messages:
    31,174
    Gender:
    Male
    You can't go over 3" in the front without spindles or a drop bracket, both of which are $1000+.
     
  11. Jan 14, 2012 at 8:05 PM
    #231
    Texas Taco

    Texas Taco Well-Known Member

    Joined:
    Aug 7, 2011
    Member:
    #61311
    Messages:
    553
    Gender:
    Male
    First Name:
    Chris
    U.S.
    Vehicle:
    2016 TRD OR DC 4x4 QS
    Icon stage 4 w/RXT leaf pack and shocks, Icon hydraulic bump stops, LT285/75R16 BFG KO2s, 30" Rigid light bar, HIDs, and window tinting. More to come...
    Hey guys, please excuse my noviceness when it comes to lifts. I have a 2011 DCSB 4x4. I already have 5100's all around with the front set at the 1.75 setting. I also added a 1.5" AAL to the rear.

    I'm looking into upgrading to a 3" suspension lift. I've know that the front 5100's can be adjusted up to 2.5", however I've also heard that in doing so I will reduce the amount of travel the shock is capable of, and therefore result in a rougher ride as well as a higher potential to damage the shock. Is this true?

    As for the rear 5100's, I read that they are too short for a 3" lift and I would have to upgrade to either an extended travel rear 5100 or a different shock.

    My main concern is price vs quality. I take my truck out to the mountains/desert about once a month for some moderate offroading. I don't want to go the cheap route and raise the risk of damage to my truck as it is also my daily driver, and I don't have a ton of money to throw at it all the time due to broken components.

    I'll continue reading through the various threads here, but any additional help/opinions on the matter would greatly appreciated!
     
  12. Jan 14, 2012 at 8:08 PM
    #232
    TexasTacoma37

    TexasTacoma37 Well-Known Member

    Joined:
    Sep 3, 2009
    Member:
    #22227
    Messages:
    31,174
    Gender:
    Male
    Any suspension lift that involves stiffer or longer springs, or preloading your springs, will decrease your down travel by the amount of the lift, just as setting the 5100s up to 2.5" will do.

    You are correct that for 3" in the back, the 5100s will not suffice. You can call downsouthmotorsports and they will find a 5125 for your application.
     
  13. Jan 14, 2012 at 8:10 PM
    #233
    OZ-T

    OZ-T You are going backwards

    Joined:
    Dec 15, 2009
    Member:
    #27584
    Messages:
    50,425
    Gender:
    Male
    First Name:
    Peter North
    British Columbia
    Vehicle:
    Mag Grey 09 Trd Sport DCLB 4x4
    OME 885x , OME shocks and Dakars , Wheelers SuperBumps front and rear , 275/70/17 Hankook ATm , OEM bed mat , Weathertech digifit floor liners , Weathertech in-channel vents , headache rack , Leer 100RCC commercial canopy , TRD bedside decals removed , Devil Horns by Andres , HomerTaco Satoshi
    Nice find on that article Cody

    Oh , you're banned , nevermind
     
  14. Jan 14, 2012 at 8:18 PM
    #234
    Texas Taco

    Texas Taco Well-Known Member

    Joined:
    Aug 7, 2011
    Member:
    #61311
    Messages:
    553
    Gender:
    Male
    First Name:
    Chris
    U.S.
    Vehicle:
    2016 TRD OR DC 4x4 QS
    Icon stage 4 w/RXT leaf pack and shocks, Icon hydraulic bump stops, LT285/75R16 BFG KO2s, 30" Rigid light bar, HIDs, and window tinting. More to come...
    What if I went with new shocks/coils as well? Aside from a long travel setup, is this the case with all?
     
  15. Jan 14, 2012 at 8:22 PM
    #235
    TexasTacoma37

    TexasTacoma37 Well-Known Member

    Joined:
    Sep 3, 2009
    Member:
    #22227
    Messages:
    31,174
    Gender:
    Male
    You would have to get a mid-travel setup, which would involve longer shocks and also uniball ucas. Icon has a popular mid travel kit.
     
  16. Jan 14, 2012 at 8:26 PM
    #236
    Texas Taco

    Texas Taco Well-Known Member

    Joined:
    Aug 7, 2011
    Member:
    #61311
    Messages:
    553
    Gender:
    Male
    First Name:
    Chris
    U.S.
    Vehicle:
    2016 TRD OR DC 4x4 QS
    Icon stage 4 w/RXT leaf pack and shocks, Icon hydraulic bump stops, LT285/75R16 BFG KO2s, 30" Rigid light bar, HIDs, and window tinting. More to come...
    Thanks for the help!
     
  17. Jan 18, 2012 at 3:07 PM
    #237
    Gabe911

    Gabe911 Well-Known Member

    Joined:
    Jan 17, 2012
    Member:
    #70850
    Messages:
    259
    Gender:
    Male
    FLORIDA
    Vehicle:
    10 PreRunner MGM
    Debadged, Rear TSB, Blue LED dome and Bright White Map Lights, Hard Top Tonneau Cover, OME885 coils (no top plate spacers)OME shocks and struts, 1.5" AAL for TSB Rear,285/70/17 Trail Grapplers, 17x9 XD Addicts with 4.5 bs, Black 4" exhaust tip, Bed pocket lights, rear diff breather Mod
    I am setting my billies@ .85 w/ Eibachs (2.5" lift) and the guys from toytec tell me I should get a 1.5" block for the rear to get me level. the more I read and calculate it seems that a 1" block would level me out better????? dbl cab 2wd anybody running this set up?? thanks trying to get it right the first time
     
  18. Jan 18, 2012 at 3:23 PM
    #238
    OZ-T

    OZ-T You are going backwards

    Joined:
    Dec 15, 2009
    Member:
    #27584
    Messages:
    50,425
    Gender:
    Male
    First Name:
    Peter North
    British Columbia
    Vehicle:
    Mag Grey 09 Trd Sport DCLB 4x4
    OME 885x , OME shocks and Dakars , Wheelers SuperBumps front and rear , 275/70/17 Hankook ATm , OEM bed mat , Weathertech digifit floor liners , Weathertech in-channel vents , headache rack , Leer 100RCC commercial canopy , TRD bedside decals removed , Devil Horns by Andres , HomerTaco Satoshi
    Get a 1 1/2" AAL instead of a block .
     
  19. Jan 18, 2012 at 3:48 PM
    #239
    DirtJumper14

    DirtJumper14 Well-Known Member

    Joined:
    Jun 26, 2007
    Member:
    #1918
    Messages:
    1,089
    Gender:
    Male
    SoCal
    Vehicle:
    2005 TRD OR
    5100's, BDF grills and light bracket, big 3 upgrade, ATH bed braces, snugtop xtra vision shell, (bed, shell, hood, rock, front, rear, footwell, glove box, center console led lighting), MESO Gasshole, MESO dome and map lights, Flyeyez center console light, custom fuse panel, TRD CAI, toyota bed mat, 2013 black carpet, 2015 side mirrors, BedRug, AJT key fob, ultraguage, 8 cadillac horns acdf, pop n lock tailgate lock, energy suspension bushings, spicer greasable ujoints, Rigid lights everywhere, kenwood stereo, led tube taillights (red), 2018 T4R trail wheels, rokblok mud flaps, TRD skid plate, RCi gas tank skid plate
    Agreed. I am running 5100s all the way around with the toytec 1.5 aal. It will not bottom out and doesn't sag anymore when I have 2 bikes in the back. But the ride can be rough on some roads. Damn Cal-trans needs to step it up. Usually have stuff back there anyway and the weight makes the ride nicer. Not a recent picture. Got a color matched grill and it looks SO much better.

    [​IMG]
     
  20. Jan 18, 2012 at 5:02 PM
    #240
    Gabe911

    Gabe911 Well-Known Member

    Joined:
    Jan 17, 2012
    Member:
    #70850
    Messages:
    259
    Gender:
    Male
    FLORIDA
    Vehicle:
    10 PreRunner MGM
    Debadged, Rear TSB, Blue LED dome and Bright White Map Lights, Hard Top Tonneau Cover, OME885 coils (no top plate spacers)OME shocks and struts, 1.5" AAL for TSB Rear,285/70/17 Trail Grapplers, 17x9 XD Addicts with 4.5 bs, Black 4" exhaust tip, Bed pocket lights, rear diff breather Mod
    Ok..thanks for response...blocks IMO keep a ride a little softer in the rear and I could probably do AAL n not feel the diffrence... but will a 1.5" block level me out or will a 1" block level me out with my set up and does anyone have this set up. Thanks my rear is stock now without the rear tsb.
     

Products Discussed in

To Top