1. Welcome to Tacoma World!

    You are currently viewing as a guest! To get full-access, you need to register for a FREE account.

    As a registered member, you’ll be able to:
    • Participate in all Tacoma discussion topics
    • Communicate privately with other Tacoma owners from around the world
    • Post your own photos in our Members Gallery
    • Access all special features of the site

Retrofit's are not turning on

Discussion in 'Lighting' started by chris duby, Nov 23, 2011.

  1. Nov 23, 2011 at 6:34 PM
    #1
    chris duby

    chris duby [OP] This is where I write something clever

    Joined:
    Dec 28, 2010
    Member:
    #48315
    Messages:
    321
    Gender:
    Male
    First Name:
    Chris
    Lake Jackson, TX
    Vehicle:
    2020 TRD OR Premium
    6" Lift, 22x12 Xtreme Force XF8 wheels, 33x12.50 Nitto Trail Grapplers...
    I just recently bought some retrofit projector headlights already made and have them hooked up and they're not turning on. Only the blinkers are turning on but no low/high beams. I may not have them wired up correctly and I really need some help.

    Can someone maybe post up a wiring diagram?
     
  2. Nov 23, 2011 at 6:37 PM
    #2
    memario1214

    memario1214 Hotshot Offroad Moderator Vendor

    Joined:
    Oct 1, 2009
    Member:
    #23628
    Messages:
    19,788
    Gender:
    Male
    First Name:
    Colton
    Missoula, MT
    Vehicle:
    SOLD - 05 Dub Cab TRD Sport 4x4, CURRENT - '21 Tundra MGM Limited
    Just snap a pic of what you have going on, and I will help you where I can. I don't think there is a "wiring diagram" for it. The ballasts and bulbs are pretty much plug and play.
     
  3. Nov 23, 2011 at 6:40 PM
    #3
    Brunes

    Brunes abides.

    Joined:
    May 31, 2008
    Member:
    #7011
    Messages:
    17,562
    Gender:
    Male
    First Name:
    Rotorhead
    Around
    Vehicle:
    08 Red/Graphite and Satin Black
    Inside: Tint, Wet Okole 1/2 Piped Red/Black Covers, Black Weathertech Digital Fit Mats, URD Short Throw w/ TWM Weighted Knob, USA Spec iPod adapter. Outside: 4300K Retro w/ Angel Eyes and Red Shrouds, 5000K Blazer Fog Light Retrofit, Debadge, Bed Locking Handle, Satin Black Rims Performance: TRD/Steigmeier Blower w/ 2.7 Pulley. 668 Injectors and 320 LPH AEM Fuel pump. URD UCON and 7th Injector. DTLT Headers, URD Y-Pipe, Wicked Flow Muffler. Suspension: Both: OME Shocks Front: 886X's and TC UCAs Rear: Dakars Armor: Relentless Front Bumper Relentless High Clearance Rear w/ Tire/Rotopax Swing Out Relentless Front, Mid, and TCase skids BAMF Diff Skid Recovery and Spares: Fullsize Spare Tire 2x2 gal Rotopax 1x1 gal Rotopax 1x1 gal Water Rotopax Warn 9.5XP-S Winch Hi-Lift Extreme 60" Ironman Off-Road Recovery Kit
    Yeah...Wiring diagram is hard to give without knowing what all parts you have....Take some photos and we'll see what is going on in there.
     
  4. Nov 23, 2011 at 6:41 PM
    #4
    chris duby

    chris duby [OP] This is where I write something clever

    Joined:
    Dec 28, 2010
    Member:
    #48315
    Messages:
    321
    Gender:
    Male
    First Name:
    Chris
    Lake Jackson, TX
    Vehicle:
    2020 TRD OR Premium
    6" Lift, 22x12 Xtreme Force XF8 wheels, 33x12.50 Nitto Trail Grapplers...
    It looks very simple but I think it may be a bad ground... I'll post some here in a minute.
     
  5. Nov 23, 2011 at 6:42 PM
    #5
    Brunes

    Brunes abides.

    Joined:
    May 31, 2008
    Member:
    #7011
    Messages:
    17,562
    Gender:
    Male
    First Name:
    Rotorhead
    Around
    Vehicle:
    08 Red/Graphite and Satin Black
    Inside: Tint, Wet Okole 1/2 Piped Red/Black Covers, Black Weathertech Digital Fit Mats, URD Short Throw w/ TWM Weighted Knob, USA Spec iPod adapter. Outside: 4300K Retro w/ Angel Eyes and Red Shrouds, 5000K Blazer Fog Light Retrofit, Debadge, Bed Locking Handle, Satin Black Rims Performance: TRD/Steigmeier Blower w/ 2.7 Pulley. 668 Injectors and 320 LPH AEM Fuel pump. URD UCON and 7th Injector. DTLT Headers, URD Y-Pipe, Wicked Flow Muffler. Suspension: Both: OME Shocks Front: 886X's and TC UCAs Rear: Dakars Armor: Relentless Front Bumper Relentless High Clearance Rear w/ Tire/Rotopax Swing Out Relentless Front, Mid, and TCase skids BAMF Diff Skid Recovery and Spares: Fullsize Spare Tire 2x2 gal Rotopax 1x1 gal Rotopax 1x1 gal Water Rotopax Warn 9.5XP-S Winch Hi-Lift Extreme 60" Ironman Off-Road Recovery Kit
    I'd believe it...Grounding is a fickle thing.
     
  6. Nov 23, 2011 at 7:05 PM
    #6
    chris duby

    chris duby [OP] This is where I write something clever

    Joined:
    Dec 28, 2010
    Member:
    #48315
    Messages:
    321
    Gender:
    Male
    First Name:
    Chris
    Lake Jackson, TX
    Vehicle:
    2020 TRD OR Premium
    6" Lift, 22x12 Xtreme Force XF8 wheels, 33x12.50 Nitto Trail Grapplers...
    Here is the wiring relay and the ground is right next to it. I sanded off the paint for the ground and used a carbon steel washer. The relay is wired directly to the battery with a 20 amp in line good fuse. Then the relay runs to the both ballast, a little wire running out the back of both headlights, two grounds and to the driver side stock 3 prong harness.
    2011-11-23204158_c0e50bca6a916fd067cc2adfe95c24a22f33c999.jpg

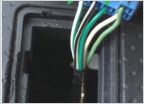
    Here is the back of the headlight (before the rubber seal) that runs to the ballast and to the relay
    2011-11-23204236_c02fef9c1a717e38436149edaaffa97434f84c25.jpg

    The Retrofit's did not come with a ballast so I just used mine from my other HID's... this may also be the problem.
    2011-11-23204322_33dc3a379d57860fe1b93367f506b0c7262a3b4d.jpg
     
  7. Nov 23, 2011 at 7:21 PM
    #7
    chris duby

    chris duby [OP] This is where I write something clever

    Joined:
    Dec 28, 2010
    Member:
    #48315
    Messages:
    321
    Gender:
    Male
    First Name:
    Chris
    Lake Jackson, TX
    Vehicle:
    2020 TRD OR Premium
    6" Lift, 22x12 Xtreme Force XF8 wheels, 33x12.50 Nitto Trail Grapplers...
    I used a tester and found out that everything past the relay is not receiving power... could be it.
     
  8. Nov 23, 2011 at 7:25 PM
    #8
    JustinL

    JustinL Well-Known Member

    Joined:
    Jan 31, 2011
    Member:
    #50299
    Messages:
    3,756
    Gender:
    Male
    First Name:
    Justin
    Berlin, CT
    Vehicle:
    2009 TRD OffRoad DCSB Pyrite Mica
    2012 Conversion
    Try a pep boys (or whatever there is in TX) they might have relays in stock to be used with aftermarket fog lights kits.
     
  9. Nov 23, 2011 at 7:49 PM
    #9
    08PRELB

    08PRELB Don't Tread On Me

    Joined:
    Jun 3, 2010
    Member:
    #38329
    Messages:
    1,073
    Gender:
    Male
    First Name:
    Adam
    805
    Vehicle:
    08 Prerunner LB
    Toy Tech Ultimate Lift kit,Buildt Right UCA's 285/70/17 BFG AT, Camburg Spindles, BHLM, K&N, Flow Master 50, Spider Trax, URD MAF CAL, Satoshi Grill, any time fog mod, 20% tint, Katzkins Leather Interior, FX-R Projector Retro
    Try switching the wire connections between the high/low solenoid and the ballist. You could have the connections backwards. Did the person you bought them from test the lights with the wiring harness provided?
     
  10. Nov 23, 2011 at 7:49 PM
    #10
    Muy Grande

    Muy Grande Well-Known Member

    Joined:
    Feb 26, 2009
    Member:
    #14111
    Messages:
    1,400
    Gender:
    Male
    First Name:
    John
    Dallas, TX; RGV, TX
    Vehicle:
    06 DC TRD
    Suspension: DHoes up front, Dakar and OME out back. Audio: Alpine w205 w/ pair of Alpine Amps, Image Dynamic 6.5 Component Speakers up front and Image Dynamic Subs in the Back. Armor: ARB Bull Bar, Rocktek rear bumper and custom rock sliders. Other: Rigid Industries LED Light Bar, Platinum DieHard Battery, BlueSea Fuse Block, rear lights, bed lights, leds inside.
    Chris,

    The Wire harness has 2 sides.

    Drivers Side (has the relay and in-line fuse) - has 3 prong for factory headlight connector, has connector for HID Ballast, has connector for projector motor, has a positive and negative.

    First connect the positive and negative wires directly to the battery (positive to + terminal and negative to - terminal). Connect the 3 prong factory connection, connect the ballast, then connect the projector motor wire. Done.

    Passenger side (has 2 connections and ground wire) - the key on this side is find a good ground if you locate the power steering fluid recepticle there is a wire that is grounded, this is your ground point. Now connect the HID Ballast to the connector and the projector wire to the connector. Done.

    At this point you should atleast have your HIDs on Low Beam coming on, flip the switch and check if your high beams work. If you do not have the low beams come on switch the ballast if that still doesnt work, re-check your grounds.

    If may very well be the ground that is on the passenger side, strip it and try it bare wire.

    If it still doesn't work it might be your Ballast.

    Hope this helps.

    J
     
  11. Nov 23, 2011 at 9:37 PM
    #11
    chris duby

    chris duby [OP] This is where I write something clever

    Joined:
    Dec 28, 2010
    Member:
    #48315
    Messages:
    321
    Gender:
    Male
    First Name:
    Chris
    Lake Jackson, TX
    Vehicle:
    2020 TRD OR Premium
    6" Lift, 22x12 Xtreme Force XF8 wheels, 33x12.50 Nitto Trail Grapplers...
    Thanks John for the phone call and all the help :thumbsup:

    We found out it was the relay so I just bypassed it for now until I get a new one. I'm loving these projectors... nothing else compares to them.
     

Products Discussed in

To Top