

-
Welcome to Tacoma World!
You are currently viewing as a guest! To get full-access, you need to register for a FREE account.
As a registered member, you’ll be able to:- Participate in all Tacoma discussion topics
- Communicate privately with other Tacoma owners from around the world
- Post your own photos in our Members Gallery
- Access all special features of the site
 Painting 2nd Gen fender flares
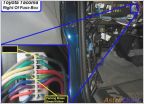 Alpine ILX Needs Parking Brake Engage Signal
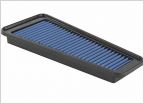 AEF air filter
 Replaced blower motor and resistor, same problem
 CV axle removal strap
El Cheapo Heated Mirrors
Discussion in '2nd Gen. Tacomas (2005-2015)' started by tsilliker, Oct 7, 2008.
Page 15 of 22
Page 15 of 22
Products Discussed in


