1. Welcome to Tacoma World!

    You are currently viewing as a guest! To get full-access, you need to register for a FREE account.

    As a registered member, you’ll be able to:
    • Participate in all Tacoma discussion topics
    • Communicate privately with other Tacoma owners from around the world
    • Post your own photos in our Members Gallery
    • Access all special features of the site

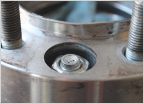
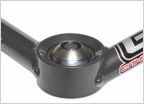
camburg long travel install questions!!

Discussion in 'Long Travel Suspension' started by 97yota4wd, Dec 11, 2011.

  1. Dec 11, 2011 at 3:28 PM
    #1
    97yota4wd

    97yota4wd [OP] Well-Known Member

    Joined:
    Aug 26, 2010
    Member:
    #42280
    Messages:
    12,846
    Gender:
    Male
    First Name:
    Eric
    Mesa, AZ
    Vehicle:
    alot of metal, small engine, decent travel.
    caged, camburg long travel, 50t leafpack (soon to be installed) light rack over cab, 5pt harnesses etc
    okay so im working on taking everything off right now.

    to get the LCAs off did you need to take off the steering rack to get the lca bolt out or is there something i dont know? (the bolt on the rear of the lca)

    the camber bolt inside the bushing wont come out, do i just donkey hammer the shit out of it?

    and theres 5 cracks in my coil bucket. figured id throw that out there. thats only on the passenger side too
     
  2. Dec 11, 2011 at 3:47 PM
    #2
    Mxpatriot

    Mxpatriot Well-Known Member

    Joined:
    Nov 18, 2009
    Member:
    #26163
    Messages:
    3,625
    Gender:
    Male
    Vehicle:
    '06 4x4 AP LT and Locked
    I've never crawled under your year truck, do you have a picture of what you're dealing with on the LCA bolt?

    And yes, you're going to need the BFH for a few things along the way.
     
  3. Dec 11, 2011 at 4:00 PM
    #3
    97yota4wd

    97yota4wd [OP] Well-Known Member

    Joined:
    Aug 26, 2010
    Member:
    #42280
    Messages:
    12,846
    Gender:
    Male
    First Name:
    Eric
    Mesa, AZ
    Vehicle:
    alot of metal, small engine, decent travel.
    caged, camburg long travel, 50t leafpack (soon to be installed) light rack over cab, 5pt harnesses etc
    ill try to get a picture up right now
     
  4. Dec 11, 2011 at 4:12 PM
    #4
    04LTtacoma

    04LTtacoma Well-Known Member

    Joined:
    May 15, 2010
    Member:
    #37190
    Messages:
    11,268
    Gender:
    Male
    Oregon
    You can take the LCA off without removing the steering rack.

    EDIT: THE LCA are a bitch to take out. I remember when I was removing the LCA from the truck's frame I had to cut the LCA out because the bolt was seized inside of the bushing.
     
  5. Dec 11, 2011 at 4:14 PM
    #5
    97yota4wd

    97yota4wd [OP] Well-Known Member

    Joined:
    Aug 26, 2010
    Member:
    #42280
    Messages:
    12,846
    Gender:
    Male
    First Name:
    Eric
    Mesa, AZ
    Vehicle:
    alot of metal, small engine, decent travel.
    caged, camburg long travel, 50t leafpack (soon to be installed) light rack over cab, 5pt harnesses etc
    how? you cant get the bolt out
     
  6. Dec 11, 2011 at 4:24 PM
    #6
    04LTtacoma

    04LTtacoma Well-Known Member

    Joined:
    May 15, 2010
    Member:
    #37190
    Messages:
    11,268
    Gender:
    Male
    Oregon

    Is the bolt seized in the bushing?
     
  7. Dec 11, 2011 at 4:27 PM
    #7
    97yota4wd

    97yota4wd [OP] Well-Known Member

    Joined:
    Aug 26, 2010
    Member:
    #42280
    Messages:
    12,846
    Gender:
    Male
    First Name:
    Eric
    Mesa, AZ
    Vehicle:
    alot of metal, small engine, decent travel.
    caged, camburg long travel, 50t leafpack (soon to be installed) light rack over cab, 5pt harnesses etc
    you cant get the back bolt out because it hits the steering rack, and the front bolt is out but the hollow piece is stuck in there
     
  8. Dec 11, 2011 at 4:30 PM
    #8
    97yota4wd

    97yota4wd [OP] Well-Known Member

    Joined:
    Aug 26, 2010
    Member:
    #42280
    Messages:
    12,846
    Gender:
    Male
    First Name:
    Eric
    Mesa, AZ
    Vehicle:
    alot of metal, small engine, decent travel.
    caged, camburg long travel, 50t leafpack (soon to be installed) light rack over cab, 5pt harnesses etc
    hollow piece thats stuck.

    other side of hollow piece thats stuck
     
  9. Dec 11, 2011 at 4:33 PM
    #9
    97yota4wd

    97yota4wd [OP] Well-Known Member

    Joined:
    Aug 26, 2010
    Member:
    #42280
    Messages:
    12,846
    Gender:
    Male
    First Name:
    Eric
    Mesa, AZ
    Vehicle:
    alot of metal, small engine, decent travel.
    caged, camburg long travel, 50t leafpack (soon to be installed) light rack over cab, 5pt harnesses etc
    and this is why i think i have to take the rack off?


  10. Dec 11, 2011 at 4:38 PM
    #10
    97yota4wd

    97yota4wd [OP] Well-Known Member

    Joined:
    Aug 26, 2010
    Member:
    #42280
    Messages:
    12,846
    Gender:
    Male
    First Name:
    Eric
    Mesa, AZ
    Vehicle:
    alot of metal, small engine, decent travel.
    caged, camburg long travel, 50t leafpack (soon to be installed) light rack over cab, 5pt harnesses etc
    some cracks too


  11. Dec 11, 2011 at 4:39 PM
    #11
    04LTtacoma

    04LTtacoma Well-Known Member

    Joined:
    May 15, 2010
    Member:
    #37190
    Messages:
    11,268
    Gender:
    Male
    Oregon

    You are going to possibly have to cut that piece out. You can try removing the steering rack, but I bet you are going to have to cut it out.
     
  12. Dec 11, 2011 at 4:42 PM
    #12
    97yota4wd

    97yota4wd [OP] Well-Known Member

    Joined:
    Aug 26, 2010
    Member:
    #42280
    Messages:
    12,846
    Gender:
    Male
    First Name:
    Eric
    Mesa, AZ
    Vehicle:
    alot of metal, small engine, decent travel.
    caged, camburg long travel, 50t leafpack (soon to be installed) light rack over cab, 5pt harnesses etc
    this is why the steeringrack needs to come off VVV


  13. Dec 11, 2011 at 4:48 PM
    #13
    nelson18matt

    nelson18matt Well-Known Member

    Joined:
    Mar 19, 2009
    Member:
    #14939
    Messages:
    13,667
    Gender:
    Male
    Goodyear, Arizona
    Vehicle:
    2004 Long Travel Tacoma
    *SOLD*
    just disconnect the tie rod ends from the rack, you're going to have to take those off anyways

    and holy shit on the cracked buckets. do not run the truck with out getting those fixed
     
  14. Dec 11, 2011 at 4:49 PM
    #14
    04LTtacoma

    04LTtacoma Well-Known Member

    Joined:
    May 15, 2010
    Member:
    #37190
    Messages:
    11,268
    Gender:
    Male
    Oregon

    Then go ahead and take the steering rack off. I am pretty sure the sleeve it seized inside of the frame though. As for your coil bucket you shoudl ask Adrian how he fixed his crack coil bucket.
     
  15. Dec 11, 2011 at 4:57 PM
    #15
    theduck911

    theduck911 Max's Canadian Twin

    Joined:
    Oct 28, 2010
    Member:
    #45374
    Messages:
    3,938
    Gender:
    Male
    First Name:
    Max
    Northwestern Ontario, Canada
    Vehicle:
    Locked and Geared!
    There is an install Manual on the TC website, but it should be pretty similar :notsure:

    You really beat on this truck eh, Cracked C/O's is crazy, you could groove it, weld it together, then create a top & bottom ring/plate and sandwich it between the 2 plates, then it would be plenty strong.

    And while you repairing that, install some UCA Shear Plates/Gussets
     
  16. Dec 11, 2011 at 5:03 PM
    #16
    97yota4wd

    97yota4wd [OP] Well-Known Member

    Joined:
    Aug 26, 2010
    Member:
    #42280
    Messages:
    12,846
    Gender:
    Male
    First Name:
    Eric
    Mesa, AZ
    Vehicle:
    alot of metal, small engine, decent travel.
    caged, camburg long travel, 50t leafpack (soon to be installed) light rack over cab, 5pt harnesses etc
    how?? can i disconnect it from inside the boot? cause the bolt would be hitting the boot when i take it out.

    i wont my dads going to bring his welder home tomorrow and were gonna weld it..

    thats the problem, the nut on the bottom facing up is stripped.

    :eek::D


    yeah i do beat on it way harder than anyone else i really know..

    what do you mean? like cut out 2 circles in 1/4 inch and sandwhich it together when i put my shocks on?

    and i was going to do the gussets, but im going to run 12 inch c/os off my engine cage in the future...
     
  17. Dec 11, 2011 at 5:09 PM
    #17
    theduck911

    theduck911 Max's Canadian Twin

    Joined:
    Oct 28, 2010
    Member:
    #45374
    Messages:
    3,938
    Gender:
    Male
    First Name:
    Max
    Northwestern Ontario, Canada
    Vehicle:
    Locked and Geared!
    Yes, cut out 2 rings that fit around that top lip and with the holes drilled out, 1/4 might be a little excessive as it will set your shock that much lower on that side, may 3/16 for the top and 1/8 for the bottom, might even be enough. Def. Recommend getting some new Grade 8 hardware for the C/O top plate before install.

    And well the UCA mount isn't going to move, so I'd still put those gussets on there.
     
  18. Dec 11, 2011 at 5:13 PM
    #18
    97yota4wd

    97yota4wd [OP] Well-Known Member

    Joined:
    Aug 26, 2010
    Member:
    #42280
    Messages:
    12,846
    Gender:
    Male
    First Name:
    Eric
    Mesa, AZ
    Vehicle:
    alot of metal, small engine, decent travel.
    caged, camburg long travel, 50t leafpack (soon to be installed) light rack over cab, 5pt harnesses etc
    the cracks are on both sides.. lol driver and passenger

    and doing the sammich will only fix the cracks on the top, not the ones on the sides, especially the one on the inside corner.

    dont you cut that whole part off and re make mounts for the uca?
     
  19. Dec 11, 2011 at 5:16 PM
    #19
    theduck911

    theduck911 Max's Canadian Twin

    Joined:
    Oct 28, 2010
    Member:
    #45374
    Messages:
    3,938
    Gender:
    Male
    First Name:
    Max
    Northwestern Ontario, Canada
    Vehicle:
    Locked and Geared!
    Oh okay, well I still think 3/16 on top & bottom would be plenty on both sides.

    Can you get a better picture of the side cracks can't really tell from the one you posted.

    You don't have too no, you can just cut out the coil-bucket top ring (and then reinforce the mount) and then have the UCA in the same place. Check out Vitang's build thread too see what I'm talking about (2nd Gen but same idea)
     
  20. Dec 11, 2011 at 5:17 PM
    #20
    nelson18matt

    nelson18matt Well-Known Member

    Joined:
    Mar 19, 2009
    Member:
    #14939
    Messages:
    13,667
    Gender:
    Male
    Goodyear, Arizona
    Vehicle:
    2004 Long Travel Tacoma
    *SOLD*
    how soon are you planning to run the 12's???
     

Products Discussed in

To Top