

-
Welcome to Tacoma World!
You are currently viewing as a guest! To get full-access, you need to register for a FREE account.
As a registered member, you’ll be able to:- Participate in all Tacoma discussion topics
- Communicate privately with other Tacoma owners from around the world
- Post your own photos in our Members Gallery
- Access all special features of the site
 Will Rivnuts work on double cab roof?
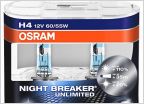 Headlight bulb replacement
 Bilstein B8 5100 over OEM?
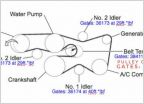 Idler Pulley Gates Parts (Solved)
 Light burned out on A/C fan switch
 2nd Gen Bolt On Grill
Step by step removal and installation of e-locker 3rd member
Discussion in '2nd Gen. Tacomas (2005-2015)' started by MonkeyProof, Dec 19, 2011.
Page 1 of 22
Page 1 of 22
