1. Welcome to Tacoma World!

    You are currently viewing as a guest! To get full-access, you need to register for a FREE account.

    As a registered member, you’ll be able to:
    • Participate in all Tacoma discussion topics
    • Communicate privately with other Tacoma owners from around the world
    • Post your own photos in our Members Gallery
    • Access all special features of the site

Help removing fog light switch

Discussion in '2nd Gen. Tacomas (2005-2015)' started by Redgrom, Dec 29, 2011.

  1. Dec 29, 2011 at 7:31 AM
    #1
    Redgrom

    Redgrom [OP] http://www.tacomaworld.com/forum/2nd-gen-builds/29

    Joined:
    Feb 11, 2010
    Member:
    #31150
    Messages:
    1,717
    Gender:
    Male
    First Name:
    Brent
    san clemente
    Vehicle:
    4x4 taco and 96 ford bronco
    ATO front skid (need more but icon's might fail if I hang anything else from my truck) All-Pro front bumper thanks to a good deal here and a pesky encounter with a rock or 20, total chaos uppers.
    Hello, I am trying to use my sock fog light switch for my new lights and can't figure out how to remove it. The lower row is easy to pop out but can't seam to reach the upper switch. What am I missing? (It's a 05 if that matters)
     
  2. Dec 29, 2011 at 7:41 AM
    #2
    Rusty 06 4x4

    Rusty 06 4x4 NBHNC

    Joined:
    Sep 26, 2011
    Member:
    #64142
    Messages:
    2,191
    Gender:
    Male
    First Name:
    Rusty
    West Georgia
    Vehicle:
    2006 4x4 Tacoma TRD DCSB
    search the forums I know I saw some do a write up on putting other stuff in those plugs.. search 2nd gens..
     
  3. Dec 29, 2011 at 7:55 AM
    #3
    Redgrom

    Redgrom [OP] http://www.tacomaworld.com/forum/2nd-gen-builds/29

    Joined:
    Feb 11, 2010
    Member:
    #31150
    Messages:
    1,717
    Gender:
    Male
    First Name:
    Brent
    san clemente
    Vehicle:
    4x4 taco and 96 ford bronco
    ATO front skid (need more but icon's might fail if I hang anything else from my truck) All-Pro front bumper thanks to a good deal here and a pesky encounter with a rock or 20, total chaos uppers.
    Already tried searching "fog light switch removal" but could not find anything. Ill try to expand my search.
    Thanks.
     
  4. Dec 29, 2011 at 11:41 AM
    #4
    TerryS

    TerryS Well-Known Member

    Joined:
    Aug 26, 2010
    Member:
    #42275
    Messages:
    266
    Gender:
    Male
    First Name:
    Terry
    Cape Cod, Mass.
    Vehicle:
    '24 Celestial Silver DCLB SR5
    OEM cast aluminum running boards & tonneau cover.
    I got the fog light switch out by taking out the center blank, then I got the switch out by reaching in and pushing it out. To get the center blank out, I tucked strong fishing line behind the face of the blank, then yanked it out. You'll need something thin to tuck the line into the narrow space between the dash and the blank itself.

    Hope this helps.
     
  5. Jan 27, 2014 at 1:00 AM
    #5
    yarro

    yarro Well-Known Member

    Joined:
    Sep 17, 2011
    Member:
    #63689
    Messages:
    742
    Gender:
    Male
    Tacoma, WA
    Vehicle:
    11' TRD Off Road DCSB
    TREX Eyelids. RIGID Fogs Toyota Skid Plate. AVID Light Bar. Rigid SR 20"Combo LED bar OEM Toyota Running Boards, LEER Canopy RIGID Roof Rack - COMPLETE. FJ cruiser Switch panel install in center isle. (4 new slots for OEM switches) Glove box & Center counsel Lighting with amber switch.
    Hey buddy just did mine, really easy, this is what you do. Use a tiny flat screw driver to remove the mirror control panel, also remove the left side cubby holder thing right under it. This will give you space to see all the way up (from the bottom, laying on the floor of drivers side) to the fog light switch panel and others. Use a flashlight to see what your doing and a flat screw driver to push it out from behind and walah!!! ;) i will make a write up soon with pics. THIS IS TE FASTEST AND CLEANEST WAY TO DO THIS!!:)
     
  6. Oct 12, 2015 at 3:51 AM
    #6
    kgarrett11

    kgarrett11 Master Yoda

    Joined:
    Jun 10, 2015
    Member:
    #157122
    Messages:
    3,599
    First Name:
    Garrett
    CA desert
    Vehicle:
    2015 DCLB
    What about getting the wiring in there? I am currently trying to tackle this as well
     
  7. Oct 12, 2015 at 4:51 AM
    #7
    Up2NoGood

    Up2NoGood Well-Known Member

    Joined:
    Jun 23, 2014
    Member:
    #132511
    Messages:
    3,302
    Gender:
    Male
    First Name:
    Jaimes
    BC, Canada
    Vehicle:
    2014 TRD Sport DCLB
    Sandman614 likes this.
  8. Dec 14, 2015 at 1:41 PM
    #8
    Sandman614

    Sandman614 Ex-Snarky TWSS elf, Travis #hotsavannahdotcom

    Joined:
    Oct 26, 2010
    Member:
    #45273
    Messages:
    35,894
    Gender:
    Male
    First Name:
    Tim
    Garner, NC/Boone, NC
    Vehicle:
    '06 SR5 Off Road
    ARB Front Bumper, Projector Headlights w/Slimcubby 4300K HID's, Oznium LED's, LED taillights, DIY Washable Cabin Moose Filter, Sockmonkey SR5 Off Road, Aux Audio plug, OME 886x, OME Nitrochargers, Wheelers 3 Leaf Progressive AAL, ImMrYo Rear-View Mirror Lift Bracket, Dodge D-Rings
    Thanks for the link.
    I'm swapping mine out for this switch for my light bar! #aironboard
    IMG_20151214_163934.jpg IMG_20151214_164008.jpg
     
    igno1tus, mrkabc and Old School like this.
  9. Jan 28, 2016 at 12:38 PM
    #9
    cvisinho

    cvisinho Well-Known Member

    Joined:
    Jan 21, 2013
    Member:
    #95694
    Messages:
    889
    Gender:
    Male
    First Name:
    Chris
    Rhode Island
    Vehicle:
    2005 TRD Sport DCSB new frame edition
    Bilstein 5100's, Eibach springs, Cali Raised Amber fogs,Cali Raised side projecting ditch lights, 17" gunmetal trd pro reps w/ falken wildpeaks, MESO interior lighting, Alpine ilx Android auto head unit, rear view camera, blue sea fuse panel, mbrp cat back, Morimoto retros in Depos, Ranch cap, triple black clazzios, DIY thin lip satoshi with FJ letters, oem roof rack, AJT climate knobs, slim sub behind rear seat, fosgate speakers all around, thule cap rack
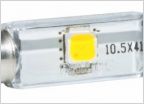
    What led bulb size is that?
    T1.5?
     
  10. Jan 28, 2016 at 12:54 PM
    #10
    mrkabc

    mrkabc Mall Crawler with a Locker

    Joined:
    Jun 9, 2014
    Member:
    #131627
    Messages:
    1,642
    Gender:
    Male
    First Name:
    Art
    Corona, CA
    Vehicle:
    2017 MGM DCSB TRD OR
    Morimoto XB LED Head & Fog Lights, Cali Raised Stealth Light bar, OEM Roof Rack, Homelink Compass Mirror, Power Tailgate Lock, LED bed lights, MESO mirrors, gashole, switch panel & Stage 2 tails, PRO grille. Where's the mall?
    Hahahahaha I love that switch!!! Where did you get it?
     
  11. Jan 28, 2016 at 1:02 PM
    #11
    Siblue

    Siblue Well-Known Member

    Joined:
    Dec 2, 2014
    Member:
    #143489
    Messages:
    3,152
    Gender:
    Male
    First Name:
    Ryan
    So Cal
    Vehicle:
    25 Tundra TRD pro
    bulb size is T3
     
    cvisinho[QUOTED] likes this.
  12. Jan 28, 2016 at 1:05 PM
    #12
    Sandman614

    Sandman614 Ex-Snarky TWSS elf, Travis #hotsavannahdotcom

    Joined:
    Oct 26, 2010
    Member:
    #45273
    Messages:
    35,894
    Gender:
    Male
    First Name:
    Tim
    Garner, NC/Boone, NC
    Vehicle:
    '06 SR5 Off Road
    ARB Front Bumper, Projector Headlights w/Slimcubby 4300K HID's, Oznium LED's, LED taillights, DIY Washable Cabin Moose Filter, Sockmonkey SR5 Off Road, Aux Audio plug, OME 886x, OME Nitrochargers, Wheelers 3 Leaf Progressive AAL, ImMrYo Rear-View Mirror Lift Bracket, Dodge D-Rings
    aironboard.com/online
     
  13. Apr 3, 2016 at 2:26 PM
    #13
    BelizeMe

    BelizeMe Active Member

    Joined:
    Feb 7, 2016
    Member:
    #177391
    Messages:
    26
    First Name:
    Chad
    Plano
    Vehicle:
    2016 White Tacoma 4x4 base with utility package.
    None, first timer looking for recommendations.

    This blank pushed out really easy, didn't snap or click or anything? I just snaked my arm around until I could push first on the cubby spot that is molded into the switch cover and then to this blank which almost fell out in my hand?


    What I want to do is mod/add a garage door opener to my base model taco.
    http://www.cnet.com/roadshow/auto/2016-toyota-tacoma-4wd-access-cab-i4-at-sr/specs/

    After a week or so of crawling the forums I found this post and a more specific one here.
    https://www.tacomaworld.com/threads/no-homelink®-no-problem-first-mod.394920/

    There are some badass switches here and the only ones label "Garage Opener" I could find thus far.
    http://www.aironboard.com/online/pu...nt-garage-opener-momentary-led-green-red.html


    I do have questions, one to remove the cubby/switch cover do I simply pull, pry and push it out for the clips to release OR do I first have to remove a dash 10mm bolt? Almost every where I have seen has this topic they say you have to pull the door sill, the foot-rest and this lower dash bolt for the switch panel to snap off. Granted all those posts are on older models with completely different interiors. Question is does this pop off or should I get more leverage on it? I've already scratched and marred it with a screwdriver (only noticable to me) and don't want to do more damage.
     
    Last edited: Apr 3, 2016
  14. Sep 12, 2016 at 6:15 AM
    #14
    DigitalSensei

    DigitalSensei Well-Known Member

    Joined:
    Jul 25, 2016
    Member:
    #192841
    Messages:
    81
    Gender:
    Male
    Texas - DFW Area
    Vehicle:
    2016 4x4 Off Road INFERNO!
    I too would like an answer on this!
     
  15. Jun 2, 2017 at 1:42 PM
    #15
    Tacodaniel

    Tacodaniel New Member

    Joined:
    Jun 2, 2017
    Member:
    #220528
    Messages:
    1
    Gender:
    Male
    First Name:
    Daniel
    Topeka, KS
    Vehicle:
    2005 Tacoma 4x4
    Blacked out grille & badging, lift kit, bigger Nittos, Ballistic wheels, fender flares, LED headlights.
    Easy peasy. No need to take out mirror control, cubby tray, or wreck your dash. 2 ordinary kitchen butter knives, nice & dull: slip one in on left, other on right, like using a slim jim. Wiggle both knives, while pulling them. Switch pops right out.
     
  16. Jun 2, 2017 at 2:55 PM
    #16
    Pigpen

    Pigpen My truck is never clean

    Joined:
    Mar 6, 2012
    Member:
    #74319
    Messages:
    9,165
    Gender:
    Male
    First Name:
    Dan
    Northwest Montana
    Vehicle:
    2012 AC Manual 4.0 4x4 Base Model
    Access cab with child seat in the back, yellow wire mod, diff breather relocated to tail light, engine block heater, Leer topper with Yakima tracks and rack, Yakima rack on cab, Ride Rite air bags with Daystar cradles, CBI hidden front hitch, wired for winch front and rear Warn quick connect, Warn x8000i on external carrier, sway bar delete, trailer plug relocated to under bumper, Pelfreybilt IFS and Mid skids, BAMF Tcase skid, ECGS front diff bushing, ARB CKMA12 compressor, 255/85/16 Backcountry MT 3 load E tires on stock steel rims, Toyo M55 tires (same size) on another set of stock steelies, Up2NoGood heated mirror kit, Husky X-act Contour front floor liners, Northstar AGM 24F battery under the hood, Northstar 27F in the cab, Redarc 25 amp DC to DC charger, Pelfreybilt bolt on sliders with kickout and top plates, TRD Pro headlights, Depo smoked tail lights, Energy suspension body mount bushing kit, OME Dakar leaf packs with AAL, OME rear shocks, OME 90021 front shocks with 885 coils, SPC LR UCAs, Up2NoGood 2wd low range mod, 4 Wheel Campers Grandby slide in camper, 4xinnovations high clearance rear bumper, Uniclutch 800 lb/ft clutch
    Just run a screw into it and pull on the screw
     
  17. Jun 2, 2017 at 6:19 PM
    #17
    igno1tus

    igno1tus Small member

    Joined:
    Apr 15, 2017
    Member:
    #216359
    Messages:
    1,816
    Lehigh Valley Area , PA
    Vehicle:
    '07 Tacoma Access Cab TRD Off Road

    Love the switch , if anyone every asks tell'em it's for a flame thrower lol
     
    Sandman614[QUOTED] likes this.
  18. Sep 6, 2019 at 9:44 PM
    #18
    mphawk

    mphawk Member

    Joined:
    Jan 6, 2016
    Member:
    #174224
    Messages:
    8
    Gender:
    Male
    First Name:
    Matt
    Bristow, VA
    Vehicle:
    2010 DC TRD OR
    OME 2885 front coil overs, Bilstein 5100 front, 5125 rear, ICON RXT pack (option 2), JBA UCA, Whiteline LCA Bushings (Best thing I've Done), ECGS front diff bushing, VLEDS Triton V6 headlight bulbs, VLEDS DRL, Power Stop front calipers, SOS rear bumper, RCI skid plate, Rough Country step bars, TRD gloss wheels, KO2 265 75. With the OME coil overs, ICON RXT option 2, I essentially achieved a 2 inch lift with no vibe issues, way less body roll than stock. With the Whiteline LCA bushings, my steering is hands off straight on the highway...night and day difference from OEM. Replaced upper and lower control arms, sway bar bushings, alignment cams and had some alignment cam stops welded on at 120K miles. Drives better now than when it was brand new.
    412836AC-FD21-4138-815D-B4EC1DD76294.jpg I just replaced the back lighting bulbs in every switch except for the inverter...

    Thanks for all the tips in previous posts. I ended up dropping the lower dash to get to the upper row of switches. Pretty straight forward. (Video link below)

    Ordered the T3 bulbs from Autolumination. The amber matched my 2010 dash perfectly. They lock and unlock in to place with a 1/4 turn from a straight slot screwdriver. (Had to shake the old ones out of switch once unlocked)

    The autolumination bulbs are tinted glass....The OEM bulbs had like a silicon condom-like cover on them. My guess is, that the heat retained by the silicon cover may be one of the reasons that the OEM ones didn’t last long...maybe?....so hopefully the tinted glass bulbs last longer...

    Found a pretty good video...it’s actually showing how to remove instrument cluster. For gaining access to top row of switches...I was able to stop once i got to the part where the lower dash is separated from the upper..(10 minutes tops to get the dash halves separated)

    I tried the fishing line...the butter knives...trim removal tools...My upper switches were locked in tight....couldn’t budge the upper switches till I separated the dash halves...and was able to get a small screwdriver behind them for some persuasion. Top switches seemed to take considerably more force than lowers..

    Dash disassembly video:

    https://m.youtube.com/watch?v=bh_SmWsSZH8
     
    jkuniverse likes this.
  19. Sep 6, 2019 at 9:59 PM
    #19
    mphawk

    mphawk Member

    Joined:
    Jan 6, 2016
    Member:
    #174224
    Messages:
    8
    Gender:
    Male
    First Name:
    Matt
    Bristow, VA
    Vehicle:
    2010 DC TRD OR
    OME 2885 front coil overs, Bilstein 5100 front, 5125 rear, ICON RXT pack (option 2), JBA UCA, Whiteline LCA Bushings (Best thing I've Done), ECGS front diff bushing, VLEDS Triton V6 headlight bulbs, VLEDS DRL, Power Stop front calipers, SOS rear bumper, RCI skid plate, Rough Country step bars, TRD gloss wheels, KO2 265 75. With the OME coil overs, ICON RXT option 2, I essentially achieved a 2 inch lift with no vibe issues, way less body roll than stock. With the Whiteline LCA bushings, my steering is hands off straight on the highway...night and day difference from OEM. Replaced upper and lower control arms, sway bar bushings, alignment cams and had some alignment cam stops welded on at 120K miles. Drives better now than when it was brand new.
    Also replaced the climate control panel backlight bulbs with clear T4’s from autolumination. Changing those bulbs first was a good way to see how the 1/4 turn lock works since the T4’s are considerably larger than the T3’s in the back of the switches.

    Not necessary, but found a pretty good trim removal tool on Amazon for $7 (Tresalto)..which made damage free removal of the climate control panel super easy.DF5EDB12-B7F1-4FB7-A0F5-396A633E12D9.jpg
     
  20. Sep 7, 2019 at 4:06 PM
    #20
    TACOMA2NDGEN

    TACOMA2NDGEN Well-Known Member

    Joined:
    Jan 24, 2018
    Member:
    #242230
    Messages:
    1,990
    Gender:
    Male
    First Name:
    ROLAND
    new jersey
    Vehicle:
    2010 dcsb silver sport trd
    baja squadron pros
    If you have a 10mm socket you can have the blannk switch out in about 10 minutes. I don’t like prying on plastic it leaves marks and dents. Thats just me . Pull the driver kick panel off there’s one bolt there . Another under the ignition little flap remove the cubbies also . Then you can pull down on the surround under the steering wheel and the two tone pieces were the dash meets will separate. Then you can reach behind with your fingers and pop them out
     

Products Discussed in

To Top