1. Welcome to Tacoma World!

    You are currently viewing as a guest! To get full-access, you need to register for a FREE account.

    As a registered member, you’ll be able to:
    • Participate in all Tacoma discussion topics
    • Communicate privately with other Tacoma owners from around the world
    • Post your own photos in our Members Gallery
    • Access all special features of the site

what a toy - keep on building it... (pics)

Discussion in '1st Gen. Builds (1995-2004)' started by whatatoy, Dec 28, 2011.

  1. Dec 28, 2011 at 10:35 PM
    #1
    whatatoy

    whatatoy [OP] Galt/Rearden 2012

    Joined:
    Jul 13, 2011
    Member:
    #59829
    Messages:
    291
    Gender:
    Male
    SO CAL
    Vehicle:
    I like it
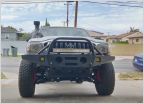
    This truck is a work truck - not a lot of fancy mod's here, but it's getting the job done!
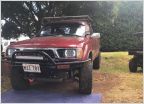
    This is the truck I bought:

    brushguard_49d1b4b686e3e6708490f6d93c76a104cbf2b518.jpg

    3na3m13pc5Y45Z25W6b768bd4294093ce1ae5_83dd471f1b464671ebd4c585a5d09d680cbddba4.jpg

    Notice the filthy wheels, the camper shell with wood windows, the ugly (IMHO) brushgaurd, etc
     
  2. Dec 28, 2011 at 10:39 PM
    #2
    pyroskier

    pyroskier Well-Known Member

    Joined:
    Mar 24, 2011
    Member:
    #53622
    Messages:
    1,004
    Gender:
    Male
    First Name:
    Jacob
    Laramie, WY
    Vehicle:
    2004 Ext Cab TRD 3.4
    First! Looks good man. Love what you did with the interior. Real creative!
     
  3. Dec 30, 2011 at 7:37 AM
    #3
    whatatoy

    whatatoy [OP] Galt/Rearden 2012

    Joined:
    Jul 13, 2011
    Member:
    #59829
    Messages:
    291
    Gender:
    Male
    SO CAL
    Vehicle:
    I like it
    This truck is a work truck - not a lot of fancy mod's here, but it's getting the job done!
    The guy I bought my truck from didn't know why his drivers seat was broken - here's why:

    IMG_20110722_142104_58b1ef802e897c29cab18cf4a24dc48a18d29ffb.jpg

    Those two bolts had backed themselves out and the back freely moved back and forth - This is the passenger side, since both were loose/broken - tightened them up and it was as good as new...

    Also put in some tunes, since the radio didn't work:
    IMG_20110718_165740_e3077b0d33d411da0b7c8d8c479243dac44cd141.jpg
     
  4. Dec 30, 2011 at 7:38 AM
    #4
    whatatoy

    whatatoy [OP] Galt/Rearden 2012

    Joined:
    Jul 13, 2011
    Member:
    #59829
    Messages:
    291
    Gender:
    Male
    SO CAL
    Vehicle:
    I like it
    This truck is a work truck - not a lot of fancy mod's here, but it's getting the job done!
    After driving the truck for awhile, I realized that I would need some sort of storage in the back of the cab - my cooler kept sliding around and my tools wouldn't stay in one spot - Generally, it was disorganized and messy, so I started thinking about making myself some cabinets - here is the result of that thought process:

    IMG_20111003_164130_37008c8066540b5afcc828eb27dd54e845581407.jpg

    IMG_20111003_164203_b7bcaa9d3cb30441c32054c5e9da545f34f1909c.jpg

    Underneath the cooler I keep a set of tie downs, a set of jumper cables and some spongie ties and the box also locks in my dirt shoes (for when I'm diggin ditches) The middle box holds a first aid kit, and 3 locking plastic boxes, one holds batteries for my maglight and small LED Flashlights, another holds my phone charger, ipod earbuds, etc and the third holds packets of emergency (to flavor water and add vitamens) and trailmix). I added a cup holder for pens and pencils (or a third cup) as well as a tray for misc stuff, but my Bible sits there. The bid box has a tray on it for notebooks, folders, plans, etc and a locker underneath for a change of clothing, a wrench and ratchet set, or whatever really...

    I built them out of 3/8" plywood and indoor/outdoor carpet, and "L" or "U" shaped aluminum from home depot.
     
  5. Dec 30, 2011 at 7:38 AM
    #5
    whatatoy

    whatatoy [OP] Galt/Rearden 2012

    Joined:
    Jul 13, 2011
    Member:
    #59829
    Messages:
    291
    Gender:
    Male
    SO CAL
    Vehicle:
    I like it
    This truck is a work truck - not a lot of fancy mod's here, but it's getting the job done!
    Next thing I did, because I was so embarrassed by them, was clean the wheels - Took me 4 hours of wire wheeling with a drill motor to clean the gunk off them and I ended up needing to have my tire guy re-balance the wheels once I was done because I had taken off so much gunk. A quick wipe with acetone and a spray of lacquer and they are much better now...

    Tires are 31x10.5x15 Kumho Mojave at-63's.

    IMG_20111025_093320_2653175c9d4976593446547c9f1eaffab06ad9e1.jpg

    IMG_20111025_112853_ace9b107dd006ca289c44d34e6b8a341cf5dddf3.jpg

    IMG_20111025_093411_bfbfb3456244b10f5353fd796791b3a5f806d371.jpg
     
  6. Jan 10, 2012 at 5:55 PM
    #6
    whatatoy

    whatatoy [OP] Galt/Rearden 2012

    Joined:
    Jul 13, 2011
    Member:
    #59829
    Messages:
    291
    Gender:
    Male
    SO CAL
    Vehicle:
    I like it
    This truck is a work truck - not a lot of fancy mod's here, but it's getting the job done!
    After I sold the camper shell and bumper, I started reading about painting it - I took it to maaco first, for a cheapo paint job, but to fix the dents, sand off the house paint and respray was much more than the 299 advertised - try 2,499 all totaled out (no thanks to a 7.5% sales tax either)

    Here's what I did - I sanded the entire thing with 100 grit sand paper and a wood sander. My dad helped a bunch, coming behind me with a 180 grit pneumatic random orbital sander from Harbor Freight to get rid of my lines... from there, we worked on the rougher areas, sanding out the surface rust, smoothing out the 5 different layers of paint, etc...


    IMG_2989_d654fe2dbfd21b962a07273978a197fee0aa752d.jpg

    After that, we hand sanded with 220 to smooth out any sanding marks. Then after some bondo work, we rattle canned on 15 cans of primer to cover up the exposed metal:

    IMG_2991_3f14bd15673ddb79c38505d199ac1939a1150d8d.jpg

    Finally, the painting begins:
    IMG_2982_be7a25b3dd1500ceaa7426e5708606726c362a42.jpg
     
  7. Jan 10, 2012 at 5:56 PM
    #7
    whatatoy

    whatatoy [OP] Galt/Rearden 2012

    Joined:
    Jul 13, 2011
    Member:
    #59829
    Messages:
    291
    Gender:
    Male
    SO CAL
    Vehicle:
    I like it
    This truck is a work truck - not a lot of fancy mod's here, but it's getting the job done!
    I chose rustoleum because, for $30/gallon, you can't screw up so much it'll cost you tons... ha ha - ended up having to buy some more (1qt) because water got into the air lines and created massive fish eyes... even with our filter/dryer - don't do this without one of these - it'll piss you off more than you can ever realize!

    IMG_3013_c21c05a4318815fd0825923012a459dfc741fdf4.jpg

    My dad worked the hlvp sprayer and we sprayed it outside - so what if a bug or too gets in it... after painting, we pulled it into his garage/shop and let it sit... rustoleum takes awhile to dry.

    IMG_3018_350af2e3421a3339160ae1e6ee32a3618dd7bad1.jpg
     
  8. Jan 13, 2012 at 8:58 PM
    #8
    whatatoy

    whatatoy [OP] Galt/Rearden 2012

    Joined:
    Jul 13, 2011
    Member:
    #59829
    Messages:
    291
    Gender:
    Male
    SO CAL
    Vehicle:
    I like it
    This truck is a work truck - not a lot of fancy mod's here, but it's getting the job done!
    While waiting for the paint to dry, I started on the bumpers and grill... didn't take before shots of the bumpers (Should have), but here is what I did... I painted the chrome bits metallic black and the plastic bits with bed liner - the front bumper just had the 2 chrome bits under the head lights. The back bumper was all chrome. Here's what the shots of the grill though, which was chrome trimmed and toyota emblem was just bare metal:

    IMG_3015_2ef9e3cc6592a12147d75cf7bdaf41c9e75b49dc.jpg

    IMG_3017_141fe33445bacf073b63cbae8039d1072ee5f4ad.jpg

    A sneak peak back on the truck...

    IMG_3025_39955de2de06c02617f19bb62a06a8ff51362b6f.jpg

    Also, I took the side mirrors off and painted them metallic black... See here:

    IMG_20120113_122210_2ac8f94422a97b6fcabeaf64e4c0ec4b63c3d762.jpg
     
  9. Jan 13, 2012 at 9:02 PM
    #9
    whatatoy

    whatatoy [OP] Galt/Rearden 2012

    Joined:
    Jul 13, 2011
    Member:
    #59829
    Messages:
    291
    Gender:
    Male
    SO CAL
    Vehicle:
    I like it
    This truck is a work truck - not a lot of fancy mod's here, but it's getting the job done!
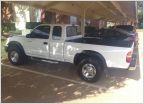
    Truck finished painted - It was my first time painting a car and I have to say, it's difficult. But, by the final coat my dad had figured out the proper way and it turned out pretty good. We let it sit in the sun for 3 days (yea for So Cal New Years - 80*F and super sunny) before wetsanding and buffing. Turned out as good as I wanted - wasn't really looking for showroom shine, just a good sheen and all one, consistent color... achieved. The black bed liner from the trim line down really makes though - check it out:

    IMG_3026_273ee997490573c13729083ecf73477725bdf486.jpg

    IMG_3027_690dde59601c994ecd6aa80d9bf0cc35647f2716.jpg

    IMG_3028_6c672eadafc166297614216c7b05f3f8e5770ad1.jpg
     
  10. Jan 13, 2012 at 9:03 PM
    #10
    whatatoy

    whatatoy [OP] Galt/Rearden 2012

    Joined:
    Jul 13, 2011
    Member:
    #59829
    Messages:
    291
    Gender:
    Male
    SO CAL
    Vehicle:
    I like it
    This truck is a work truck - not a lot of fancy mod's here, but it's getting the job done!
    Since I know I'll get asked about the painting - Here are some tips - Read this:

    http://autobodystore.com/ms6.shtml
    http://www.stovebolt.com/techtips/hvlp_paintgun_basics.htm

    And the most helpful link:
    http://board.moparts.org/ubbthreads...?http://www.rickwrench.com/50dollarpaint.html

    Beyond that, painting a car for a certain level of quality is all about prep work - my truck took my dad and I 2 days of solid work to prep it to a so-so level of quality - their are blemishes, dings (see tailgate in the post above), small divets, some smudges, etc in the paint because we didn't do enough prep work and we weren't patient enough with the paint - It required 24 hours between coats to cure before another coat could be added - we waited 8-10hrs... It was dry to the touch, sandable, etc, but...

    Painting it took forever because of the dry times, so we had a lot of down time - good for beer? Actually, we worked on the bumpers and the plastic light covers (cleaning them, dehazing, etc). And then, we had to sand off a bunch of paint because of moisture in the compressed air (faulty dryer/filter)... had to wait for it to dry and then sand (killed 2 days doing this alone)...

    Lastly, don't skimp on the quality of the masking tape - My dad gave me HFT masking tape and that stuff wouldn't stick to itself let alone anything else - we had to re-mask mid coats sometimes, which led to some overspray on my seals and rubber trim pieces... oh well.
    PM me for more specific information - just do what everyone else says - prep, prep, prep
     
  11. Jan 13, 2012 at 9:04 PM
    #11
    whatatoy

    whatatoy [OP] Galt/Rearden 2012

    Joined:
    Jul 13, 2011
    Member:
    #59829
    Messages:
    291
    Gender:
    Male
    SO CAL
    Vehicle:
    I like it
    This truck is a work truck - not a lot of fancy mod's here, but it's getting the job done!
    Did my next mod I've been waiting for forever to do - some cab lights so I can see at night - I've taken a closer look at my dome light only to find remnants of prior shorting issues and since I couldn't get the switch to work in testing with a multimeter, I ditched it altogether. So, I started looking around the net and on this forum and I ended up buying some oznium pre-wired LED's --> surface mount LED's <-- as well as 2 not lit rocker switches.

    I didn't take any pictures of them just out of the packaging... kinda in a hurry earlier today... So, here's some pic's of the process and final product. I pulled the crack wiring job off the cigarette lighters (the Prior owner bypassed the fusebox and went straight to the battery with no fuse) and borrowed the power line, since it was good. I added an inline fuse and found a good ground - the rest is just clip, squeeze, tape, repeat. The nice thing about OZNIUM is that the LED's come pre-wired with a resistor and about 20" of wire... these surface mounts have double stick 3m tape on the back so no worries on even mounting them... and they are small - maybe 1/8 inch square.

    I put 3 on each side of the cab. Both the front and back LED's are in the same spot, the middle one I put further back on the drivers side for the ext cab storage and further forward on the passenger side for the passenger. switches are mounted on center console and they control their respective sides...

    The Mess below:

    IMG_3033_4576bb7030290a4c05ea881427a45b947aa8c285.jpg

    Switches mounted nice and snug:

    IMG_3037_de0a111c1b26904de1be9efb05c795d7fbc0d341.jpg

    Front Driver:

    IMG_3036_587e0180c605b6bc8d76427a6fd44e463f476735.jpg

    Behind driver:

    IMG_3035_5f2a6ab1bea33474ad6e6dcfb43e53bf520c68db.jpg

    Front Passenger:

    IMG_3039_14db36be2db6aa30adf839655c6f45b425cb25e5.jpg
     
  12. Jan 13, 2012 at 10:15 PM
    #12
    whatatoy

    whatatoy [OP] Galt/Rearden 2012

    Joined:
    Jul 13, 2011
    Member:
    #59829
    Messages:
    291
    Gender:
    Male
    SO CAL
    Vehicle:
    I like it
    This truck is a work truck - not a lot of fancy mod's here, but it's getting the job done!
    MORE LEDS - 10 3mm orange ones from oznium... going to wire some to the headlight switch, some to my existing switches... good weekend project
    IMG_20120323_055501_622ae0fe282709dbc8c97f2a9637f4dff0155960.jpg

    will post pics when I'm done... more pics here!

    So I tapped the power from here: It's power for the light under the shifter indicators.

    IMG_20120325_125115_190303004525c3691a7646f1d35f9b6257cb6850.jpg

    Yeah, I know - rust... what do you expect from an old truck?

    IMG_20120325_125139_d19908294b051b658a1ee31b21d82cf2e8636d77.jpg

    Underneath the cupholders, I used 18guage wire and 16 0 22 gauge butt connectors to attach the wires. I drilled a hole roughly the same size as the LED bulb - 3mm in size. The LED's fit pretty snug inside the hole and could probably stay in place without the hot glue, but for double reassurance, I used some hot glue to back the LEDs in place. I put one in each cup holder...

    IMG_20120325_140544_53e3ea2f53633533fbf85827eff0acf53c083bff.jpg

    This is the back section of the center console... I put 1 more in each of the square cupholders (stupid things) and one at the top of the center console to light up the dash... The wires duct taped to the back there are butt connectors for later use in case I want to add more lights to this group...

    IMG_20120325_145449_beca892fd184473f397de17a040ee8fdee72b1b8.jpg

    Trucks kinda dirty, but here's the two in the cup holders during the day...

    IMG_20120325_145503_4ba9fe91120fcda3176a2da70b092d872989dc90.jpg

    Funny enough, the scratch at the top LED is not the drill walking on me - it's been there since I bought the truck - just happened to be where I put the LED... and again - dirty truck...

    IMG_20120325_210151_e125ce378d6a592eb8c0e5d5ed6eeffa615a0032.jpg

    just one night shot - my phone's camera decided to quit last night after this shot... pretty bright for 1 3mm LED per water bottle, right?


    The only disappointment I have here is that I thought it would dim with the dash lights and the shift indicator light power that I snagged power from - I guess the ground on the truck system is the side that is connected to the dimmer knob... oh well.
     
  13. Jan 13, 2012 at 10:46 PM
    #13
    TacoMX

    TacoMX TW's Official anti body-lift pundit

    Joined:
    Aug 24, 2011
    Member:
    #62240
    Messages:
    4,825
    Gender:
    Male
    First Name:
    Jonathan
    Deltona, Florida
    subbed...

    looks great.

    I love your cabinet/storage system in the back of the truck :thumbsup:

    And X2 on painting your wheels like someone said up there^^^

    satin black wheels would looks great on your truck
     
  14. Jan 13, 2012 at 10:55 PM
    #14
    whatatoy

    whatatoy [OP] Galt/Rearden 2012

    Joined:
    Jul 13, 2011
    Member:
    #59829
    Messages:
    291
    Gender:
    Male
    SO CAL
    Vehicle:
    I like it
    This truck is a work truck - not a lot of fancy mod's here, but it's getting the job done!
    I will paint the wheels black - I'm just sick of paint at the moment - thanks for all the compliments!
     
  15. Jan 21, 2012 at 10:25 PM
    #15
    2000GTacoma

    2000GTacoma Well-Known Member

    Joined:
    Jan 29, 2011
    Member:
    #50183
    Messages:
    2,357
    Gender:
    Male
    Snow Hill NC
    Vehicle:
    00 Tacoma Ext. 3.4L SR5
    looks good so far.
     
  16. Jan 25, 2012 at 6:59 PM
    #16
    whatatoy

    whatatoy [OP] Galt/Rearden 2012

    Joined:
    Jul 13, 2011
    Member:
    #59829
    Messages:
    291
    Gender:
    Male
    SO CAL
    Vehicle:
    I like it
    This truck is a work truck - not a lot of fancy mod's here, but it's getting the job done!

    I highly recommend it - I've had the chance now at night to turn on the lights - it's like stadium lighting in my truck - I get 2 shadows - super bright. I bought 3 for each side because I was skeptical of the amount of light I was going to get - dang, it's bright!!!
     
  17. Jan 25, 2012 at 7:00 PM
    #17
    whatatoy

    whatatoy [OP] Galt/Rearden 2012

    Joined:
    Jul 13, 2011
    Member:
    #59829
    Messages:
    291
    Gender:
    Male
    SO CAL
    Vehicle:
    I like it
    This truck is a work truck - not a lot of fancy mod's here, but it's getting the job done!
    Finished up my LED addition inside the cab - nice and low lit - so low the night pics didn't really turn out... I added 2 more, 1 in each door handle, which required pulling the door off... Pics below:

    Pulled the door panel off and ran my red/black 18 gauge wire through the door to get to my door handles...

    IMG_20120401_151241_90b598805549b4070d8554aa917b5b48fd8da28a.jpg

    Getting it through the rubber wire protector that connects to the door was a pain, but a coat hanger worked wonders here:

    IMG_20120401_144607_260205fcb9569b66a4e8cd286f901e1cca8783e7.jpg


    IMG_20120401_144557_0925b31fb9228d7b1b450d47e234f7818e399043.jpg

    To take off the old fashioned crank windows, I deployed the shop rag technique and it popped right off:

    IMG_20120401_144716_93abda4a6643d7af6f731ab80ca9ca728357d5a7.jpg

    Running the wire from behind:

    IMG_20120401_182623_6e5354dc9a2b432972edbb2cf83cc599cc0cf8c6.jpg

    Used Oznium 3mm LED's for this application - gives a nice glow on the floor. That's a chrome LED holder they sell, and since I used the prewired LED's, I had to hot glue this puppy in...

    IMG_20120401_182837_7ac60ced6533c30327c8243de5237f943179c0c4.jpg

    One night shot so you can see how dim (what I was going for) it is and it didn't help that my phone's camera is lame...

    IMG_20120401_200606_97a4b041d28dffc6fe74b92596a84cf2dbf42ebf.jpg
     
  18. Jan 25, 2012 at 7:01 PM
    #18
    whatatoy

    whatatoy [OP] Galt/Rearden 2012

    Joined:
    Jul 13, 2011
    Member:
    #59829
    Messages:
    291
    Gender:
    Male
    SO CAL
    Vehicle:
    I like it
    This truck is a work truck - not a lot of fancy mod's here, but it's getting the job done!
    Hopefully I'll get me a new toolbox sooner than later...
     
  19. Jan 25, 2012 at 7:17 PM
    #19
    taco52

    taco52 01 5 speed

    Joined:
    Apr 24, 2011
    Member:
    #55481
    Messages:
    590
    Gender:
    Male
    First Name:
    Trevor
    Bailey, Colorado
    Vehicle:
    01 SR5 v6 5speed 4x4
    Grey wire mod, De flapped,
    Love the truck. Awesome storage. Great build. Bump for more views.
     
  20. Jan 25, 2012 at 9:10 PM
    #20
    whatatoy

    whatatoy [OP] Galt/Rearden 2012

    Joined:
    Jul 13, 2011
    Member:
    #59829
    Messages:
    291
    Gender:
    Male
    SO CAL
    Vehicle:
    I like it
    This truck is a work truck - not a lot of fancy mod's here, but it's getting the job done!

    thanks man - I appreciate it a bunch... My truck is a work in progress and for what I have in it - I'm pretty happy with it!
     

Products Discussed in

To Top