

-
Welcome to Tacoma World!
You are currently viewing as a guest! To get full-access, you need to register for a FREE account.
As a registered member, you’ll be able to:- Participate in all Tacoma discussion topics
- Communicate privately with other Tacoma owners from around the world
- Post your own photos in our Members Gallery
- Access all special features of the site
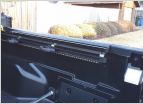 Bed Lights
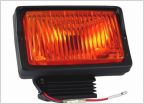 Back to the Future Toyota question??
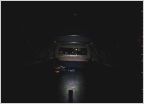 Bed lighting for $20 (warning, lots of pictures + detail)
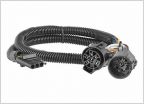 Hardwire Tailgate LED Bar
 Switchback DRL/front directionals
 Upgrading '98 Headlights
Another Mini D2S Retrofit from TRS
Discussion in 'Lighting' started by Dr. Sleep, Jan 14, 2012.
Page 1 of 3
Page 1 of 3


