1. Welcome to Tacoma World!

    You are currently viewing as a guest! To get full-access, you need to register for a FREE account.

    As a registered member, you’ll be able to:
    • Participate in all Tacoma discussion topics
    • Communicate privately with other Tacoma owners from around the world
    • Post your own photos in our Members Gallery
    • Access all special features of the site
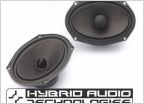
Install Help: Pioneer AVH-P2400BT

Discussion in 'Audio & Video' started by Coronach, Feb 10, 2012.

  1. Feb 10, 2012 at 2:00 AM
    #1
    Coronach

    Coronach [OP] Well-Known Member

    Joined:
    Feb 1, 2012
    Member:
    #71934
    Messages:
    58
    Gender:
    Male
    First Name:
    Mike
    OH! IO!
    Vehicle:
    2011 SR5 Double Cab Long Bed
    ARB Bumper, Toytec Boss coilovers, OME Dakkars, coffee stains
    I'm replacing the HU in my 2011 SR5 DCLB. I have done some searches (which is how I got as far as I have so far), but I'm still looking for a little mroe info. I appreciate your help, and I imagine that a lot of this has been asked-and-answered already, so if you know of a link or FAQ, that's great.

    OK, so I have my HU and the following items:

    1. The Metra Double-DIN kit

    2. the TY-8100 harness

    3. the ASWC Steering wheel control interface kit with the LD-SWC-F3.5 wire.

    Do I need anything else? Also, is there anything else I should be doing while I'm in there?

    Specific questions:

    1. Do I need anything to use my OEM AUX input?I haven't looked at how it is connected to the factory HU (haven't cracked the dash yet).

    2. My truck has the steering wheel radio controls but does not have the Bluetooth steering wheel controls. I know that there is a kit out there that allows you to use the OEM steering wheel controls for the bluetooth, and I think that the wiring harness is there for them...is there any point to purchasing the OEM controls and the kit to use them? My guess is "no", it's probably a lot of money and some moderate install work for minimal gain. Or will it not even work with my HU?

    3. Has anyone done the parking brake override on this HU yet? I know that there are some kits out there, but I'm not sure which ones are the best ones to use. Any experience?

    4. How difficult is it to splice into the BU camera so it runs on both the HU and the mirror? What is the procedure for this?

    5. Any tips or tricks or gotchas?

    Thanks in advance,

    Mike
     
  2. Feb 10, 2012 at 7:03 PM
    #2
    Coronach

    Coronach [OP] Well-Known Member

    Joined:
    Feb 1, 2012
    Member:
    #71934
    Messages:
    58
    Gender:
    Male
    First Name:
    Mike
    OH! IO!
    Vehicle:
    2011 SR5 Double Cab Long Bed
    ARB Bumper, Toytec Boss coilovers, OME Dakkars, coffee stains
  3. Feb 11, 2012 at 5:54 PM
    #3
    auburn taco

    auburn taco Well-Known Member

    Joined:
    Jun 26, 2010
    Member:
    #39469
    Messages:
    55
    Gender:
    Male
    First Name:
    kevin
    Athens GA area
    Vehicle:
    2021 SR5 Tacoma
    Homelink Mirror, mud flaps and interior LEDs. so far
    You will lose the factory aux but searching may yield a fix. Not sure on the camera, I think there is some info in the forum. There is a nice video showing the parking brake override. The aswc works great but you will have to tap into the wires on the factory steering wheel harness which plugs into the factory radio. Not a big deal. The awsc works great. I have a Pioneer 3200DVD receiver and no real issues. good luck
     
  4. Feb 11, 2012 at 6:13 PM
    #4
    Coronach

    Coronach [OP] Well-Known Member

    Joined:
    Feb 1, 2012
    Member:
    #71934
    Messages:
    58
    Gender:
    Male
    First Name:
    Mike
    OH! IO!
    Vehicle:
    2011 SR5 Double Cab Long Bed
    ARB Bumper, Toytec Boss coilovers, OME Dakkars, coffee stains
    There's a harness with the ASWC, does that tie in at the steering column, or behind the dash kit?

    Thanks for the info. I'll look for the info on the AUX port and the parking brake.

    Mike
     
  5. Feb 12, 2012 at 6:58 AM
    #5
    auburn taco

    auburn taco Well-Known Member

    Joined:
    Jun 26, 2010
    Member:
    #39469
    Messages:
    55
    Gender:
    Male
    First Name:
    kevin
    Athens GA area
    Vehicle:
    2021 SR5 Tacoma
    Homelink Mirror, mud flaps and interior LEDs. so far
    aswc wiring goes behind the radio. that is where you access the 3 wires needed for install.
     
  6. Feb 12, 2012 at 8:00 AM
    #6
    Muy Grande

    Muy Grande Well-Known Member

    Joined:
    Feb 26, 2009
    Member:
    #14111
    Messages:
    1,400
    Gender:
    Male
    First Name:
    John
    Dallas, TX; RGV, TX
    Vehicle:
    06 DC TRD
    Suspension: DHoes up front, Dakar and OME out back. Audio: Alpine w205 w/ pair of Alpine Amps, Image Dynamic 6.5 Component Speakers up front and Image Dynamic Subs in the Back. Armor: ARB Bull Bar, Rocktek rear bumper and custom rock sliders. Other: Rigid Industries LED Light Bar, Platinum DieHard Battery, BlueSea Fuse Block, rear lights, bed lights, leds inside.
    I'm replacing the HU in my 2011 SR5 DCLB. I have done some searches (which is how I got as far as I have so far), but I'm still looking for a little mroe info. I appreciate your help, and I imagine that a lot of this has been asked-and-answered already, so if you know of a link or FAQ, that's great.

    OK, so I have my HU and the following items:

    1. The Metra Double-DIN kit

    Great Double DIN......you will use your existing Metal Brackets. You mount your radio first then you just snap in the Metra kit. It has these small little clips about 5 that don't always snap right into the existing holes. If you take a razor blade and cut into the Metra kit just a little to make the small holes bigger you will get them to fit better. Be careful not to break these small clips because I don't know where you can get replacements other than buying a whole new kit.


    2. the TY-8100 harness

    Looks like you got the right harness, connect all the wires as they are color coded. Do not I repeat do not connect the "Orange" illumination wire - you run the risk of blowing out your Dash lights. You don't need this wire anyways so just tape it off or cap it.

    3. the ASWC Steering wheel control interface kit with the LD-SWC-F3.5 wire. (You will not use the extra piece that is included in the kit, it has a female 3.5mm hole with 2 wires a brown and a brown with white stripe wire - you can just mail this to me. :D)

    This one gets a little tricky but for this specific radio it has a dedicated "Hardwire Remote" input so just find it and you will snap in the wired male plug from the ASWC.

    Ok, on Toyota Tacomas you will utilize 3 wires from the factory plug in order to locate this specific plug it is the white plug that is not used after taking the factory radio out and does not hook up to the aftermarket wire harness might be a 20 pin plug but not sure and no there isn't 20 wire coming out of it. You will use the following 3 wire colors. 1. White with Red (pinkish) stripe, 2. Yellow with Black stripe. 3. Purple/Violet with White stripe. The instructions on the Axxess state that T-taps are not recommend but you can use them be sure to get some a radio shack they are called "Quick-Splice Connectors" get the 22-18 gauge wire you can use "Quick Connects" these can be found at Walmart or radio shack. You will need 3 connectors. Make sure you have your Axxess Harness connected and prep before making the connections. I use T-taps because I can tap into the factory wires and leave them ready and then I put the male part of the taps to the harness (ASWC) to the 3 wires I use and when I put everything together its as easy as taping in 3 wires and done.

    Ok you are going to use the following wires from the ASWC.

    1. Red (+) - you can plug in directly to your harness power source (Red Wire)

    2. Black (-) - this is where it gets tricky, you will have to have an extra piece of Black wire (or whatever color). You can plug the Black (-) wire to the wire harness and also extra piece. I would use a 18-12 gauge Closed-End Connector on these because now you will have 4 wires all coming together. Use a zip tie to hold them in place and use the caped plug to keep them all together. Or you can solder all of them also.......now if you want to do the brake bypass you take the Brake Wire (this one is almost always a light green but make sure read your Pioneer Instructions to find it) and just connect it with this bunch. So you should have the 2 Black wires from the harness, the ASWC Black wire, the extra piece of Black wire coming out of the bunch and the Brake wire from the Stereo. All of these wires are Negative (-). This is the hardest part. The extra Black (-) wire taps into the White with Red (almost pinkish) wire. This is a negative wire.

    3. You will use the Black with Green stripe wire. This wire taps into the Yellow with Black stripe from the factory pin plug.

    4. You will use the Green with Orange stripe wire (don't confuse the Orange with Green stripe they look almost the same). This wire taps into the Purple with white strip wire from the factory pin plug.

    The way you will know if this has been hooked up right is that you should see a Red light flash when you turn your key on and push your steering wheel controls.

    The ASWC interface is an Auto detect feature so all you have to do is make sure it is hooked up right and it should work. You can also manually program it but you probably don't have to........


    Do I need anything else? Also, is there anything else I should be doing while I'm in there? If you follow the instructions above you should be good. Remember its all in the prep work!

    Specific questions:

    1. Do I need anything to use my OEM AUX input?I haven't looked at how it is connected to the factory HU (haven't cracked the dash yet).

    Not sure, my truck doesn't have OEM Aux input.


    2. My truck has the steering wheel radio controls but does not have the Bluetooth steering wheel controls. I know that there is a kit out there that allows you to use the OEM steering wheel controls for the bluetooth, and I think that the wiring harness is there for them...is there any point to purchasing the OEM controls and the kit to use them? My guess is "no", it's probably a lot of money and some moderate install work for minimal gain. Or will it not even work with my HU? I think you are right.

    Your Stereo already has bluetooth, it would just take a few strokes of your hand to get it to work......

    3. Has anyone done the parking brake override on this HU yet? I know that there are some kits out there, but I'm not sure which ones are the best ones to use. Any experience?

    Like I said, find the Brake wire (look at your wiring diagram from the instructions) and tap into the Negative (Black) wire on the harness and you're done. No need to buy a relay and switch. Although I would recommend that you sure the web and see what other say. I do not have this specific unit but did have a Pioneer AVIC-D3 a while back and that's what I did.......never had any trouble.

    4. How difficult is it to splice into the BU camera so it runs on both the HU and the mirror? What is the procedure for this?

    Only had the camera running on my Stereo so not much help here.......search sure its been done before.

    5. Any tips or tricks or gotchas?

    Do not connect the Orange Illumination Wire......you run the risk of blowing up your Dash lights. The risk is to much.

    Prep work is key, make sure everything is connected and secure and no wires are exposed. Solder when you have to or use Close End Connectors aka caps.


    Good Luck Mike, looks like a very nice Stereo......let us know how it goes. If you need help just PM me or give me a call......PM for number.

    Thanks in advance,

    Mike
     
  7. Feb 12, 2012 at 10:20 AM
    #7
    Coronach

    Coronach [OP] Well-Known Member

    Joined:
    Feb 1, 2012
    Member:
    #71934
    Messages:
    58
    Gender:
    Male
    First Name:
    Mike
    OH! IO!
    Vehicle:
    2011 SR5 Double Cab Long Bed
    ARB Bumper, Toytec Boss coilovers, OME Dakkars, coffee stains
    Thanks! Good catch about the dash lights. I saw threads on dead dash lights but never opened then, but I figured someone cross wired stuff, and that just making sure that you got stuff wired right would prevent problems. Guess not.

    Mike
     
  8. Feb 12, 2012 at 6:36 PM
    #8
    Coronach

    Coronach [OP] Well-Known Member

    Joined:
    Feb 1, 2012
    Member:
    #71934
    Messages:
    58
    Gender:
    Male
    First Name:
    Mike
    OH! IO!
    Vehicle:
    2011 SR5 Double Cab Long Bed
    ARB Bumper, Toytec Boss coilovers, OME Dakkars, coffee stains
    Hmm. Re the illumination wiring:

    The TY-8100 harness mentions two orange illumination wires, a plain orange one labelled "Illumination" and an orange/white one labelled "Dimmer". However, the harness itself only has the orange/white one. I presently have wired orange/white on the TY-8100 harness to the orange/white wire from the HU (which the install instructions ID as "lighting switch terminal". Is this correct?

    On the TY-8100, the only wires not hooked up are as follows:

    Blue (power antenna)
    Orange/black (not identified, from the smaller harness with the rear speaker lines)
    (And Orange, which is not present on the harness but mentioned in the schematic)

    From the HU itself, the following wires are not connected:

    Blue/white (system remote control)
    Yellow/black (mute)
    Purple/white (reverse gear)
    Lime Green (Parking Brake, which you mentioned and haven't hooked up yet).

    Other than the ebrake line, does this sound right? Or should I disconnect and cap the two dimmer lines?

    Thanks again!

    Mike
     
  9. Feb 12, 2012 at 6:53 PM
    #9
    Coronach

    Coronach [OP] Well-Known Member

    Joined:
    Feb 1, 2012
    Member:
    #71934
    Messages:
    58
    Gender:
    Male
    First Name:
    Mike
    OH! IO!
    Vehicle:
    2011 SR5 Double Cab Long Bed
    ARB Bumper, Toytec Boss coilovers, OME Dakkars, coffee stains
    And, my understanding is that the remote line is for using the HU to turn on an external amp (or similar equipment) that I'm not going to use ( at least at present). The mute is for some external device to silence the radio (not in use). The reverse gear wire would kick the radio into BU camera mode, which I will use, but until I figure out the wiring for the camera its not needed.

    Correct?

    Mike
     
  10. Feb 12, 2012 at 8:12 PM
    #10
    Muy Grande

    Muy Grande Well-Known Member

    Joined:
    Feb 26, 2009
    Member:
    #14111
    Messages:
    1,400
    Gender:
    Male
    First Name:
    John
    Dallas, TX; RGV, TX
    Vehicle:
    06 DC TRD
    Suspension: DHoes up front, Dakar and OME out back. Audio: Alpine w205 w/ pair of Alpine Amps, Image Dynamic 6.5 Component Speakers up front and Image Dynamic Subs in the Back. Armor: ARB Bull Bar, Rocktek rear bumper and custom rock sliders. Other: Rigid Industries LED Light Bar, Platinum DieHard Battery, BlueSea Fuse Block, rear lights, bed lights, leds inside.

    Sounds right.....remote line can be used to power an amp anything that needs to be turned on when the unit is on. Correct on the mute. The reverse gear wire, you tap into the driver's side floor panel to access the rear wire. If you do some searches you should find it.

    I wouldn't risk it with the orange wires.......unless you like to give the stealership money. Just cap them and be done with it.
     
  11. Feb 12, 2012 at 9:00 PM
    #11
    Coronach

    Coronach [OP] Well-Known Member

    Joined:
    Feb 1, 2012
    Member:
    #71934
    Messages:
    58
    Gender:
    Male
    First Name:
    Mike
    OH! IO!
    Vehicle:
    2011 SR5 Double Cab Long Bed
    ARB Bumper, Toytec Boss coilovers, OME Dakkars, coffee stains
    Got it. I'll probably try this tomorrow afternoon.

    Thanks.
     
  12. Feb 13, 2012 at 8:55 PM
    #12
    Coronach

    Coronach [OP] Well-Known Member

    Joined:
    Feb 1, 2012
    Member:
    #71934
    Messages:
    58
    Gender:
    Male
    First Name:
    Mike
    OH! IO!
    Vehicle:
    2011 SR5 Double Cab Long Bed
    ARB Bumper, Toytec Boss coilovers, OME Dakkars, coffee stains
    OK, got it in.

    Good Stuff:

    The HU is a massive improvement over the OEM radio, even if you ignore the additional functionality. The OEM unit sounded like listening to an AM transistor radio via two cans on a string. This thing, even using the 'stock' EQ settings and saddled with the OEM speakers, is already a lot better. Not perfect, but very listenable. If anyone was wondering if it was worth it to just upgrade the HU and not do anything else, I would say yes, it absolutely is. I will do speakers eventually, but even just dropping this in completely changes the sound. Wow.

    The harnesses worked like a charm, and the steering wheel interface is dead nuts simple. No delay/lag, it works just like it did with the OEM unit.

    As an added benefit, the steering wheel interface came with an AUX input, so now I have use of the OEM AUX jack, as well as a USB input and an AUX jack on the front of the HU.

    The Metra kit is rock solid. As Muy Grande said, you use the factory brackets, so this thing is in there just as firmly as the OEM HU was. Zero movement, zero flex.

    There's lots of slace back there to stuff wires and harnesses. Some radios seem to have no space at all behind them, this thing looks like you could smuggle kilos of coke back there. This makes for a nice easy install.

    I cut and capped the illumination or dimmer lines. As was said, the unit seems to run just fine without them.

    The Bad:

    The Metra kit's trim pieces don't fit 100%. It's like the radio is a skosh too long, so the piece that goes around the radio itself, behind bezel, had to be omitted. I'll try to take pictures in the AM. It's not bad, but it does lead to some small gaps. I'll see them because I know that they're there, but I doubt many other people would notice.

    The E-brake override didn't work by just grounding it, so I'll have to get a relay.

    I didn't fiddle with the backup camera or the reverse line. I know I have to go back in there anyway to fix the e-brake override, so I'll try to have that researched before I go in, so I can do it all at once.

    Thanks again!

    Mike
     
  13. Feb 18, 2012 at 7:51 PM
    #13
    sun

    sun Well-Known Member

    Joined:
    May 5, 2011
    Member:
    #56099
    Messages:
    139
    Gender:
    Male
    Memphis
    Vehicle:
    2011 PreRunner
    Pioneer avic-z130bt with axxess aswc and rear cam mod, audiovox 10 flip down monitor, Pyle pl76d headrest monitors, kicker cvr tens wired down to one ohm with hifonics Brutus 1200.1, Clazzio seat covers, 20% tint on front windows, polished factory exhaust, peragon retractable bed cover, pop n lock tailgate handle with dei actuators for automatic lock, viper 5901 alarm remote start with viper smart start, hid bixenon 4500k headlights with 4500k fog lights, led map license plate lights and dome lights
    do a search on the rear cam i posted a link on for it a few months ago i got it from toyota nation...i would recommend highly in soldering the rca cable to the video feed from the cam. and the best part is that the video feed and reverse signal is all right near the fuse box...if you dont solder you will get a lot of snow and yea u gotta use a relay for bypass 85 and 87 to ground 87a not used 86 to remote wire of unit and 30 to parking break
     
  14. May 7, 2012 at 5:32 PM
    #14
    Rock Coppus

    Rock Coppus Member

    Joined:
    Apr 27, 2012
    Member:
    #77749
    Messages:
    13
    Gender:
    Male
    First Name:
    Eric
    Tucson
    Vehicle:
    06 TRD DblCab 3in. Lift
    3in. Dealer Installed Lift
    Hey guys, is the TY-8100 used so you don't have to cut the factory wiring harness up? And if thats the case, then do you use it encase you want to put the factory HU back in? Thats seems like the only reaso why you would need it.
     
  15. May 10, 2012 at 6:52 PM
    #15
    sun

    sun Well-Known Member

    Joined:
    May 5, 2011
    Member:
    #56099
    Messages:
    139
    Gender:
    Male
    Memphis
    Vehicle:
    2011 PreRunner
    Pioneer avic-z130bt with axxess aswc and rear cam mod, audiovox 10 flip down monitor, Pyle pl76d headrest monitors, kicker cvr tens wired down to one ohm with hifonics Brutus 1200.1, Clazzio seat covers, 20% tint on front windows, polished factory exhaust, peragon retractable bed cover, pop n lock tailgate handle with dei actuators for automatic lock, viper 5901 alarm remote start with viper smart start, hid bixenon 4500k headlights with 4500k fog lights, led map license plate lights and dome lights
    Hey rock u use the harness so u can return to stock and it makes it easier to wire since wires will be colored the same as the aftermarket radio. Toyota factory colors r different than aftermarket color
     
  16. May 11, 2012 at 3:20 PM
    #16
    Rock Coppus

    Rock Coppus Member

    Joined:
    Apr 27, 2012
    Member:
    #77749
    Messages:
    13
    Gender:
    Male
    First Name:
    Eric
    Tucson
    Vehicle:
    06 TRD DblCab 3in. Lift
    3in. Dealer Installed Lift
    Ok thanks, also I hope this isnt a stupid question, but what is the difference between the TY-8100 harness, and the PAC Tato JBL interface?

    Is the TY-8100 for a non-jbl stero, and the PAC Tato necessary for the JBL system, to hook up the factory amp connections?

    Thanks?
     
  17. Oct 7, 2012 at 11:20 AM
    #17
    Tacopig

    Tacopig Active Member

    Joined:
    Jun 30, 2012
    Member:
    #81656
    Messages:
    25
    Gender:
    Male
    Durham, NC
    Vehicle:
    12 TRD Sport 4x4 V6
    Do you connect all three together: 1. head unit remote wire (blue/white) 2. Metra harness remote wire (blue/white) and 3. remote wire from aftermarket amplifer (blue/white). Or do you just connect the amplifier to the head unit wire leaving the metra wire unused. Also, the remote (blue wire) wire from the Viper alarm should be spliced into all of the above, or just the car side or head unit side? I'm a bit confused....2012 non-JBL stereo
    Also...is it still not advised to use the orange illumination wire?
     
  18. Oct 7, 2012 at 12:25 PM
    #18
    brian

    brian Another Traitor

    Joined:
    Apr 15, 2009
    Member:
    #16011
    Messages:
    7,551
    Gender:
    Male
    Elizabeth City, NC
    Vehicle:
    2017 F-250 Powerstroke
    If you don't have anything else thats being turned on then you shouldn't need the 'remote wire' on the truck side. Just the line from the head unit to the amplifier. This is not to be confused with the ACC wire though, they serve the same purpose... just ACC turns on the radio, and REM turns on the amp.


    Muy Grande, whats the story with your dimmer wire? I got mine hooked up.
     
  19. Oct 7, 2012 at 3:45 PM
    #19
    jmdaniel

    jmdaniel Has A Well Known Member

    Joined:
    Oct 20, 2010
    Member:
    #44965
    Messages:
    5,340
    Gender:
    Male
    First Name:
    Jeff
    Leander, TX
    Vehicle:
    2018 Tundra SR5 CrewMax, 1977 FJ40 Landcruiser
    I put the 2400 in two weeks ago, and added a Kicker sub yesterday. I don't think I used a Metra harness, unless that is what Crutchfield supplies, but the blue wire from the harness was joined to the blue/white wire from the deck, and the blue remote on wire from the Kicker.
     

Products Discussed in

To Top