1. Welcome to Tacoma World!

    You are currently viewing as a guest! To get full-access, you need to register for a FREE account.

    As a registered member, you’ll be able to:
    • Participate in all Tacoma discussion topics
    • Communicate privately with other Tacoma owners from around the world
    • Post your own photos in our Members Gallery
    • Access all special features of the site

What have you done to your Tacoma today? 1st Gen Edition

Discussion in '1st Gen. Tacomas (1995-2004)' started by SlimDigg, Feb 7, 2011.

  1. Mar 30, 2012 at 6:44 AM
    BVCOTaco

    BVCOTaco Well-Known Member

    Joined:
    Nov 19, 2011
    Member:
    #67313
    Messages:
    361
    Gender:
    Male
    BV, CO
    Vehicle:
    02 Xtra Cab SR5 TRD
    ARB Bullbar
    Not today, but last night I changed the valve cover gaskets, installed new spark plugs and wires. Today I hope to install the new Skid Row skid plates!
     
  2. Mar 30, 2012 at 6:46 AM
    ontarioyota

    ontarioyota Well-Known Member

    Joined:
    Oct 2, 2010
    Member:
    #44122
    Messages:
    1,330
    Gender:
    Male
    First Name:
    @scott777taco INSTAGRAM
    SW Ontario, Canada
    Vehicle:
    2001 Reg Cab 4x4
    Blacked out badges-rims OME lift with 881's & dakar pacs, summer tires=BFG 31x10.5x15 on 93 4runner rims,winter= 265 75 16 DURATRACS on stock steelies,Flowmaster exhaust, deck plate mod, ARB front bumper
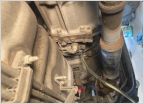
    4" deck plate mod on my 2.7 L with mouse defence!!
    IMG-20120329-00446_58782310bcc3a4547c1694a4fd9211d55754dc05.jpg
     
  3. Mar 30, 2012 at 7:18 AM
    saundern

    saundern Swerve for nothing

    Joined:
    Dec 10, 2009
    Member:
    #27342
    Messages:
    6,861
    Gender:
    Male
    First Name:
    Nick
    Simpsonville, SC
    Vehicle:
    2005 TRD Sport
    how tough was the gasket? i need to do mine sometime since the last time i got it serviced, the guy said its starting to leak
     
  4. Mar 30, 2012 at 8:53 AM
    scocar

    scocar hypotenoper

    Joined:
    Nov 11, 2009
    Member:
    #25814
    Messages:
    40,022
    That depends.
    Have you ever done this before?
    Have you already studied up various lift installation writeups on this site and others?

    Don't attempt to R&R the shocks from the coils without a serious, heavy duty spring compressor. That is the most potentially dangerous aspect of the job (aside from not using jackstands and having the truck fall on you, which smarts something fierce). If you aren't comfortable doing that or don't have the right tool, you can have a shop do it. Just take off the entire coil and shock assemblies and take them to a tire and wheel shop, which usually have a wall-mounted compressor.
     
  5. Mar 30, 2012 at 9:34 AM
    CUtacomaTIGER

    CUtacomaTIGER Unprofessional Driver

    Joined:
    Jul 23, 2011
    Member:
    #60412
    Messages:
    382
    Gender:
    Male
    San Diego
    Vehicle:
    '01 4X4 SR5 Chrome Stepside
    Black Wheels Tow Hitch w/4 Pin Weathertech Floor Mats Flowmaster Deck Plate Mod Window Tint Rear Diff Breather Mod Blacked out Badges Window Rain Guards Bed Liner
    did you put it in on the right side (as when facing front of truck and box is installed) of the air filter box?

    i put my deckplate on the front of the air box
     
  6. Mar 30, 2012 at 9:45 AM
    TACOMABOSS

    TACOMABOSS Well-Known Member

    Joined:
    Jul 7, 2011
    Member:
    #59499
    Messages:
    4,294
    Gender:
    Male
    Vehicle:
    96 SR5 4x4
    Bilstein 5100s, Toytec AAL, Deck plate mod, Hella 500ff's, Sportsman Camo seat covers, Total Chaos 1" diff drop, JVC stereo, Painted bumpers and grille, Custom grille insert, HID projectors, Black spray paint
    Nice what size are they?
     
  7. Mar 30, 2012 at 10:10 AM
    sir1123

    sir1123 Tacomas FTMFW!!!!

    Joined:
    Nov 15, 2010
    Member:
    #46216
    Messages:
    1,383
    Gender:
    Male
    First Name:
    John
    Charleston
    Vehicle:
    99 SR5 Prerunner, Black,3.4L
    3"Ebaich with 5100 Bilstiens, K&N cai, 5% 3M Tint, Magnaflow 18", Hella 500s with 35w 3000k hid retro, 33x9.5x15 BFG A/T
    it says 33x10.5x15.....they look good
     
  8. Mar 30, 2012 at 10:15 AM
    marsh97

    marsh97 Well-Known Member

    Joined:
    Jan 27, 2012
    Member:
    #71557
    Messages:
    88
    Gender:
    Male
    First Name:
    Marshall
    Grass Valley, CA
    Vehicle:
    1997 4x4
    Toytec 3" lift
    Those tires and rims look clean. I sometimes wonder what my truck would look like with just the stock look like that, and now I have an image lol
     
  9. Mar 30, 2012 at 10:41 AM
    ronman737

    ronman737 Dangerous

    Joined:
    Jan 24, 2011
    Member:
    #49846
    Messages:
    1,312
    Gender:
    Male
    First Name:
    Ron
    Greenville, SC
    2008 4Runner 4x4 Sport
    :thumbsup:Nice
     
  10. Mar 30, 2012 at 11:46 AM
    marsh97

    marsh97 Well-Known Member

    Joined:
    Jan 27, 2012
    Member:
    #71557
    Messages:
    88
    Gender:
    Male
    First Name:
    Marshall
    Grass Valley, CA
    Vehicle:
    1997 4x4
    Toytec 3" lift
    I think my first mod might be a new grille..mine has a tiny crack in it, its really not a huge deal but it bugs the shit out of me. Lol.
     
  11. Mar 30, 2012 at 12:37 PM
    itin1200

    itin1200 Member

    Joined:
    Mar 26, 2011
    Member:
    #53748
    Messages:
    19
    Gender:
    Male
    First Name:
    Bill
    Pittsburgh, PA
    Vehicle:
    2004 4x4 TRD XtraCab
    Got my PA State inspection done yesterday.

    Passed with flying colors, and got an emissions exemption because I only put 2300 miles on the truck in 12 months.

    Today I replaced my wipers with some Bosch Icons. Took all of 30 seconds to do.

    They're on sale $8 off/pair at Autozone until 4/2.
     
  12. Mar 30, 2012 at 12:49 PM
    Blackdawg

    Blackdawg Dr. Frankenstein

    Joined:
    Dec 31, 2010
    Member:
    #48500
    Messages:
    81,607
    Gender:
    Male
    First Name:
    Monte
    Wyoming/St. Louis
    Vehicle:
    The Trifecta of Taco's
    ALL OF THEM!...Then some more.
    instead of the canopy?? or you gonna make a rack to go on top of the canopy??
     
  13. Mar 30, 2012 at 1:56 PM
    ronman737

    ronman737 Dangerous

    Joined:
    Jan 24, 2011
    Member:
    #49846
    Messages:
    1,312
    Gender:
    Male
    First Name:
    Ron
    Greenville, SC
    2008 4Runner 4x4 Sport
    Changed the oil (Pennzoil Platinum Synth), new wiper blades(Michelin), Topped off my wiper fluid( RainX 2-n-1 bug and de-icer), Aired up the tires.
     
  14. Mar 30, 2012 at 4:38 PM
    IDtrucks

    IDtrucks Unhinged and Fluid

    Joined:
    Jun 2, 2010
    Member:
    #38254
    Messages:
    23,536
    Gender:
    Male
    First Name:
    Mark "Buck"
    Jackson Wyoming
    Vehicle:
    96' X-Cab 4x4 TRD Off Road Clusterfuck
    JVC Deck, 10" sub mountd in rear seat cubby, 2 LED off road lights mounted in grille, amber raptor style grille lights, LED rock lights, square led bed light, custom made fuse block tray, 12 blade Blue Sea fuse block, 100a marine circuit breaker, black plasti dipped full grille, tinted tail lights + third, Uniden 520 with 4' firestik, Bilstein 5100s with 620lb Eibach coils, Diff drop, Chevy 63 leaf swap, TG creeper joints, 14" triangulated biletein 5125s, 8" extended steel braided brake line, TG Rock Sliders, CBI Moab 1.0 front bumper, custom fabbed bed rack, full TRD E-Locker axle swap and matching re-gear with custom stand alone wiring circuit, 29 spline pinion flange from an 06 wishbone runner, tubbed for 35x12.5" general grabbers on Ultra type 181 wheels, crush sleeve eliminator, Mini ARB compressor, front ARB locker, garage fab aluminum front skid plate, custom built high clearence rear bumper, removable mothafuckin doors
    thanks for the compliments :yay: very very pleased with the look. now i have to go take them out and get them dirty to see how well they do off road. however im not the least bit worried about them under performing.

    get at least one friend, and at least a day for each end of the truck. the rear isn't very hard. but the front is a bit daunting and can be a PITA. a few tips i learned after installing my 5100s.

    1 break lugs

    2 jack the truck up and take off lugs and tires.

    3 remove sway bar at the bolt that goes through the brackes on the uca and the brackets that hold it to the frame. 4 bolts on each side of the frame and 2 bolts for the uca bracket. leave it off and drive around with it after install to see how you do without it. it will improve your flex offroad and if you can drive safley on the road you dont really need it. as ian said "its like a condom, safer with it, but more fun without"

    4 to remove the strut:

    5put the jack under the uca and support it when the strut is fully drooped and in its neutural position

    6 take off the top 3 nuts that hold the top plate in the bucket (NOT THE MIDDLE ONE, this holds the strut together)

    7 break the bottom shock bolt on the uca and take it out. you till probably have to hit it with a screw driver and a hammer from the otherside to tap it out

    8 pull out strut and it should just drop out

    9 when you get the strut out take it to a place what will compress it and put your new parts on because the rent-able ones from auto zone are not worth the trouble. they are a huge pain in the ass.

    to get it back in:

    10 slide the strut in top first , with the 3 top plate bolts back in the holes making sure to have the eye at the bottom of the shock lined up with the bracket and put the nuts on just enough to keep it fromfalling out.

    11 have your friend push up and down the brake assembly with their foot (thus forcing the uca to go up and down) so you can line up the bottom of the shock with the bracket on the uca and slide the bolt in (MAKE SURE IT GOES IN THE WAY IT CAME OUT) when sliding the bolt in you may think the cv is getting in the way... its not.

    12 once you have the uca at the right level with the shock slide the bolt in. to get it through you will probably have to put a screw driver through the hole where the sway bar bolted to and hit it with a hammer to tap in the shock bolt. its a slow process tapping in the shock bolt, but it will get there eventually. when you are tapping it through keep moving the uca up and down and twisting the bottom shock eye so it lines up smoothly with the mounting holes and you can tap the bolt through.

    13 tighten everything back down, and tighten it again in a day or so


    when i did this it took 4 hours one night just to get the driver side strut out and get the new shock on the coil. the next day we did the passenger side and it took an hour and a half total. and that included the half hour it took to take the strut to get it compressed.


    if you have any questions just ask, it can be intimidating and complicated the first time. good luck!

    once you have the
     
  15. Mar 30, 2012 at 6:09 PM
    01Tac0ma

    01Tac0ma Bash Fabriction & Off-Road

    Joined:
    Jun 11, 2010
    Member:
    #38782
    Messages:
    6,304
    Gender:
    Male
    First Name:
    Chad
    West Columbia, SC
    Vehicle:
    SAS 01 TRD 4x4
    Look at build!
    Nice explination^^^, I also used a wall monut spring compressor when i did my 5100's and eibachs and it made it much easier than using the rentable ones from autozone...I only spent about 2 hours total on both sides of mine though the second time around when i did the spacer lift :crapstorm: originally it took me and another member around 4-5 hours total...just take your time and be sure to have all your tools ready and a good weekend with nothing else to do and it should be a snap!
     
  16. Mar 30, 2012 at 7:34 PM
    Jsimp

    Jsimp WV, VA, NC places i roam in the Yota

    Joined:
    Feb 9, 2012
    Member:
    #72476
    Messages:
    470
    Gender:
    Male
    First Name:
    Justin
    Winchester VA
    Vehicle:
    02 4runner
    E-Locker swapped! Limited swapppppp
    we need some more pictures in this thread..

    today i took off my LED fog lights that i had on the side of my rack (just not enough light) going to put them either in my bed or under the bumper as back up lights.. any suggestion on which spot or somewhere else to put them? -note- im gettin two KC lights to put on the rack backwards also.
     
  17. Mar 30, 2012 at 7:43 PM
    01Tac0ma

    01Tac0ma Bash Fabriction & Off-Road

    Joined:
    Jun 11, 2010
    Member:
    #38782
    Messages:
    6,304
    Gender:
    Male
    First Name:
    Chad
    West Columbia, SC
    Vehicle:
    SAS 01 TRD 4x4
    Look at build!

    In the toolbox :notsure: Thats where i plan to put some led lights for night time when im out wheeling or just need to get something out the box
     
  18. Mar 30, 2012 at 7:45 PM
    ontarioyota

    ontarioyota Well-Known Member

    Joined:
    Oct 2, 2010
    Member:
    #44122
    Messages:
    1,330
    Gender:
    Male
    First Name:
    @scott777taco INSTAGRAM
    SW Ontario, Canada
    Vehicle:
    2001 Reg Cab 4x4
    Blacked out badges-rims OME lift with 881's & dakar pacs, summer tires=BFG 31x10.5x15 on 93 4runner rims,winter= 265 75 16 DURATRACS on stock steelies,Flowmaster exhaust, deck plate mod, ARB front bumper
    yes put it on the right side...easier to get at then front
     
  19. Mar 30, 2012 at 7:56 PM
    Jsimp

    Jsimp WV, VA, NC places i roam in the Yota

    Joined:
    Feb 9, 2012
    Member:
    #72476
    Messages:
    470
    Gender:
    Male
    First Name:
    Justin
    Winchester VA
    Vehicle:
    02 4runner
    E-Locker swapped! Limited swapppppp
    i just thought about putting one in the tool box and then one under the tool box to see the bed. or maybe just both in the tool box but thats a lot of light for a little box.
     
  20. Mar 30, 2012 at 8:00 PM
    MapleMoose

    MapleMoose Drunk Canadian

    Joined:
    Feb 15, 2011
    Member:
    #51211
    Messages:
    8,575
    Gender:
    Male
    First Name:
    Ian
    West Kootenays
    Vehicle:
    1996 Tacoma SR5
    3" Eibach Coils, 3" AP Springs, AP 6" Shackles Toytec Diff drop, BAMF Sliders, Deck plate mod,Volt meter, Highbeam mod, PIAA fogs, 18" Magnaflow, LED dash swap, Color matched Satoshi Grille, Custom Rear Plate Bumper
    :worthless:
     

Products Discussed in

To Top