1. Welcome to Tacoma World!

    You are currently viewing as a guest! To get full-access, you need to register for a FREE account.

    As a registered member, you’ll be able to:
    • Participate in all Tacoma discussion topics
    • Communicate privately with other Tacoma owners from around the world
    • Post your own photos in our Members Gallery
    • Access all special features of the site

Behind Grill Light Bar feeler

Discussion in '2nd Gen Tacoma Parts Marketplace (2005-2015)' started by CayucosTacoma, Apr 24, 2012.

  1. Apr 24, 2012 at 4:14 PM
    #1
    CayucosTacoma

    CayucosTacoma [OP] Just think outside the Yota

    Joined:
    Mar 9, 2012
    Member:
    #74580
    Messages:
    5,597
    Gender:
    Male
    First Name:
    Chris
    San Luis Obispo/San Jose
    Vehicle:
    2004 Double Cab 4x4
    Specs in the Build Thread
    So i made a satoshi the other day, and me and my buddy made a light bar that fits behind the grill. They look good, and work perfectly. Wanted to see if anyone on here would be interested in one. Thinking maybe I can make a little extra cash..

    Anyways here what they look like. The first 2 pictures are of the 1st one made. The next ones(one I have, is longer and has rounded edges, looks better)

    These bars can hold up to 4 lights.

    [​IMG][​IMG]

    Heres the one i have, sorry for the pictures. I didnt want to take my grill off.

    IMG_4296_765b09967dc3394538aff6292fbee2397feadbf8.jpg
    IMG_4297_5f0232b603bf741ff52a5ba642d2d75cfbb7864e.jpg
    IMG_4298_b33a55af6fe905480acab7b695227fb3b5b85619.jpg
     
  2. Apr 24, 2012 at 4:58 PM
    #2
    CayucosTacoma

    CayucosTacoma [OP] Just think outside the Yota

    Joined:
    Mar 9, 2012
    Member:
    #74580
    Messages:
    5,597
    Gender:
    Male
    First Name:
    Chris
    San Luis Obispo/San Jose
    Vehicle:
    2004 Double Cab 4x4
    Specs in the Build Thread
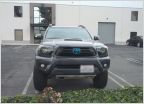
    This is how it looks mounted

    Untitled_0df5048f5ad57ebef94008cd5276a871643c3ea9.jpg
     
  3. Apr 24, 2012 at 5:00 PM
    #3
    2010TRD

    2010TRD Well-Known Member

    Joined:
    Mar 8, 2012
    Member:
    #74467
    Messages:
    3,056
    Gender:
    Male
    First Name:
    Thomas
    Waldo, FL
    Vehicle:
    2010 MGM trd offroad DCSB
    Billistein 5100 front/rears, Toytec 2" AAL Custom grill, All Pro rear bumper, All Pro sliders, Anytime elocker/foglights, Rear diff vent relocated, W/O seat covers, weathertech mats/visors, nfab tire racK, cobra 75 stealth CB, Custom engine/trans skids 3/8", Hella and HID behind grill, LED bar backup light, LED pods under cab (rocklights)
    nicely done
     
  4. Apr 24, 2012 at 5:00 PM
    #4
    munkeeboi

    munkeeboi Well-Known Member

    Joined:
    Jun 28, 2011
    Member:
    #58990
    Messages:
    281
    Gender:
    Male
    Burbank
    looks good. per my pm to you...i'd like to be able to adjust it vertically so the lights can be moved a tad bit higher in the grill.
     
  5. Apr 24, 2012 at 5:03 PM
    #5
    greenguy3

    greenguy3 BOOM goes the dynamite!

    Joined:
    Nov 26, 2011
    Member:
    #67702
    Messages:
    286
    Gender:
    Male
    First Name:
    Ian
    Arkansas
    Vehicle:
    Dirty A$$ TRD
    Mud and dirt
    Do you have a price? How much we talking?
     
  6. Apr 24, 2012 at 5:20 PM
    #6
    CayucosTacoma

    CayucosTacoma [OP] Just think outside the Yota

    Joined:
    Mar 9, 2012
    Member:
    #74580
    Messages:
    5,597
    Gender:
    Male
    First Name:
    Chris
    San Luis Obispo/San Jose
    Vehicle:
    2004 Double Cab 4x4
    Specs in the Build Thread
    Thanks!
    AND YES for EVERYBODY the next ones will be able to be moved up and down.
    50 plus shipping
     
  7. Apr 24, 2012 at 5:34 PM
    #7
    XPOTRPR

    XPOTRPR CNC Programmer/Machinist

    Joined:
    May 29, 2011
    Member:
    #57449
    Messages:
    30,619
    Gender:
    Male
    First Name:
    Josh
    Chandler, AZ
    Vehicle:
    [2009 Supercharged Adventuretruck] & [1986 22r Minitruck]
    > BUILD LINKS >
    looks good man. just some input tho, i made a light bar like this as well, and used the exact same mounting points.. i found that with the lights mounted and driving offroad, they would jiggle alot.. so i added two vertical pieces to make it solid. good luck! :thumbsup:
     
  8. Apr 24, 2012 at 5:38 PM
    #8
    CayucosTacoma

    CayucosTacoma [OP] Just think outside the Yota

    Joined:
    Mar 9, 2012
    Member:
    #74580
    Messages:
    5,597
    Gender:
    Male
    First Name:
    Chris
    San Luis Obispo/San Jose
    Vehicle:
    2004 Double Cab 4x4
    Specs in the Build Thread
    O thanks for the info. Ill go look and see if i can make it sturdier with some more mounting positions
     
  9. Apr 24, 2012 at 5:43 PM
    #9
    XPOTRPR

    XPOTRPR CNC Programmer/Machinist

    Joined:
    May 29, 2011
    Member:
    #57449
    Messages:
    30,619
    Gender:
    Male
    First Name:
    Josh
    Chandler, AZ
    Vehicle:
    [2009 Supercharged Adventuretruck] & [1986 22r Minitruck]
    > BUILD LINKS >
    no prob.. i just used smaller and thicker angled aluminum for the vertial braces, drilled and bolted into the light cross bar, and drilled and bolted into two existing holes on the bottom cross brace. hard to tell in this pic.. forgot to take some when actually building it.

    [​IMG]
     
  10. Apr 24, 2012 at 5:49 PM
    #10
    CayucosTacoma

    CayucosTacoma [OP] Just think outside the Yota

    Joined:
    Mar 9, 2012
    Member:
    #74580
    Messages:
    5,597
    Gender:
    Male
    First Name:
    Chris
    San Luis Obispo/San Jose
    Vehicle:
    2004 Double Cab 4x4
    Specs in the Build Thread
    Yeah everything is black haha but thanks for the description. Ill take a look soon. We welded everything so i guess ill see what we can come up with.
     
  11. Apr 24, 2012 at 6:32 PM
    #11
    CayucosTacoma

    CayucosTacoma [OP] Just think outside the Yota

    Joined:
    Mar 9, 2012
    Member:
    #74580
    Messages:
    5,597
    Gender:
    Male
    First Name:
    Chris
    San Luis Obispo/San Jose
    Vehicle:
    2004 Double Cab 4x4
    Specs in the Build Thread
    the gap from the radiator to the holes is about 3.5-3.75 inches. However we can always make it sit further away..
     
  12. May 14, 2012 at 5:13 PM
    #12
    mcampos0

    mcampos0 Today I Will!!!!

    Joined:
    Aug 3, 2009
    Member:
    #20600
    Messages:
    168
    Gender:
    Male
    First Name:
    Mark
    EL Paso
    Vehicle:
    09 DC Pre
    Mud Flaps Off, Window Tint, Keyless Remote w/ Kill switch n Alarm, Straps for shovel in back, Avh-3100DVD, 3in toytec lift, 285/75/16 Nitto tera Grapplers on stock 16 wheels, Polk Audio MM speakers all around
    Look pretty cool, the horn is the only thing that has to be relocated right?
     

Products Discussed in

To Top