1. Welcome to Tacoma World!

    You are currently viewing as a guest! To get full-access, you need to register for a FREE account.

    As a registered member, you’ll be able to:
    • Participate in all Tacoma discussion topics
    • Communicate privately with other Tacoma owners from around the world
    • Post your own photos in our Members Gallery
    • Access all special features of the site

How to Install a CB Radio (my version)

Discussion in 'Audio & Video' started by ccoorreeyy, May 23, 2009.

  1. May 23, 2009 at 11:20 PM
    #1
    ccoorreeyy

    ccoorreeyy [OP] www.EvolvedFinance.com

    Joined:
    Feb 8, 2009
    Member:
    #13432
    Messages:
    666
    Gender:
    Male
    First Name:
    Corey
    Los Angeles (South Bay)
    Vehicle:
    08 Double Cab 4x4 SR5 Debadged
    BHLM, Revenge Fab Rock-Sliders, BFG TA KO's, N-Fab light bar with 4 Hella 500's, Rear Suspension TSB, TRD Exhaust, CB Radio, 100W Ultra bright headlights, JBL Sound
    Hey All,

    After searching all over Google and TacomaWorld for a good Tacoma install tutorial and not finding one, I decided to make it!

    INSTALL AT YOUR OWN RISK. I'M NOT RESPONSIBLE FOR ANYTHING. PERIOD!

    Prep:

    First off, the install took me (an idiot when it comes to wiring), by myself, 5 hours. Now, I'm super anal about wires and getting every little detail just right. If you're at all like me, it should take at the very max 5 hours. Hopefully with this tutorial, you will cut down your install time.

    Second: Tools are needed!
    1. Socket wrench
    2. Wire cutters
    3. Wire t-shirt hanger
    4. Wire stripper
    5. Pliers
    6. Wire Loom (3/8 inch worked for me)
    7. Drill
    8. 8-mm Drill Bit
    9. Zip Ties
    10. Electrical Tape

    Depending on your CB radio kit and certian situations, you could need the following:
    1. Crimping tube (those things that connect two wires together without a solder machine)
    2. Flash light
    3. Snap Spade (to give the wire power for those of you like me who don't know what the hell they're doing)
    4. Wire (Red and Black - I used 12 Gage which I understand now may have been over kill but better safe than sorry!)

    Getting to it:

    First: This is the hardest part of the whole process. If you can get through this, you're golden.

    You'll be using that hanger. Cut off the longest piece you can get. Probably going to be the bottom portion. Grab the red wire and tap and wrap the wire around and around (about 4 or 5 times) the hanger followed by some tape like so:

    IMG_5835_fdfebaf52ecb5519a02cb553e987d5f4ba70fd38.jpg

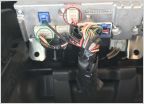
    Second: Find the firewall plastic piece in your engine bay on the right (by the driver). There's a cable there. It should have a blue piece on it. The hole that this cable leads into it the hole that I used. Here's a picture:

    IMG_5831_3d53b734e0baeac5894d5dc4b91f4f53158f7b9d.jpg

    Third. Take your new spiffy contraption you just made and shove it through that hole. The angle you want to be at when pushing it through is almost straight but not quite. You want to be pushing just a fraction of an inch down and right. The reason is that there's a hole that the original wire your following goes through and so you don't have to puncture the fire wall. Don't worry if you do. It's not a problem, but try and get it through that hole.

    IMG_5837_33175407e1e671e502e682fe0e08f82cbff92992.jpg

    And coming through the other side near the parking break:

    IMG_5833_22b4657cca51848a562c2b87a6a9919f72c0911b.jpg

    Fourth: Do it all over again with the other wire (black).

    Fifth: Now that you have the wires through, lead them through to where ever you want the CB to go. I did mine the the glove box so I had to take it off. You can do this by simply pulling on the glove box with a little force. Examine the box to see how to do this.

    IMG_5841_ed621fc5cb569dcf0ec29ba0fcc9b4c16bfba50f.jpg

    Drilled a couple of holes for them:

    IMG_5844_42bc0e11eb60c182dfb35fd565a0aa282bcb39d5.jpg

    Sixth: Grab your CB radio. Strip your wires and attach the black wire with the black CB wire and the red with the red CB wire using the crimping tube. Here's mine during and after doing this step.

    IMG_5845_a5afe331b870aeacc8e9b4ec4116af3c29210374.jpg

    IMG_5847_5f37484a8d8db111c29b0cd28792d06e1e28c460.jpg

    Seventh: Disconnect your barrty. Take the socket and undo the nut on the black and pull it off. Then, take the red off.

    Note: When replacing, attach the red first and then the black.

    IMG_5846_377d7ca9f8eb2a159ec72c81a9a598c3a223abc4.jpg

    Eighth and Ninth: Wire up the red and black wires that are leading to the CB. Strip them and attach the snap spade. Attach the ground to a good ground. I found this spot on my truck and worked well. The battery actually uses it as it's ground (see picture). Then, attach the red wire to the battery. There's a nut you can use on the red part of the battery to get power. You'll see it. After that, check to see if it's working then use the loom and tape to add a neat look and provide protection for the wires.

    IMG_5851_feaf754b206e3b70faa99f4082584271a07ffa40.jpg

    The ground:

    IMG_5852_55b752ad956e5093e43061dac90811d4387c5b91.jpg

    Tenth: You'll need to find a way to get the COAX cable (the cable that connects to the antenna) out of the truck. I found an awesome spot for this. It's right near the front passenger seat. There's a plastic peice that brings some other wires through. You can push that aside and pull the whole cable through. In order to get to the "in the truck" spot, you'll have to remove the panel on the door.

    IMG_5856_4791692b57833548509fd99f019b94a7438287be.jpg

    IMG_5858_869e0788aa86e7698f9f0a2df4aa6b589d203685.jpg

    IMG_5857_759e368d0e7b172cd44b05c57d28d96c13fd3201.jpg

    Eleventh: Take the COAX cable and run it along the wire trail towards the glove box as you can see above ^^. Once you get to the piece you have not disconnected, take the cable left and shove it under that. There's a nut that you have to remove to get it totally under.

    IMG_5860_3fc34749fb6729e8d4d635b58f2b5c7a030fe3e6.jpg

    IMG_5861_a05220a11e3154e3e90c75b25a18e7a8d7d94205.jpg

    Twelfth: Bring the COAX cable to the back of the cab like so:

    IMG_5862_27c221a41134f404d9ff758a516a43436b6e7d4e.jpg

    Then, pull the excess cable into the cab and clean up the wires. You'll want to tape down the inside access of the COAX cable. Some duct tape would do.

    All cleaned up!

    IMG_5865_5f031a0e75623adf1a25f8a1ea22d031db5c67a3.jpg

    Thirteenth: Put your passenger plastic piece back on and clip it in place.

    Fourteenth: Loom up the wire running to the back of the cab and zip-tie it up to the frame and what ever else you can find. Just make sure it's not something that can get hot.

    IMG_5864_9e6a667a7934d6456c3df473623905df17b1f03e.jpg

    Fifteenth: Attach your antenna to the bed (or to the metal tracks) by drilling the holes needed and attaching the bracket.

    IMG_6009_3be19a4943f36d6bf6ec5211ddbb7eff8ca85645.jpg

    I put the wire around and below the top of the liner.

    IMG_6010_86439aad2db9f8cf359f2a2c41f2a84dd836877b.jpg

    IMG_6011_8a2b23710da612540d3724e0b837fa5f01f10772.jpg

    Doesn't fit in my garage :D

    IMG_6012_3045279a9600cf377f397e9c373824b57b06e1ef.jpg

    Here's my truck on the trail today. Looks real nice.

    IMG_5924_8a8a892a76be2bdd0eb3774eab665c9bc46f43a0.jpg

    A few ending notes:
    1. The CB WILL stay on if your ignition is off. Turn it off when the engine is not running unless you want a dead battery.
    2. I put my antenna under my rear seats when I'm not using it.
    3. Most antenna's need a ground. Mine did not. If you do need to ground your antenna, attach and tape the ground the wire to the COAX cable back down to the bottom of the cab. Then, you'll need to find something to ground that other end to. I hear a lot of people ground their antenna's to the frame.

    I think that's about it! Good luck!
     
  2. May 23, 2009 at 11:26 PM
    #2
    SocalMan22

    SocalMan22 Well-Known Member

    Joined:
    Mar 25, 2007
    Member:
    #1146
    Messages:
    8,080
    Gender:
    Male
    First Name:
    Steve-0
    So*Cal
    Vehicle:
    06 PreRunner Dbl Cab
    What Mods!
    Thats a damn nice write up good job!
     
  3. May 23, 2009 at 11:34 PM
    #3
    rpparkster

    rpparkster Well-Known Member

    Joined:
    Apr 10, 2009
    Member:
    #15818
    Messages:
    537
    Gender:
    Male
    First Name:
    Roger
    Long Beach, CA
    Vehicle:
    2009 Tacoma TRD 4X4
    TRD FJ Wheels, 285 GY DuraTrac's, Fox 2.5 C/O w/ Res, TC UCA's, Demello Sliders,AllPro 3" Leaf Pack, Walker Evans 2.0 Adj. RR, AllPro Front Bumper & IFS Skid, Timbren Bump Stops, Leather
    Nice write-up. I have been searching for a DIY thread about installing. How long of a coax cable did you use?
     
  4. May 23, 2009 at 11:43 PM
    #4
    MonkeyProof

    MonkeyProof Power Top

    Joined:
    Oct 7, 2008
    Member:
    #9774
    Messages:
    12,599
    SoCal- SGV
    nice write up indeed... but you didn't touch basis on the most important part of a CB install/setup...calibrating the SWR of the antenna to the CB. a improperly adjusted antenna will literally blow the CB but in most cases others won't be able to hear you talk when you transmit..you'll hear everyone else...

    if you don't have the means to calibrate the SWR yourself, you can find a local radio shop to do it for you... usually charges anywhere from 15-25 bucks for the calibration.

    check out these links by FireStik...

    http://www.firestik.com/Meas-SWR.htm#Setting%20SWR

    http://www.firestik.com/Meas-SWR.htm#SWR Testing

    http://www.firestik.com/Meas-SWR.htm#63 Things

    http://www.firestik.com/Meas-SWR.htm#CoaxCable Processing
     
  5. May 23, 2009 at 11:45 PM
    #5
    derekabraham

    derekabraham Living vicariously through everybody

    Joined:
    Jul 8, 2008
    Member:
    #7822
    Messages:
    28,873
    Gender:
    Male
    First Name:
    TW'S Hippy Liberal
    Portland, OR
    Vehicle:
    2002 4x4 4Runner
    Stick on hood scoop from Autozone.
    Subscribing. :D


    Maybe we can do this to my truck at the mod day. :D


    Excellent work!
     
  6. May 23, 2009 at 11:52 PM
    #6
    ccoorreeyy

    ccoorreeyy [OP] www.EvolvedFinance.com

    Joined:
    Feb 8, 2009
    Member:
    #13432
    Messages:
    666
    Gender:
    Male
    First Name:
    Corey
    Los Angeles (South Bay)
    Vehicle:
    08 Double Cab 4x4 SR5 Debadged
    BHLM, Revenge Fab Rock-Sliders, BFG TA KO's, N-Fab light bar with 4 Hella 500's, Rear Suspension TSB, TRD Exhaust, CB Radio, 100W Ultra bright headlights, JBL Sound
    Thanks for the info MonkeyProof. I did forget to mention the tune. Very important if you want to:
    a. be able to talk to other people
    b. want to keep you cb working for longer then 6 months.

    Most local shops will do it. Mine cost $15. It takes about 15-30 minutes.
     
  7. May 23, 2009 at 11:53 PM
    #7
    ccoorreeyy

    ccoorreeyy [OP] www.EvolvedFinance.com

    Joined:
    Feb 8, 2009
    Member:
    #13432
    Messages:
    666
    Gender:
    Male
    First Name:
    Corey
    Los Angeles (South Bay)
    Vehicle:
    08 Double Cab 4x4 SR5 Debadged
    BHLM, Revenge Fab Rock-Sliders, BFG TA KO's, N-Fab light bar with 4 Hella 500's, Rear Suspension TSB, TRD Exhaust, CB Radio, 100W Ultra bright headlights, JBL Sound
    Lets do it! I have to install my Hella lights too. :D
     
  8. May 24, 2009 at 12:06 AM
    #8
    derekabraham

    derekabraham Living vicariously through everybody

    Joined:
    Jul 8, 2008
    Member:
    #7822
    Messages:
    28,873
    Gender:
    Male
    First Name:
    TW'S Hippy Liberal
    Portland, OR
    Vehicle:
    2002 4x4 4Runner
    Stick on hood scoop from Autozone.

    I'm down if we do it together. :D


    Is there a way to get the magnetic base of a magnet mount detached from the antenna or should I get a new one? :eek:
     
  9. May 24, 2009 at 12:23 AM
    #9
    MiikeyD

    MiikeyD The Green Machine

    Joined:
    Jul 6, 2007
    Member:
    #2017
    Messages:
    1,432
    Gender:
    Male
    First Name:
    Mike
    Upland, CA
    Vehicle:
    Green Prerunner DC 2.7L
    Suspension / Wheels / Tires 3.5" Fabtech lift w/ AAL 265/75/16 BFG A/T American Racing Baja Audio Alpine HU CDA-9886 Kicker DS650 Z-Edition 1000W Memphis M3 US Amps 4000W 2.5Farad Cap Lighting 6000K HID 2 Hella 500FF 2 Aux Bed Lights 2 Aux Driving Lights Performance Volant CAI Flomaster Super 44 Doug Thorley Long Tube headers (coming soon) NGK Iridium Sparkplugs Accessories Scanguage II Cobra LTD27-NW with 3' Firestik Radio Shack Triple Trunking Scanner Harbor Freight Hi-Lift Cosmetics Flat Black Bumper Trim Flat Black Grill Surrounding with Satoshi Clear Corners Future Modifications (not specific) Longtravel w/ king shocks or fox Caged bed Shackles rear suspension. Fox / king shocks custom front bumper Custom Glassworks extreme kit for 01-04 (only have hood and passenger side.. need driver panel) Supercharger + 8port intake manifold optima yellow top battery remounted new rims caged interior rear bench removal 4 sparc
    and thats exactly why i bought a 3" firestik :] lol.
     
  10. May 24, 2009 at 12:26 AM
    #10
    ccoorreeyy

    ccoorreeyy [OP] www.EvolvedFinance.com

    Joined:
    Feb 8, 2009
    Member:
    #13432
    Messages:
    666
    Gender:
    Male
    First Name:
    Corey
    Los Angeles (South Bay)
    Vehicle:
    08 Double Cab 4x4 SR5 Debadged
    BHLM, Revenge Fab Rock-Sliders, BFG TA KO's, N-Fab light bar with 4 Hella 500's, Rear Suspension TSB, TRD Exhaust, CB Radio, 100W Ultra bright headlights, JBL Sound
    ^^ LOL. Good call!

    Derek, I don't really know, but I can only guess so. Why not?

    You could also just get a new one but they're a little pricey I think.
     
  11. May 24, 2009 at 10:22 AM
    #11
    ccoorreeyy

    ccoorreeyy [OP] www.EvolvedFinance.com

    Joined:
    Feb 8, 2009
    Member:
    #13432
    Messages:
    666
    Gender:
    Male
    First Name:
    Corey
    Los Angeles (South Bay)
    Vehicle:
    08 Double Cab 4x4 SR5 Debadged
    BHLM, Revenge Fab Rock-Sliders, BFG TA KO's, N-Fab light bar with 4 Hella 500's, Rear Suspension TSB, TRD Exhaust, CB Radio, 100W Ultra bright headlights, JBL Sound
    I think it was around 10-12 feet. You don't need much surprisingly.
     
  12. Jan 6, 2012 at 2:46 PM
    #12
    ralphtater

    ralphtater Well-Known Member

    Joined:
    Dec 14, 2011
    Member:
    #68791
    Messages:
    48
    Gender:
    Male
    florida
    Vehicle:
    06 prerunner access cab
    2.5 in revtech leveling kit 285 nitto terra grapplers 10 inch custom mounted sub 15%tint
    sick build were did you get that antena?
     
  13. Apr 26, 2012 at 11:53 AM
    #13
    shaniac

    shaniac Well-Known Member

    Joined:
    Nov 13, 2009
    Member:
    #25883
    Messages:
    188
    Gender:
    Male
    First Name:
    Mike
    Charleston, SC
    Vehicle:
    2014 Double-Cab Tacoma SR5 V6 4x4
    Nice job! :)

    One important thing that most people need to know when running the coaxial in your vehicle is to never wrap or coil up any excess coaxial cable. In order to get ta proper SWR calibration you need to spread the entire coaxial out. If you purchase a 18 foot cable and only need 10 feet to get from your Antennae to your radio, you will need to somehow route the 8 feet of excess coaxial. I had to do this in my 1987 Toyota single cap pickup and the way I did it was to make an entire loop around the cab of my truck so that I wouldn't have to tie up the excess. I figured this out when I couldn't get a good calibration on my radio/antennae and I took it to a shop that does professional installs of cb's and radio's...etc...
    When the tech saw my coaxial coiled up he laughed and told me that was a no–no. He helped me reroute it and I got my calibration as close to perfect as possible.

    Coiling or wrapping up excess coaxial when using a linear amp is a BIG no–no as the coaxial will heat up where it is coiled or gathered up and that spells disaster. Think about running a power tool off of a 100 foot extension cord that is still coiled up...the coils do get hot, hot enough to burn a ring into the carpet (I know this first hand :laugh:). :cool:
     
  14. Apr 26, 2012 at 4:27 PM
    #14
    ccoorreeyy

    ccoorreeyy [OP] www.EvolvedFinance.com

    Joined:
    Feb 8, 2009
    Member:
    #13432
    Messages:
    666
    Gender:
    Male
    First Name:
    Corey
    Los Angeles (South Bay)
    Vehicle:
    08 Double Cab 4x4 SR5 Debadged
    BHLM, Revenge Fab Rock-Sliders, BFG TA KO's, N-Fab light bar with 4 Hella 500's, Rear Suspension TSB, TRD Exhaust, CB Radio, 100W Ultra bright headlights, JBL Sound
    Agreed! Thanks for the info!
     
  15. Apr 26, 2012 at 4:33 PM
    #15
    Irish020

    Irish020 Well-Known Member

    Joined:
    Aug 19, 2010
    Member:
    #41947
    Messages:
    705
    Gender:
    Male
    First Name:
    Phil
    Pennsylvania
    Vehicle:
    '05 Tacoma TRD Sport 4 Door Longbed
    ARE Hard Tonneau Cover Flowmaster American Thunder Super 50 Series Stainless Dual Exhaust Toytec Ultimate 3" w/ UCA's
    Did you see my post? I've had a lot of comments about the box and requests to duplicate for them....
    http://www.tacomaworld.com/forum/2nd-gen-tacomas/210373-cb-box-build.html
    [​IMG]
     
  16. Apr 26, 2012 at 4:56 PM
    #16
    ccoorreeyy

    ccoorreeyy [OP] www.EvolvedFinance.com

    Joined:
    Feb 8, 2009
    Member:
    #13432
    Messages:
    666
    Gender:
    Male
    First Name:
    Corey
    Los Angeles (South Bay)
    Vehicle:
    08 Double Cab 4x4 SR5 Debadged
    BHLM, Revenge Fab Rock-Sliders, BFG TA KO's, N-Fab light bar with 4 Hella 500's, Rear Suspension TSB, TRD Exhaust, CB Radio, 100W Ultra bright headlights, JBL Sound
  17. Apr 26, 2012 at 5:05 PM
    #17
    IGO4LOW

    IGO4LOW Well-Known Member

    Joined:
    Dec 13, 2011
    Member:
    #68720
    Messages:
    702
    Gender:
    Male
    First Name:
    Zach
    Fullerton, CA
    Vehicle:
    2011 DCLB TRD SPORT 4x4 w/ JBL Audio
    3" Procomp lift, 285/70 R17 Nitto Terra Grapplers on Procomp series 6005 wheels, Fog lights on Anytime mod, illuminated oem fog switch, bed mat, all weather floormats, CB Radio in dash, alternating turn signal mod, automatic center console light. Blacked out badges, D2s in the grille.
    Coax needs to be in incriments of 3 feet.
    Here's my set up
    [​IMG]
     
  18. Apr 26, 2012 at 5:29 PM
    #18
    LUSETACO

    LUSETACO Here for the Taco Pron

    Joined:
    Jun 27, 2009
    Member:
    #18991
    Messages:
    11,315
    Gender:
    Male
    First Name:
    Dennis
    South Central Pee A
    Vehicle:
    2005 PIMP MOBILE
    Yes
     
  19. Apr 26, 2012 at 5:48 PM
    #19
    IGO4LOW

    IGO4LOW Well-Known Member

    Joined:
    Dec 13, 2011
    Member:
    #68720
    Messages:
    702
    Gender:
    Male
    First Name:
    Zach
    Fullerton, CA
    Vehicle:
    2011 DCLB TRD SPORT 4x4 w/ JBL Audio
    3" Procomp lift, 285/70 R17 Nitto Terra Grapplers on Procomp series 6005 wheels, Fog lights on Anytime mod, illuminated oem fog switch, bed mat, all weather floormats, CB Radio in dash, alternating turn signal mod, automatic center console light. Blacked out badges, D2s in the grille.
  20. Apr 26, 2012 at 6:00 PM
    #20
    LUSETACO

    LUSETACO Here for the Taco Pron

    Joined:
    Jun 27, 2009
    Member:
    #18991
    Messages:
    11,315
    Gender:
    Male
    First Name:
    Dennis
    South Central Pee A
    Vehicle:
    2005 PIMP MOBILE
    Yes
     

Products Discussed in

To Top