1. Welcome to Tacoma World!

    You are currently viewing as a guest! To get full-access, you need to register for a FREE account.

    As a registered member, you’ll be able to:
    • Participate in all Tacoma discussion topics
    • Communicate privately with other Tacoma owners from around the world
    • Post your own photos in our Members Gallery
    • Access all special features of the site

LCA Question

Discussion in '2nd Gen. Tacomas (2005-2015)' started by Pugga, Apr 28, 2012.

?

LCA options...

Poll closed May 28, 2012.
  1. Let Toyota have at it and pray

    5 vote(s)
    14.3%
  2. Replace LCA bushings myself

    18 vote(s)
    51.4%
  3. Deal with the crappy ride

    0 vote(s)
    0.0%
  4. Something else

    3 vote(s)
    8.6%
  5. Potato (Click here if you're a tool and have nothing constructive to offer)

    9 vote(s)
    25.7%
  1. May 11, 2012 at 12:10 PM
    #101
    Pugga

    Pugga [OP] Pasti-Dip Free 1983 - 2015... It was a good run

    Joined:
    Jun 18, 2010
    Member:
    #39131
    Messages:
    38,662
    Gender:
    Male
    First Name:
    Mike
    Massachusetts
    Vehicle:
    '19 Ford F-250 6.7 SCrew
    F-250 Land Yacht Mod
    Damn right! I had to call 4 dealerships before I found one that had the parts, I was starting to get nervous. I'll see if I can get some pictures of the process since Boyd's thread got all messed up when he did the sailor dive off the ship and tried dividing by 0 :D
     
  2. May 11, 2012 at 2:13 PM
    #102
    XXXX

    XXXX Well-Known Member

    Joined:
    Sep 1, 2011
    Member:
    #62715
    Messages:
    20,889
    Gender:
    Male
    First Name:
    sKiP
    Vehicle:
    05 Prius
    I still have all the pics...just been to lazy to fix the LCA bushing thread or post them in a DIY.
     
  3. May 11, 2012 at 5:59 PM
    #103
    Pugga

    Pugga [OP] Pasti-Dip Free 1983 - 2015... It was a good run

    Joined:
    Jun 18, 2010
    Member:
    #39131
    Messages:
    38,662
    Gender:
    Male
    First Name:
    Mike
    Massachusetts
    Vehicle:
    '19 Ford F-250 6.7 SCrew
    F-250 Land Yacht Mod
    I'm in balls deep now. Truck is torn down and on jack stands. I supported the spindles using ratchet straps so they're not just hanging and everything that would come off is off and once I have the other parts in my hands, I'll start cutting (Fiance is making a parts run at 7:30 tomorrow morning :D)
     
  4. May 11, 2012 at 6:01 PM
    #104
    hard2kill

    hard2kill Well-Known Member

    Joined:
    Apr 28, 2011
    Member:
    #55714
    Messages:
    3,862
    Gender:
    Male
    First Name:
    John
    Rhinebeck NY
    Vehicle:
    06 4door trd sport white 6spd
    ...315's,2in bora wheel spacers,safari snorkel,wheel spacers,bruteforcefab rear bumper and sliders,afe filter,hi-lift jack,5100 with OME 886 & 1/2in spacer,allpro expo's,icon 10in rear shox,flip kit,ss brake lines,cobra cb,fog light mod,yellow fogs,weathertech mats,fullsize spare tire and extra sport rim,tinted windows,aeroturbine 2525 muffler dumped over axle...rear diff breather mod...removed factory spare...removed 2nd air filter...THULE roof rack and fairing....bud builts front to back,allpoo front bumper,BAMF lca skids,overland Offroad roof and bed racks,
  5. May 12, 2012 at 5:54 PM
    #105
    Pugga

    Pugga [OP] Pasti-Dip Free 1983 - 2015... It was a good run

    Joined:
    Jun 18, 2010
    Member:
    #39131
    Messages:
    38,662
    Gender:
    Male
    First Name:
    Mike
    Massachusetts
    Vehicle:
    '19 Ford F-250 6.7 SCrew
    F-250 Land Yacht Mod
    New bushings in! :yay:

    For anyone considering this, think long and hard about it. It was a royal pain in the ass. Here's some tips I came away with:
    1) Milwaulkee metal blades SUCK! I fried 2 of them getting half way through the first cut. Switched to Lenox Gold blades, finished the first cut as well as all the others.

    2) Screw drilling the rubber and attempting to cut it out that way, it's very tough to cut because if it builds up heat, it gets gummy. We torched them out. The rubber doesn't just melt and let go of the center metal sleeve though, it takes a lot of heat and a lot of working with a screwdriver and a center punch with a hammer to finally knock the centers out. Plus it really stinks when you torch the rubber so do it outside and stand upwind. When it's hot, use a screwdriver and scrape out as much of the remaining rubber as you can, it makes it easier to make your cuts later.

    3) After you get the centers are out and you've cleaned the rubber out, cut the outter bushing in 2 spots, about 1/8 of the way around away from each other. Then cut the bushing outter ring with a dremel where you made the inside cuts and use a pry bar to knock that piece out. Even after you do that, you might have a hard time knocking the outter ring out anyways. Mine were rusted in good and took a hell of a time getting out.

    4) Having some good help makes the world of difference. HUGE thank you to John and Rob for helping out! It made the job go much smoother than it would have had I gone at it alone.

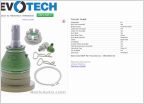
    For the record, I started at 8:30, finished around 5:00 with 2 people helping most of the time and the wheels were off and LCA's unbolted from the front shocks and spindles the night before. I was able to re-use a lot of the bolts and cam washers to save some money. In hind sight, I'm not sure I'd have just replaced the bushings vs. buying the control arm new and getting new bushings and ball joints all in one. I did end up saving a decent amount of money but it's not a quick/easy job.
     
  6. May 13, 2012 at 12:57 PM
    #106
    XXXX

    XXXX Well-Known Member

    Joined:
    Sep 1, 2011
    Member:
    #62715
    Messages:
    20,889
    Gender:
    Male
    First Name:
    sKiP
    Vehicle:
    05 Prius
    WOOT!


    I cut the bushing rubber with a jig saw. You didn't try it by hand did you?

    Did you swap the BJ's or just the bushings?
     
  7. May 13, 2012 at 2:21 PM
    #107
    johnnym

    johnnym Well-Known Member

    Joined:
    Jun 14, 2010
    Member:
    #38917
    Messages:
    6,893
    Gender:
    Male
    First Name:
    john
    NH
    Vehicle:
    87 4Runner Chevy 1500
    Sas 4.7tranfer case gears 5.29s Locked front/rear
    Hand saw ... Then we torched the other 3 out . Bushings only
     
  8. May 13, 2012 at 4:55 PM
    #108
    Pugga

    Pugga [OP] Pasti-Dip Free 1983 - 2015... It was a good run

    Joined:
    Jun 18, 2010
    Member:
    #39131
    Messages:
    38,662
    Gender:
    Male
    First Name:
    Mike
    Massachusetts
    Vehicle:
    '19 Ford F-250 6.7 SCrew
    F-250 Land Yacht Mod
    Yep, we cut one out with a hand saw, tried cutting the rear one with the sawzall but it wouldn't make a turn in the rubber and the higher speed seemed to make the rubber gum up. The torch was actually really effective and we think the heat might have helped loosen the outter bushing ring against the LCA.

    I think if you're going to do BJ's along with both sets of bushings, you're much better off just buying a new arm and swapping them in. The cost differential wouldn't be overly substantial and you'd save a HELL of a lot of time and effort.
     
  9. May 14, 2012 at 6:11 AM
    #109
    XXXX

    XXXX Well-Known Member

    Joined:
    Sep 1, 2011
    Member:
    #62715
    Messages:
    20,889
    Gender:
    Male
    First Name:
    sKiP
    Vehicle:
    05 Prius

    I need to go back and look at what I paid. I remember it being much cheaper to fix them then go new, but I could be wrong. I thought I saved almost $500 :notsure:
     
  10. May 14, 2012 at 7:30 AM
    #110
    Pugga

    Pugga [OP] Pasti-Dip Free 1983 - 2015... It was a good run

    Joined:
    Jun 18, 2010
    Member:
    #39131
    Messages:
    38,662
    Gender:
    Male
    First Name:
    Mike
    Massachusetts
    Vehicle:
    '19 Ford F-250 6.7 SCrew
    F-250 Land Yacht Mod
    It depends on what needs to be replaced. If you need new bushings, cam nuts, bolts and that cam sleeve, it's $350 in parts + whatever the ball joints cost and misc. tools/disposables (blades, wire brushes, paint, etc figure around $30 - $50). The bushings themselves only cost $120, the rest is the bolts, cam washers and sleeves. You can get the whole LCA, bushings and ball joints installed and ready to go for $260/ea. I'm not sure what the ball joints cost but I'd assume they're at least $50 for the pair so you're looking at a little over $400 - $450 and a day of labor vs. $650ish and a simple swap. I also bought most of my stuff through Camelback Toyota and used their 5% off deal. Had I gone through my local stealership, parts would have been at least 40% higher (I wish that was an exaggeration, but I priced everything out local and through Camelback and was floored by the cost differential). I got lucky, I was able to reuse a lot of my bolts, cam washers and nuts. Overall, this project only cost me $160 - $175 in parts since most of what I bought will be returned.

    What really burned my ass about this whole thing was the bushings weren't bad, they had a lot of life left and were silent. The only thing wrong was the metal sleeves seized inside the bushings making it impossible to align. Again, way to drop the ball on the suspension Toyota... There's this silver crap called Never Seize that should have been applied at the factory that does wonders for corrosion prevention, you look into it. :mad:

    I got my new alignment numbers this morning:
    Caster 2.0 - 1.8
    Camber .5 - .5
    Toe .08 - .08

    The tech said he tried to get more caster but he pushed it as far as he could without affecting camber too much. Overall, it drives a LOT better and actually tracks in a straight line. Still follows ruts in the pavement somewhat but I believe this is an attribute of the tires and it's not nearly as bad as it was pre-alignment.
     
  11. May 14, 2012 at 12:00 PM
    #111
    brutalguyracing

    brutalguyracing BIG DADDY

    Joined:
    Jun 28, 2009
    Member:
    #19000
    Messages:
    24,052
    Gender:
    Male
    F.U> GUYZ
    broken mods
    WHERE DOES ONE GET THE LCA COMPLETE FOR $260?

    AND THEM #'S ARE:eek:
     
  12. May 14, 2012 at 12:04 PM
    #112
    XXXX

    XXXX Well-Known Member

    Joined:
    Sep 1, 2011
    Member:
    #62715
    Messages:
    20,889
    Gender:
    Male
    First Name:
    sKiP
    Vehicle:
    05 Prius

    those are stock height numbers :cool:
     
  13. May 14, 2012 at 12:14 PM
    #113
    Pugga

    Pugga [OP] Pasti-Dip Free 1983 - 2015... It was a good run

    Joined:
    Jun 18, 2010
    Member:
    #39131
    Messages:
    38,662
    Gender:
    Male
    First Name:
    Mike
    Massachusetts
    Vehicle:
    '19 Ford F-250 6.7 SCrew
    F-250 Land Yacht Mod
    LCA's for $260 here free shipping over $60 and for the month of May, they're offering an additional 5% off so it's closer to $250.

    I hope you mean :eek: as in :) not :eek: as in :bananadead:

    I'm +1.5" over stock (Eibach coils up front, Icon AAL in the rear).
     
  14. May 14, 2012 at 12:17 PM
    #114
    XXXX

    XXXX Well-Known Member

    Joined:
    Sep 1, 2011
    Member:
    #62715
    Messages:
    20,889
    Gender:
    Male
    First Name:
    sKiP
    Vehicle:
    05 Prius
    Your lifted more then me :eek:
     
  15. May 14, 2012 at 12:20 PM
    #115
    Pugga

    Pugga [OP] Pasti-Dip Free 1983 - 2015... It was a good run

    Joined:
    Jun 18, 2010
    Member:
    #39131
    Messages:
    38,662
    Gender:
    Male
    First Name:
    Mike
    Massachusetts
    Vehicle:
    '19 Ford F-250 6.7 SCrew
    F-250 Land Yacht Mod
    :eek:


    And the only reason I'm lifted at all is because it was cheaper to stiffen the suspension by adding lift that it was to beef it up and stay stock height :eek:
     
  16. May 14, 2012 at 12:21 PM
    #116
    OZ-T

    OZ-T I hate my neighbour

    Joined:
    Dec 15, 2009
    Member:
    #27584
    Messages:
    50,579
    Gender:
    Male
    First Name:
    Peter North
    British Columbia
    Vehicle:
    Mag Grey 09 Trd Sport DCLB 4x4
    OME 885x , OME shocks and Dakars , Wheelers SuperBumps front and rear , 275/70/17 Hankook ATm , OEM bed mat , Weathertech digifit floor liners , Weathertech in-channel vents , headache rack , Leer 100RCC commercial canopy , TRD bedside decals removed , Devil Horns by Andres , HomerTaco Satoshi
    You're
    than
     
  17. May 14, 2012 at 12:22 PM
    #117
    Pugga

    Pugga [OP] Pasti-Dip Free 1983 - 2015... It was a good run

    Joined:
    Jun 18, 2010
    Member:
    #39131
    Messages:
    38,662
    Gender:
    Male
    First Name:
    Mike
    Massachusetts
    Vehicle:
    '19 Ford F-250 6.7 SCrew
    F-250 Land Yacht Mod
    :laughing:
     
  18. May 14, 2012 at 12:24 PM
    #118
    XXXX

    XXXX Well-Known Member

    Joined:
    Sep 1, 2011
    Member:
    #62715
    Messages:
    20,889
    Gender:
    Male
    First Name:
    sKiP
    Vehicle:
    05 Prius

    eat me asshole...

    I'm going to make a WC trip to kanistukian to shove a English book up you're ass
     
  19. May 14, 2012 at 12:28 PM
    #119
    OZ-T

    OZ-T I hate my neighbour

    Joined:
    Dec 15, 2009
    Member:
    #27584
    Messages:
    50,579
    Gender:
    Male
    First Name:
    Peter North
    British Columbia
    Vehicle:
    Mag Grey 09 Trd Sport DCLB 4x4
    OME 885x , OME shocks and Dakars , Wheelers SuperBumps front and rear , 275/70/17 Hankook ATm , OEM bed mat , Weathertech digifit floor liners , Weathertech in-channel vents , headache rack , Leer 100RCC commercial canopy , TRD bedside decals removed , Devil Horns by Andres , HomerTaco Satoshi
    Bring it
     
  20. May 14, 2012 at 12:30 PM
    #120
    XXXX

    XXXX Well-Known Member

    Joined:
    Sep 1, 2011
    Member:
    #62715
    Messages:
    20,889
    Gender:
    Male
    First Name:
    sKiP
    Vehicle:
    05 Prius
    with no lube

    you cheeky bastard
     

Products Discussed in

To Top