

-
Welcome to Tacoma World!
You are currently viewing as a guest! To get full-access, you need to register for a FREE account.
As a registered member, you’ll be able to:- Participate in all Tacoma discussion topics
- Communicate privately with other Tacoma owners from around the world
- Post your own photos in our Members Gallery
- Access all special features of the site
 Show Me Your Co2 Mounting Solutions
 Does anyone make a camera relocation mount?
 4.0 Spark Plug replacement fun
 Advice because I won't use my truck for 10 months
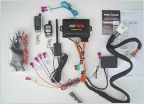 Remote Start
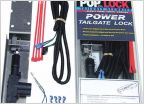 Locking tailgate for 2013 tacoma with back up cam, suggestions?
HOW TO: Change LEDs in the stock radio.
Discussion in '2nd Gen. Tacomas (2005-2015)' started by F75gunslinger, May 17, 2012.
Page 1 of 2
Page 1 of 2


