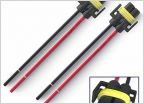
1. Welcome to Tacoma World!

    You are currently viewing as a guest! To get full-access, you need to register for a FREE account.

    As a registered member, you’ll be able to:
    • Participate in all Tacoma discussion topics
    • Communicate privately with other Tacoma owners from around the world
    • Post your own photos in our Members Gallery
    • Access all special features of the site

Finally finished LEDS - cupholders, console, and bed lights

Discussion in 'Lighting' started by Oregon TRD, Jan 27, 2012.

  1. Jun 25, 2012 at 1:56 PM
    #281
    Oregon TRD

    Oregon TRD [OP] "GO DUCKS" Edition

    Joined:
    Oct 16, 2007
    Member:
    #3081
    Messages:
    15,316
    Gender:
    Male
    First Name:
    Ross
    Steel Panthers bathroom floor!
    Vehicle:
    2005 Mall Krawler
    6" Fabtech Lift, 35" Fierce M/T 17" Eagle Alloy Sim bead locks Naked girls in the bed 10.1" DVD head unit Two 7" Headrest Monitors PS2 in glove box

    I can't remember. I ran out and had to run to Autozone and i grabbed whatever they had.
     
  2. Jun 25, 2012 at 1:59 PM
    #282
    Oregon TRD

    Oregon TRD [OP] "GO DUCKS" Edition

    Joined:
    Oct 16, 2007
    Member:
    #3081
    Messages:
    15,316
    Gender:
    Male
    First Name:
    Ross
    Steel Panthers bathroom floor!
    Vehicle:
    2005 Mall Krawler
    6" Fabtech Lift, 35" Fierce M/T 17" Eagle Alloy Sim bead locks Naked girls in the bed 10.1" DVD head unit Two 7" Headrest Monitors PS2 in glove box
    When I ran power from the toggle to the wagos , after I put the led wires into the wagos I hit the toggle to see if they were working before I put everything back together.

    Keep checking them as you go.

    After I got all the cupholder LED's and the console LED's hooked into the WAGO clamps, I flipped the toggle to see if everyone of them were working before popping cupholders back in and buttoning everything up.

    Nothing worse than putting everything back together then realizing shit ain't working..;)
     
  3. Jun 25, 2012 at 2:11 PM
    #283
    Forster46

    Forster46 Very nice how much?

    Joined:
    Jul 20, 2010
    Member:
    #40487
    Messages:
    3,362
    Gender:
    Male
    First Name:
    Nick
    Mount Vernon, WA
    Vehicle:
    The doritos locos taco
    6000k HID's, AUX Reverse Lights, 3" Rough Country Suspension Lift, Pioneer AVH-P4200 Double Din, Underglow and footwell Lights, Camo Seat Covers, Duralast Tool Box, Blacked Out Badges, Grill, Front Emblem, Midland CB Radio, Amber Strobes, POWER REAR WINDOW, cup holder LED's, Firestik 3' in bed, console divider, Ultragauge.
    You can say that again.

    I think the hardest part for me will be deciding where I want to put the lights. I have ten, so I am thinking:

    One in each cupholder (3)
    One in storage cubby in front of shifter
    Two in center console
    Two in glove box
    One in rear air vent, by feet

    and one extra.... maybe two in storage cubby, I'm not sure
     
  4. Jun 25, 2012 at 2:22 PM
    #284
    Oregon TRD

    Oregon TRD [OP] "GO DUCKS" Edition

    Joined:
    Oct 16, 2007
    Member:
    #3081
    Messages:
    15,316
    Gender:
    Male
    First Name:
    Ross
    Steel Panthers bathroom floor!
    Vehicle:
    2005 Mall Krawler
    6" Fabtech Lift, 35" Fierce M/T 17" Eagle Alloy Sim bead locks Naked girls in the bed 10.1" DVD head unit Two 7" Headrest Monitors PS2 in glove box

    That's perfect!!! Wish I would of put 2 in my glovebox.

    And YES - 2 in the cubby area.

    I need to do that cubby area in my truck still.
     
  5. Jun 25, 2012 at 3:02 PM
    #285
    Forster46

    Forster46 Very nice how much?

    Joined:
    Jul 20, 2010
    Member:
    #40487
    Messages:
    3,362
    Gender:
    Male
    First Name:
    Nick
    Mount Vernon, WA
    Vehicle:
    The doritos locos taco
    6000k HID's, AUX Reverse Lights, 3" Rough Country Suspension Lift, Pioneer AVH-P4200 Double Din, Underglow and footwell Lights, Camo Seat Covers, Duralast Tool Box, Blacked Out Badges, Grill, Front Emblem, Midland CB Radio, Amber Strobes, POWER REAR WINDOW, cup holder LED's, Firestik 3' in bed, console divider, Ultragauge.
    Our layouts are the same down the center. I think that sounds good then. Maybe I'll get more to put someplace later.

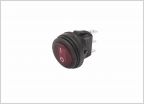
    On another note, I got a four pack of those round oznium switches. I am going to use one for all these lights I think, but I don't know where I want to mount it. Somewhere besides the switch blanks to the left of the sterring wheel.
     
  6. Jun 25, 2012 at 3:07 PM
    #286
    Oregon TRD

    Oregon TRD [OP] "GO DUCKS" Edition

    Joined:
    Oct 16, 2007
    Member:
    #3081
    Messages:
    15,316
    Gender:
    Male
    First Name:
    Ross
    Steel Panthers bathroom floor!
    Vehicle:
    2005 Mall Krawler
    6" Fabtech Lift, 35" Fierce M/T 17" Eagle Alloy Sim bead locks Naked girls in the bed 10.1" DVD head unit Two 7" Headrest Monitors PS2 in glove box
    You could put it inside the little pull down change compartment.
     
  7. Jun 25, 2012 at 3:27 PM
    #287
    Forster46

    Forster46 Very nice how much?

    Joined:
    Jul 20, 2010
    Member:
    #40487
    Messages:
    3,362
    Gender:
    Male
    First Name:
    Nick
    Mount Vernon, WA
    Vehicle:
    The doritos locos taco
    6000k HID's, AUX Reverse Lights, 3" Rough Country Suspension Lift, Pioneer AVH-P4200 Double Din, Underglow and footwell Lights, Camo Seat Covers, Duralast Tool Box, Blacked Out Badges, Grill, Front Emblem, Midland CB Radio, Amber Strobes, POWER REAR WINDOW, cup holder LED's, Firestik 3' in bed, console divider, Ultragauge.
    Good idea
     
  8. Jun 25, 2012 at 4:08 PM
    #288
    tango down

    tango down Policy Ninja

    Joined:
    Oct 17, 2011
    Member:
    #65363
    Messages:
    580
    Gender:
    Male
    First Name:
    jeff
    peoples republik of IL
    Vehicle:
    12 Taco DCSB TRD Off Road
    LED interior, rail mounted ammo cans
    18 ga worked for me
     
  9. Jun 25, 2012 at 4:18 PM
    #289
    Oregon TRD

    Oregon TRD [OP] "GO DUCKS" Edition

    Joined:
    Oct 16, 2007
    Member:
    #3081
    Messages:
    15,316
    Gender:
    Male
    First Name:
    Ross
    Steel Panthers bathroom floor!
    Vehicle:
    2005 Mall Krawler
    6" Fabtech Lift, 35" Fierce M/T 17" Eagle Alloy Sim bead locks Naked girls in the bed 10.1" DVD head unit Two 7" Headrest Monitors PS2 in glove box

    Yep. I believe thats what I had.
     
  10. Jun 25, 2012 at 5:25 PM
    #290
    Forster46

    Forster46 Very nice how much?

    Joined:
    Jul 20, 2010
    Member:
    #40487
    Messages:
    3,362
    Gender:
    Male
    First Name:
    Nick
    Mount Vernon, WA
    Vehicle:
    The doritos locos taco
    6000k HID's, AUX Reverse Lights, 3" Rough Country Suspension Lift, Pioneer AVH-P4200 Double Din, Underglow and footwell Lights, Camo Seat Covers, Duralast Tool Box, Blacked Out Badges, Grill, Front Emblem, Midland CB Radio, Amber Strobes, POWER REAR WINDOW, cup holder LED's, Firestik 3' in bed, console divider, Ultragauge.
    Okay well I realized I had what I needed to do the three cupholders, so those are done! I don't want to deal with taking my whole center console apart so that will be a project for tomorrow probably.

    My cupholders are now lit with a temporary switch stickin out the side, Ill get pics when its dark and you can actually see
     
  11. Jun 25, 2012 at 6:22 PM
    #291
    RadRed06

    RadRed06 Christ Follower

    Joined:
    Sep 20, 2011
    Member:
    #63845
    Messages:
    753
    Gender:
    Male
    First Name:
    Daniel
    Flowood, MS
    Vehicle:
    '12 Pyrite 4x4 OR
    Lifted on 33s
    Where did you ground the rocker switch? Thanks a ton
     
  12. Jun 25, 2012 at 7:25 PM
    #292
    Forster46

    Forster46 Very nice how much?

    Joined:
    Jul 20, 2010
    Member:
    #40487
    Messages:
    3,362
    Gender:
    Male
    First Name:
    Nick
    Mount Vernon, WA
    Vehicle:
    The doritos locos taco
    6000k HID's, AUX Reverse Lights, 3" Rough Country Suspension Lift, Pioneer AVH-P4200 Double Din, Underglow and footwell Lights, Camo Seat Covers, Duralast Tool Box, Blacked Out Badges, Grill, Front Emblem, Midland CB Radio, Amber Strobes, POWER REAR WINDOW, cup holder LED's, Firestik 3' in bed, console divider, Ultragauge.
    You can pull off the left kick panel and there are bolts behind that and behind the coin tray below the fuse panel that I have used.
     
  13. Jun 25, 2012 at 7:34 PM
    #293
    tango down

    tango down Policy Ninja

    Joined:
    Oct 17, 2011
    Member:
    #65363
    Messages:
    580
    Gender:
    Male
    First Name:
    jeff
    peoples republik of IL
    Vehicle:
    12 Taco DCSB TRD Off Road
    LED interior, rail mounted ammo cans
    i used the bolt under the false pedal near the left kick panel.
     
  14. Jun 25, 2012 at 7:43 PM
    #294
    EODTech08

    EODTech08 Well-Known Member

    Joined:
    Feb 10, 2012
    Member:
    #72543
    Messages:
    876
    Gender:
    Male
    First Name:
    Jacob
    Oahu, HI
    Vehicle:
    '11 Access Cab TRD Off-Road
    FX-R Retrofits, Hood Struts, aFe CAI, Wet Okoles, Pioneer AVH-P8400BH Head Unit,
  15. Jun 25, 2012 at 9:24 PM
    #295
    RadRed06

    RadRed06 Christ Follower

    Joined:
    Sep 20, 2011
    Member:
    #63845
    Messages:
    753
    Gender:
    Male
    First Name:
    Daniel
    Flowood, MS
    Vehicle:
    '12 Pyrite 4x4 OR
    Lifted on 33s
    In his diagram, there are 5 wires coming from the rocker switch, but there are only 3 tabs on the switch. How did he wire all 5 to the switch? Thanks guys
     
  16. Jun 26, 2012 at 1:23 PM
    #296
    ccurtis0805

    ccurtis0805 Well-Known Member

    Joined:
    May 13, 2012
    Member:
    #78743
    Messages:
    198
    Gender:
    Male
    First Name:
    cale
    South Florida
    Vehicle:
    2010 SR5 4x4
    5100s all around, rear tsb, interior LEDs (center console, driver & passenger side floor boards, glove box, under a/c controls, rear cupholders; BHLM; DIY Satoshi
    Look at the diagram again. There are only two wires (positive and negative) coming from the rocker switch. The positive goes into one wago clamp, the negative in the other. Than take all the positive wires from your led's and run them to the wago that has the positive feed from the rocker and do the same for the negative side.
     
  17. Jun 26, 2012 at 1:53 PM
    #297
    Oregon TRD

    Oregon TRD [OP] "GO DUCKS" Edition

    Joined:
    Oct 16, 2007
    Member:
    #3081
    Messages:
    15,316
    Gender:
    Male
    First Name:
    Ross
    Steel Panthers bathroom floor!
    Vehicle:
    2005 Mall Krawler
    6" Fabtech Lift, 35" Fierce M/T 17" Eagle Alloy Sim bead locks Naked girls in the bed 10.1" DVD head unit Two 7" Headrest Monitors PS2 in glove box

    scanner521_d4027783a4be64a4f7d0ec1b5d3436fd743ba19b.jpg


    [​IMG]
     
  18. Jun 26, 2012 at 1:54 PM
    #298
    Oregon TRD

    Oregon TRD [OP] "GO DUCKS" Edition

    Joined:
    Oct 16, 2007
    Member:
    #3081
    Messages:
    15,316
    Gender:
    Male
    First Name:
    Ross
    Steel Panthers bathroom floor!
    Vehicle:
    2005 Mall Krawler
    6" Fabtech Lift, 35" Fierce M/T 17" Eagle Alloy Sim bead locks Naked girls in the bed 10.1" DVD head unit Two 7" Headrest Monitors PS2 in glove box


    1. Positive from truck battery to positive on rocker
    2. Negative from truck battery to negative on rocker
    3. ground wire from rocker to a bolt in the dash area to ground it
    4. Positive wire from rocker to 1 WAGO clamp so that WAGO is an all positive "hub"
    5. negative wire from the rocker to 1 WAGO making that an all negative "hub"

    Then plug ALL positive red wires from LED's into the positive WAGO

    and plug all black negative wires from LED's into negative WAGO
     
  19. Jun 26, 2012 at 1:55 PM
    #299
    Oregon TRD

    Oregon TRD [OP] "GO DUCKS" Edition

    Joined:
    Oct 16, 2007
    Member:
    #3081
    Messages:
    15,316
    Gender:
    Male
    First Name:
    Ross
    Steel Panthers bathroom floor!
    Vehicle:
    2005 Mall Krawler
    6" Fabtech Lift, 35" Fierce M/T 17" Eagle Alloy Sim bead locks Naked girls in the bed 10.1" DVD head unit Two 7" Headrest Monitors PS2 in glove box

    Center console is EASY PEASY MAN!!!!!

    I thought it would be a headache but it literally took couple minutes. 2 bolts inside compartment under the little carpet piece and two screws where the cupholder pulls out.
     
  20. Jun 26, 2012 at 2:01 PM
    #300
    Oregon TRD

    Oregon TRD [OP] "GO DUCKS" Edition

    Joined:
    Oct 16, 2007
    Member:
    #3081
    Messages:
    15,316
    Gender:
    Male
    First Name:
    Ross
    Steel Panthers bathroom floor!
    Vehicle:
    2005 Mall Krawler
    6" Fabtech Lift, 35" Fierce M/T 17" Eagle Alloy Sim bead locks Naked girls in the bed 10.1" DVD head unit Two 7" Headrest Monitors PS2 in glove box

    You could even do these steps under the hood before you install anything.

    Just open your hood and do these steps above right at your battery.
    Toggle switch, WAGO and all. Hook it up in your hand then flip toggle on and off after doing these steps to see the LED's light up.

    Then when you go to install you should have a better idea on what needs to power what.

    I know I have a terrible time of explaining stuff...LOL :eek:
     
To Top