

-
Welcome to Tacoma World!
You are currently viewing as a guest! To get full-access, you need to register for a FREE account.
As a registered member, you’ll be able to:- Participate in all Tacoma discussion topics
- Communicate privately with other Tacoma owners from around the world
- Post your own photos in our Members Gallery
- Access all special features of the site
 Philrab’s Audio: Kicker 180.4 + Kicker 500.1 + Marv box
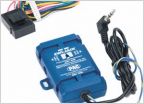 Clarion NX500
 Xplod head unit compatible with oem steering wheel?
 Moving from CB to HAM
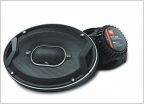 Infinity reference 9633ix or JBL GTO939
 How to switch from Crux SWRTY-61S to PAC SWI-RC
DIY: External Bed Speakers with a factory head unit
Discussion in 'Audio & Video' started by UH60 TACO CE, Oct 8, 2012.


