

-
Welcome to Tacoma World!
You are currently viewing as a guest! To get full-access, you need to register for a FREE account.
As a registered member, you’ll be able to:- Participate in all Tacoma discussion topics
- Communicate privately with other Tacoma owners from around the world
- Post your own photos in our Members Gallery
- Access all special features of the site
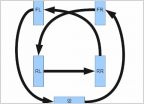 5 Tire Rotation w/ Functional TPMS
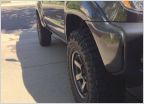 Level 8 MK6 with DuraTracs - Intro post
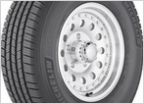 Michelin Defenders
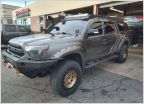 Saving weight vs looks
 35 spare on stock spare wheel?
 Same tire, different load ratings. Need help!
DIY: Painted Wheels
Discussion in 'Wheels & Tires' started by Phi Kai, Mar 4, 2008.


