

-
Welcome to Tacoma World!
You are currently viewing as a guest! To get full-access, you need to register for a FREE account.
As a registered member, you’ll be able to:- Participate in all Tacoma discussion topics
- Communicate privately with other Tacoma owners from around the world
- Post your own photos in our Members Gallery
- Access all special features of the site
 Electronics whiz types - can anyone help me figure out how to wire this switch?
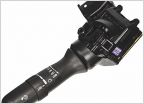 Adding Backup Camera Display
 Where do i put my transmission temp sensor
 Coolant--engine block drain plug
 Storage Solutions Behind Rear Seat
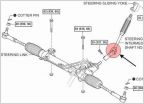 2nd gen lower steering shaft rebuild DIY :)
Front brakes, how hard to service them?
Discussion in 'Technical Chat' started by ZMan2k2, Mar 29, 2013.
Page 1 of 2
Page 1 of 2


