1. Welcome to Tacoma World!

    You are currently viewing as a guest! To get full-access, you need to register for a FREE account.

    As a registered member, you’ll be able to:
    • Participate in all Tacoma discussion topics
    • Communicate privately with other Tacoma owners from around the world
    • Post your own photos in our Members Gallery
    • Access all special features of the site

How To: Black Head Light mod

Discussion in 'Lighting' started by Viet2100, Dec 14, 2009.

  1. Jun 30, 2013 at 5:54 PM
    #481
    acdronin

    acdronin Well-Known Member

    Joined:
    Dec 2, 2010
    Member:
    #47036
    Messages:
    19,641
    Gender:
    Male
    .
    I just did this last night, can you post a pic? What parts are you talking about?
     
  2. Jun 30, 2013 at 5:59 PM
    #482
    wheelerkr2

    wheelerkr2 Well-Known Member

    Joined:
    Aug 4, 2012
    Member:
    #84100
    Messages:
    530
    Gender:
    Male
    First Name:
    Kevin
    Richmond, VA
    Vehicle:
    08 TRD Rugged Trail
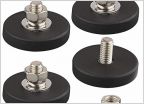
    Sorry those were just rubber covers, what i really need to know how to take off are the small parts that have a black cover over them, they are like bolts but have a really wide head.
    Thanks.
     
  3. Jun 30, 2013 at 6:09 PM
    #483
    acdronin

    acdronin Well-Known Member

    Joined:
    Dec 2, 2010
    Member:
    #47036
    Messages:
    19,641
    Gender:
    Male
    .
    I left them on, no problems here
     
  4. Jun 30, 2013 at 7:58 PM
    #484
    wheelerkr2

    wheelerkr2 Well-Known Member

    Joined:
    Aug 4, 2012
    Member:
    #84100
    Messages:
    530
    Gender:
    Male
    First Name:
    Kevin
    Richmond, VA
    Vehicle:
    08 TRD Rugged Trail
    thanks for the fast replies! I just got the first headlight separated, preheating the oven now for the other one!
     
  5. Jul 1, 2013 at 11:24 PM
    #485
    ryantaco

    ryantaco Well-Known Member

    Joined:
    Apr 22, 2013
    Member:
    #102642
    Messages:
    80
    Gender:
    Male
    SoCal
    Vehicle:
    06 DC Long Bed TRD Sport
    Can I use plasti-dip to do this?
     
  6. Jul 1, 2013 at 11:27 PM
    #486
    acdronin

    acdronin Well-Known Member

    Joined:
    Dec 2, 2010
    Member:
    #47036
    Messages:
    19,641
    Gender:
    Male
    .
    I suppose though I would say hitting the chrome with some steel wool or fine-ish sandpaper will make the coating stick better, don't have to sand all the chrome off, just rough it enough where you have a nice textured surface
     
  7. Jul 2, 2013 at 5:26 AM
    #487
    Pugga

    Pugga Pasti-Dip Free 1983 - 2015... It was a good run

    Joined:
    Jun 18, 2010
    Member:
    #39131
    Messages:
    38,444
    Gender:
    Male
    First Name:
    Mike
    Massachusetts
    Vehicle:
    '19 Ford F-250 6.7 SCrew
    F-250 Land Yacht Mod
    I suppose someone has to be first although I wouldn't... Krylon Fusion sticks to the chrome plastic very well, not sure how well the Plasti-Dip would hold up or if it would fade in color over time.
     
  8. Jul 5, 2013 at 9:42 PM
    #488
    NorthWoods

    NorthWoods Well-Known Member

    Joined:
    Mar 3, 2013
    Member:
    #98914
    Messages:
    113
    Gender:
    Male
    Seacoast NH
    Vehicle:
    '15 TRD OR SW
    So, this needs to happen on my truck, the only thing holding me back is me. Is it really as easy as it seems? Any tips for a first timer?
     
  9. Jul 5, 2013 at 9:46 PM
    #489
    Rich91710

    Rich91710 Well-Known Member

    Joined:
    Feb 23, 2012
    Member:
    #73470
    Messages:
    16,331
    Gender:
    Male
    First Name:
    Rich
    Los Angeles
    Vehicle:
    08 Base
    Satoshi with FJ badge, factory cruise, factory intermittent wipers, Redline Tuning hood-lift struts, Hellwig Swaybar, Rosen DVD-Nav
    Preheat to 300, shut the oven off, put the housings on a piece of cardboard in the oven for no more than 10-15 minutes, handle with gloves.

    Same thing for reassembly.
     
  10. Jul 6, 2013 at 12:04 AM
    #490
    acdronin

    acdronin Well-Known Member

    Joined:
    Dec 2, 2010
    Member:
    #47036
    Messages:
    19,641
    Gender:
    Male
    .
    10 minutes did it for me, fallowed this thread mostly, came out well.
    Oh be really careful pulling the headlight bulb, leave the hold down clip in there, it doesnt hurt anything, I broke the tab that holds down one end of the clip and had to superglue it back on.
     
  11. Jul 7, 2013 at 7:42 PM
    #491
    danteisme

    danteisme Well-Known Member

    Joined:
    Jan 14, 2008
    Member:
    #4248
    Messages:
    2,096
    Gender:
    Male
    South Western PA
    Vehicle:
    06 DCSB Sport, 96 Integra GSR
    stupid question.... i put the headlights back together and everything lined up real nice until i noticed something this evening. the sides with the screws, the 2 upper screws only screwed into the new rubber. its hardened back up so there is no more give in it but the other 3 sides look great. am i able to put the whole assembly back into the oven for a few minutes to loosen up the new rubber again so that i could hopefully get those screws to seat where they are supposed to?
     
  12. Jul 7, 2013 at 7:49 PM
    #492
    Rich91710

    Rich91710 Well-Known Member

    Joined:
    Feb 23, 2012
    Member:
    #73470
    Messages:
    16,331
    Gender:
    Male
    First Name:
    Rich
    Los Angeles
    Vehicle:
    08 Base
    Satoshi with FJ badge, factory cruise, factory intermittent wipers, Redline Tuning hood-lift struts, Hellwig Swaybar, Rosen DVD-Nav
    That'll work just fine.
     
  13. Jul 8, 2013 at 4:26 AM
    #493
    danteisme

    danteisme Well-Known Member

    Joined:
    Jan 14, 2008
    Member:
    #4248
    Messages:
    2,096
    Gender:
    Male
    South Western PA
    Vehicle:
    06 DCSB Sport, 96 Integra GSR
    i don't think it would need to go in at 300 for the full 10 min, what do you think?
     
  14. Jul 8, 2013 at 5:43 AM
    #494
    Pugga

    Pugga Pasti-Dip Free 1983 - 2015... It was a good run

    Joined:
    Jun 18, 2010
    Member:
    #39131
    Messages:
    38,444
    Gender:
    Male
    First Name:
    Mike
    Massachusetts
    Vehicle:
    '19 Ford F-250 6.7 SCrew
    F-250 Land Yacht Mod
    You could try it at 6 - 8 minutes but why not wait the full 10? If you take them out early and the glue isn't softened, you just wasted your time and you'll have to re-bake them anyways.

    FWIW, the glue shouldn't prevent you from putting those screws in. Even when cured, it shouldn't harden to the point where you can't install the screws.
     
  15. Jul 8, 2013 at 7:06 AM
    #495
    acdronin

    acdronin Well-Known Member

    Joined:
    Dec 2, 2010
    Member:
    #47036
    Messages:
    19,641
    Gender:
    Male
    .
    What he said Dante, I noticed that I had to use a fair amount of force and some channel locks in a few places to get the suckers closed up, there was rubber coming out of the screw holes too, I paid no heed and just screwed them in till it felt like they were all the way home.
     
  16. Jul 8, 2013 at 9:12 PM
    #496
    Rich91710

    Rich91710 Well-Known Member

    Joined:
    Feb 23, 2012
    Member:
    #73470
    Messages:
    16,331
    Gender:
    Male
    First Name:
    Rich
    Los Angeles
    Vehicle:
    08 Base
    Satoshi with FJ badge, factory cruise, factory intermittent wipers, Redline Tuning hood-lift struts, Hellwig Swaybar, Rosen DVD-Nav
    +1

    SWMBO was out of town for the weekend when I disassembled mine.
    I did the painting, assembled the projectors, and set them aside to let the paint cure until I was not on call duty and could tear the truck down.

    So 3 weeks later, I start assembling them and start preheating the oven.
    "WHAT THE FUCK ARE YOU DOING?????"

    Ruh Roh Shaggy.....

    "Softening the glue"

    "DON'T YOU DARE PUT THOSE CHEMICALS IN MY OVEN!"

    <debating whether to tell her I already did 3 weeks ago, decide to not say anything>

    So I put everything back together, clipped the edges best I could with spring clamps, and got creative with some wood strips and bar clamps to apply even pressure as best I could on the housing.

    Every couple of days, I'd tighten the bar clamps up.

    4 weeks later, I removed the clamps, put the screws in, and put them on the truck. The 4 week wait was only because of call duty... they would have been good after a few days.
     
  17. Jul 9, 2013 at 4:59 AM
    #497
    Agent Smith

    Agent Smith Always outnumbered, never outgunned

    Joined:
    Oct 4, 2010
    Member:
    #44197
    Messages:
    1,018
    Gender:
    Male
    Vehicle:
    05 TRD Offroad Ivan Stewart Edition
    Toytec lift,FJ Anthracite wheels wrapped in BFG A/T 265/75/16's,WAAG Brush Guard, IPF 868's,sleeved fog lights
    So it took 7 weeks to finish the project and get your balls back from her purse?;)
     
  18. Jul 10, 2013 at 5:51 PM
    #498
    99TacoDriver

    99TacoDriver Well-Known Member

    Joined:
    Jul 8, 2011
    Member:
    #59531
    Messages:
    6,709
    Gender:
    Male
    South Louisiana
    OME 885x/5100s/LR UCA/3 leaf AAL/275/70/17 Terra Trac X-Venture
    i did the BHLM and wanted to tint the blinker covers but accidentally broke the cove because it was already cracked from being burned and melted by the light....is there a place where i can get a new blinker cover or should i just black out the chrom where the bulb is and roll with it like that with out the cover on?


    any one have any pics without the cover?
     
  19. Jul 10, 2013 at 8:40 PM
    #499
    acdronin

    acdronin Well-Known Member

    Joined:
    Dec 2, 2010
    Member:
    #47036
    Messages:
    19,641
    Gender:
    Male
    .
    ditch it, paint it black, you got the amber bulb
     
  20. Jul 11, 2013 at 4:03 PM
    #500
    Meangreen1

    Meangreen1 Active Member

    Joined:
    Feb 10, 2013
    Member:
    #97213
    Messages:
    34
    Gender:
    Male
    AZ
    Vehicle:
    '13 prerunner trd off road
    Stock for now
    So I tried doing this mod on my '13 taco and started to take off the headlights when I ran into a major pain in the culo. I removed the top screws except for the one that is on the bottom where there is a screw that is close to the fender and bumper. I had all the tools necessary that were listed and couldn't get it out. Any idea or other method I could use to get it out? I tried using the adjustable pliers but no success.
     

Products Discussed in

To Top