

-
Welcome to Tacoma World!
You are currently viewing as a guest! To get full-access, you need to register for a FREE account.
As a registered member, you’ll be able to:- Participate in all Tacoma discussion topics
- Communicate privately with other Tacoma owners from around the world
- Post your own photos in our Members Gallery
- Access all special features of the site
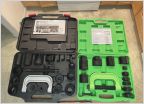 Ball joint press
 HELP make it look awesome. budget is 1500$
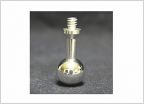 2016 Go Pro Style Mount but for Garmin Style GPS?
 Will this combination work
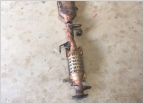 CAT Delete No CEL with Resistor????
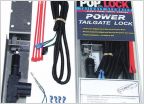 Tailgate lock from the inside of the bed?
OFFICIAL 2nd gen 4x4 front differential bearing vibration thread
Discussion in '2nd Gen. Tacomas (2005-2015)' started by BenWA, Apr 17, 2011.
Page 59 of 226
Page 59 of 226
Products Discussed in


