

-
Welcome to Tacoma World!
You are currently viewing as a guest! To get full-access, you need to register for a FREE account.
As a registered member, you’ll be able to:- Participate in all Tacoma discussion topics
- Communicate privately with other Tacoma owners from around the world
- Post your own photos in our Members Gallery
- Access all special features of the site
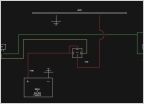 Bed lighting question
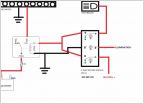 Light bar setup what switch
 Switchback DRL/front directionals
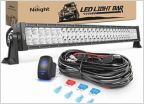 Finally mounted an LED lightbar behind the grill. Can't wait to hit the mall parking lot after dark!
 First Gen interior lights
 Anyone have a tow hitch light?
BHLM success/failure
Discussion in 'Lighting' started by VooDoo, Jul 21, 2010.
Page 10 of 11
Page 10 of 11


